|
|
End Game
This section is for documenting the final push to complete the plane. It
will consist of those activities that are either work done after the move
to the hangar, or are things such as interior and upholstry.
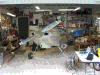
| Prep for Move to Airport |
July 17, 2012 |
|
Ok ... there is more I could do at home, but I had to pick a date to
schedule the move with the guys I'm getting to assist me, and tomorrow
is the day. So tonight I got the plane ready to move. Tidied up a
number of things, put the cowl on, put the forward top skin on, shut
the canopy, checked tire inflation, put the bag of play-sand on the
back deck as counterweight .... I think it is ready to go.
Tomorrow the guys from Hocutt's Automotive (in Garner NC, the guys we
have used for literally the last 25 years with great success) will
come out with their roll-back tilt-bed towtruck and we'll load her
up. A nice sedate drive down US1 to KTTA, and a safe and uneventful
unload into the hangar. Sounds simple, ehh? I sure hope it turns out
that way. :)
Time : 2.25 hours |
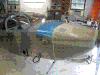
| Move to Airport / Tailfeathers |
August 5, 2012 |
|
Just before Oshkosh we did move the airplane to the airport, and this
last weekend we also moved "heavy stuff" (a bench, big tools, my large
toolchest, etc.). So most of my tools have been transported, with the
rest easily moved just using the Rav4. The big stuff took a U-Haul
trailer to move. I'm just glad my son was able to take some time to
lend a hand as much of that was without a doube a 2-person job.
On Sunday (the 5th) I spent some time unpacking, but finally had to
take a break to do SOMETHING on the plane itself. I decided to bolt on
the tailfeathers. As I got started on this task a friend, George,
wandered over and I pressed him into work holding wrenches. It was
hot sweaty work, but by the time we were done the HS and VS were
in place with all their bolts torqued. This makes it look a LOT more
like an airplane! (I need to take some pictures, but my camera was
at home not having made the move yet.)
Time : 1.25 hours |
| Fuel Tank SB Finished / Odds-N-Ends |
August 26, 2012 |
|
Today I took care of a number of things. This is the first day I've been
able to spend the bulk of the day working on things -at- the airport. (Last
weekend was consumed by taking my daughter back to school on Orlando!)
I finished reinstalling the tank access plate, completing the SB work. I
did the final install of my ELT antenna. I terminated the APRS ground wire
on my forrest-of-tabs now that I had my crimp tools at the airport. And
I dimpled the skins on the lower fuselage wing overlap so I don't forget
to dimple the darn things when I put the wings on.
Today was also the first day I really have experienced how folks love to
drop by to talk when you are working at the airport. I must have had a
half-dozen folks wander by at one point or another ... which is actually
quite nice. My decision is to keep on working and talk as I get stuff
done. I'm not perfect at that yet, but will continue to practice! :)
Time : 4.5 hours |
| Rudder Pedal Hookups |
September 11, 2012 |
I had planned on getting multiple hours of work done tonight on the plane,
but the "Day Job" kept me until 7:00, so I ended up with only an hour of
time to work on the RV. Oh well. I dug into what I needed to do to hook
the rudder control cables to the pedals, and got that work started. After
digging out the required hardware from my little brown bags (yes, I still
have little brown bags) I fabricated the connecting links from light AL.
I wanted to make sure I had the length and spacing right before I started
to cut steel. Once I have the AL links doing what I want I'll transfer
the finalized dimensions to the steel. I didn't quite get finished making
the links .. so will finish that Thursday night when I'm at the airport
next.
Time : 1.0 hours |
| Rudder Pedals / Pitot / Tail Lynx / APRS |
September 16, 2012 |
|
As you can see, I was all over the plane today. First I installed my
temporary rudder pedal links, and am puzzled at some aspects of how
things are working. I can get the rudder to the stop on one side, but
not the other. I do know I need to turn a couple of snap bushings
around, but beyond that I'm not sure what is up. I let it be while I
let thoughts about it "bake" a bit in my brain ... but if I can't
find a happy solution, I'll drag one of the local builders out to
have a look-see.
I also installed my Gretz heated pitot control board in the wing. I
had to dither a bit to decide where I wanted it to go, but have it
in a handy enough spot now. It isn't connected to anything, but is in
a location easily accessed thorugh an inspection port.
I also spent some time fabricating the tool needed for final assembly
of my tailwheel Tail Lynx. These are nice looking units, and I sure
hope I like how they work. If nothing else they look better than the
traditional chains-and-springs.
I also started looking at wiring and installation for the APRS module.
There is a special cord which combines the 12V and GPS inputs into a
single plug, and I needed to cut off the cigarette lighter plug so I
could install Anderson PowerPole connectors. I got those installed,
and put a pair on the cigarette lighter plug so it is still able to
be used.
I also spent a little time identifying which wires are going down the
conduit in the wings, and which are routing through snap bushings. I
believe I have that all organized now so I'm ready to install the
wings any time at this point. My thought is next weekend. (I had planned
to install them this weekend, but ended up needing to defer it due to
a change in plans.)
Time : 6.5 hours |
| Replace Screws / Tail Lynx |
September 22, 2012 |
|
After installing the rudder cables I was unhappy with how the rudder
would travel to the stop on one side, but not on the other. A fellow
(very experienced) builder was out at the airport and I snagged him to
take a look. In the end we discovered the cable was binding at the first
bulkhead and I'm going to "oval" the hole to allow for a cleaner range
of motion. I defered that until I felt like being crammed into the
cockpit again (maybe during the week one night) and moved on to other
tasks.
While Mark was looking at the plane he called out a few situations that
he felt needed adjusting. In particular, I didn't have a full three
threads sticking out of a few bolts. I also had not quite "clamped" the
bearing in the rod-end-bearings on the rudder in place.
So ... off comes the rudder, and I use some light washers to shim things
up so I can clamp the bearings in the hinges. He was right, and taking
time to fix it the way it should be was worth it. I had another collection
of bolts that I swapped out for longer bolts, which took longer to do
than it should have ... but, again, it was the right thing to do.
I then moved onto Tail Lynx work, and got the eyes bent to the desired
20-degree angle. I also drilled the tailwheel stearing arm to size, and
marked the flats pieces for bending. I then ended up with a visitor who
distracted me so effectively work ended for the day.
One really nice thing today is that Theresa and Marie came out to bring
me some lunch ... and brought the dog along too. It was fabulous to have
them visit (and the sub they brought was pretty darn welcome too!).
Time : 5.5 hours |
| Elevator Rigging (Finished) |
November 11, 2012 |
|
Today I went out and spent a little time finishing up the rigging of the
elevator. I needed a little more up-travel to get the elevator horn to hit
the up-stops, so I made that adjustment. Then I had to crawl into the rear
of the baggage compartment to tweak the pitch servo arm position and tighten
all the jam nuts.
I hate crawling into the back of the plane ... with the tail slow you are
sliding downhill head-first. It sucks. So today I lifted the tail up onto
my low construction table (it is -very- robust, and has a large top surface)
to more closely level the plane. It was _fabulous_. With the plane in a more
level pitch attitude crawling back into the fuselage was a piece of cake (or
as close to a piece of cake as that tight spot is ever going to get.
Time : 1.75 hours |
| APRS / Missing Hole |
November 17, 2012 |
|
Today is one of those days where you spend a lot of time in the shop, but
it doesn't sound like you got all that much done. Part of the problem is
that some of the things I did were fiddly .. and I intentionally went slow
and carefully. One of those was drilling a hole that had been missed back
when I was initially fitting the wings. This is a hole on the belly skin
that overlaps the wing root. The rear-most hole on the left side just got
missed. So I had to use a piece of scrap to match-drill the last three
holes on the wing, two of which were drilled full-sized and dimpled so they
would mate with the existing dimples on the skin, and the other left as
only a pilot hole. That pilot hole was the used to drill the missing hole
on the skin ... which got enlarged and dimpled. It just took a while to
get it all done.
I also mounted my APRS transmitter on the wing. This was mounted on the
tip, and initially I intended to build a shelf for it. But in the end I
realized that the simpler choice was just to put a couple of platenuts
in the end rib itself, and mount it there. However, I had to burn time
fiddling with a shelf first before deciding on the final solution.
Through the day I also had people drop by to visit, helped one friend who
was replacing a vacumn pump, and helped another aquaintance jump-start a
plane with a dead battery. It was a busy (but good) day at the airport. :)
Time : 4.75 hours |
| Rudder and VS Tips |
November 23, 2012 |
|
Today was spent mainly working on the vertical stab and rudder tips. It
never ceases to amaze me how long a task that seems like it should be
simple can take. I'll admit that on top of fitting and drilling the tips
I spent some time sanding, priming, and then filling the tips. The VS
tip still needs to be closed out, and I'm waiting for my balas/glass
filler piece to cure overnight.
I also reinstalled the boost pump from when I had to move it to pull
those wires mentioned in the Nov18 entry. I also put a few more pop
rivets into the spar upright cover plates. I figure that if I do a few
every time I go out eventually they'll all get done and I won't have
had to endure a tedious back-breaking marathon of pop-riveting. :)
Time : 4.25 hours |
| Rudder and VS Tips (again) |
November 24, 2012 |
|
I went out in the morning to get a little done before we headed out for
some family activities. I did a little more sanding and priming on the
rudder tip, and came to the conclusion that I had a _little_ more filling
that was needed before I was totally happy with it. I ran out of time
as I figured that out ... so it might be tomorrow before I can take
another shot at the filling.
I also spent a little time cutting out the piece that I'll use as a filler
in the back-side of the VS tip. I did another layup on that filler, and
left it to cure.
I forgot to mention yesterday that I started glassing in my marker beacon
antenna in the lower cowl. No ... marker beacons aren't that common any
longer, but my audio panel has a MB receiver, so I figured what the heck.
I'm doing the DIY stripped-coax style of antenna, so it is simple enough.
I also spent a little time getting ready for tomorrow's wing install event.
Things *seem* ready to go. Tomorrow will tell that story, though. :)
Time : 2.25 hours |
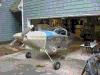
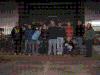
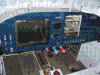
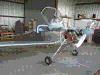
| Wings Installed! |
November 25, 2012 |
|
Today was the day to install the wings. I had a handful of people come out
to assist ... Theresa, Marie, Chris, Kat (i.e the whole Frye crew), Cam,
her girls Hanna and Miranda, Wally, Ernest, and Chris' friend, and our dog
Skye. Wow. It was a party.
It took longer than expected (like that should be a surprise), but we got
it done. I still need to torque the bolts, but can do that solo. In the
morning I also spent time getting everything ready to go, and during a spare
hour also riveted on the rudder tip.
It was an amazing day. A real milestone, and I totally appreciate all the
help people gave me getting it done. The picture is a rather poor one, but
all I ended up getting from the day. Chris isn't in the picture because he
is driving the camera (and hates having his picture taken anyway).
Time : 5.50 hours |
| Wing Bolts Torqued |
December 2, 2012 |
|
Today I spent a tedious number of hours carefully torquing the wing bolts
in the spar center-section. The reason it took so long is that getting the
right mix of sockets, extensions, wrenches, ratchets, etc. seemed to take
forever. It is a tight spot and I was working alone so every time I needed
to try something different I had to climb back out of the plane, find
what I needed, climb back in, and get positioned to actually get wrenches
on bolts. On the up-side I now have taught myself how to get in and out
of the RV now that the wings are on.
I spent time on a few other odds-and-ends (doing a little more fiddling
with the VS tip, cleaning up from the wing-mounting-frenzy, and other
small activities not worth mentioning here).
Time : 4.25 hours |
| Pitot, Vents, APRS, OAT |
December 16, 2012 |
|
I didn't work on the RV last weekend because I flew (commercial, dang
it) to Florida to bring my daughter back home for the Christmas holiday.
I got there a few days earlier than I absolutely had to so that we could
do some stuff together before driving back. The reason for the drive was
so that the car, registered in NC, could get its scheduled safety and
emissions inspection. So I didn't get back to working on the RV until
today.
That said, today was a collection of small things ... but the results were
very gratifying. I installed and wired the OAT probe. That has been sitting
on a shelf for, well, years now. It is cool to now have it installed even
if it is a small/trivial thing in itself. I also installed the pitot today,
another item that has been waiting to see the light of day for a long time.
It is a Gretz pitot, and therefore I also had to wire up the Gretz pitot
control board ... but I got all that done as well. I finished the wiring of
the APRS transmitter (except for the antenna, which must get glassed into
the wingtip). Finally, I fabricated and installed the fuel vent lines that
run from the tank to the fitting on the side of the fuselage.
Oh, and I almost forgot ... I installed the line of screws on each side of
the fuselage that tie the bottom skin into the lower wing skin. I also did
a small amount of glass-work on the VS tip. Hopefully it'll be cured by
the time I get back out there again on Tuesday.
All in all a very productive day. It doesn't hurt that it was cloudy and
rainy today which meant I didn't have a lot of visitors. I really enjoy
having people stop by, but it does impact productivity. :)
Time : 5.5 hours |
| Pitot Line / Left Nav Kerfluffle |
December 23, 2012 |
|
Today I headed out to the airport thinking I'd get a lot done ... and,
in a sense, I did ... but not exactly how I expected. I spent a little
time doing a bit more glass-work on the VS tip, and left it to do its
next round of curing. I sanded, primed, and shot a coat of white paint
on the inside of the top cowl. That was slow work, but nothing difficult.
I put another layer of glass over the marker beacon antenna I'm glassing
into the bottom cowl. Then I went to connect the nav antennas at the
wing root.
Except .... there wasn't enough room in the wing root for a right-angle
BNC connector. Damn. The short version of the story is that I unscrewed
the bulkhead BNC connector, fished it out, cut it off, and re-routed
the coax. But that short version doesn't fully convey the frustration
of doing this in exceedingly tight and confining circumstances. I'll
leave it to your imagination, but suffice it to say that lessons learned
will (hopefully) make doing the same thing on the right side at least
a _smidge_ easier. I'm annoyed with myself for making assumptions that
I'd have enough room in the wing roots. I had no conception of how
tight that area really is.
I also fished some red plastic pitot tubing out of the fuselage and
down the wing. I'm going to join it to the AL tubing coming out of
my heated pitot at location of the first wing inspection panel. But
that will wait for another day.
Time : 5.5 hours |
| Nav Coax Shuffle |
December 26, 2012 |
|
Today was cold, rainy, and nasty at the airport. That said, it was a
productive day. It doesn't sound like much, but I re-routed the nav
coax in the wings. One one side this was no big deal as I was able to
vacuum a pull-string down the conduit with little trouble. The other
side wasn't so easy. There is a "hump" in the flexible conduit to
clear the roll servo, and that meant that no matter how hard I tried
I could not get a vacuum to pull a string down the conduit. So I had
to remove the roll servo, and then take some AL tubing and shove it
down the conduit to use as a "fish". I taped the pull-string to the
tubing, and pulled it through with no troubles.
This is all my fault, of course. (Isn't everything?) I had pull-strings
in the conduit, but when I pulled my wires through the wings I didn't go
to any effort to insure that the pull-strings stayed in place. It was
a hectic time with lots of people helping me install the wings, so the
pull-strings just got forgotten. Silly me.
Today after re-routing the coax down the conduit I insured that the
pull-strings would stay in place. I terminated the coax in the wing
root, and am shy one male BNC connector which means that I'm not *quite*
completely done with all the futzing in the wing root. I hope to finish
that up tomorrow if I can get a crimp-style male BNC from my local
avionics shop.
I did a few other odds-and-ends as well ... tidied up the pitot install
in the wing root, etc. But mostly the day was spent fiddling with the
nav coax. I'm actually much happer with how things are arranged now, and
wish I had done it this way from the get-go. Oh well. Live and learn.
Time : 5.0 hours |
| Vent Line Spacers / HS Lower Fairing |
January 30, 2013 |
|
I got to the airport then ended up spending a good bit of time helping
secure airplanes at the flying club as a storm advanced. We really
thought that the storm wouldn't be that big a deal, but since it had
done a good bit of damage in other states we also felt it wouldn't
hurt to exercise a little caution.
Once that was done I headed down to my hangar and started working on
finishing up my fuel tank vent line fabrication. Mainly I wanted to
secure the loops of tubing so that they would not act so much like
a spring. To do that I cut pieces of 1/4" ID vinyl tubing to slide
over the AL tubing. I arranged the pieces so that from coil to coil
they were coincident with one set of pieces at the top of the coil
and another set at the bottom. I pulled them together with zip-ties
which caused the AL tubing to be much more rigid, but still spaced
so the coils weren't touching. I did -not- trim the outflow end,
wanting to wait until I had a hole in the lower side of the wing
gap fairing to use as a guide. I hope to get that done this weekend.
I also spent some time finishing the drilling out of rivets for my
HS lower fairing. Why .. oh why .. didn't I do this before I put
the HS on?? I just wasn't thinking far enough ahead. But I got it
finished with very little drama.
I also burned some time with a few visitors from the flying club who
wanted to see the RV. There are always many questions to be answered
when folks come to visit. And, while it does cost me some time, I
like giving folks an opportunity to see what the insanity is all about.
Time : 1.5 hours |
| Wing Root Fairings |
March 2, 2013 |
|
March is a new month, and it is my intention to have no disasters keeping
me from working or distractions to keep me from having my builder's log
up to date. Wish me luck.
Today I got a lot done. I finished my fuel sender hookup and installed
my wing root gap seals. This also included doing the final installation
of my coiled-tube vent line in the wing root. It all turned out quite
nicely.
In the afternoon I installed the aileron pushrods to the bell cranks
in the middle of the wing. Those rod-end bearings had become VERY stiff
so I used a little LPS to lube them up and an AN bolt to wiggle them
around until they moved smoothly again. I started to fabricate a
control stick rigging fixture, but was delayed because I had left my
torpedo level at home.
So, instead, I started trimming my wingtip lenses. They sure are smelly
to cut with a cut-off wheel. But they are going to fit up nicely.
Time : 4.5 hours |
| HS and Elevator Tips |
March 10, 2013 |
|
Today was more about flying than working on the RV. I -almost- regret
that, too. It was a lovely day and I had promised to take a coworker
and his wife flying. I also told another guy from work who is thinking
about learning to fly that he could come out and look at the planes,
the club, and go for a quick hop. All in all I flew 4 times, and walked
the prospective pilot all around the airport and answering questions.
I did get a little work done on the HS and elevator tips (still working
to get that shape right), and did a bit more trimming on the empenage
fairing. It is coming into shape VERY nicely now.
However, I'll not burn another day on non-RV-building activitis again. We
are getting into warmer weather, and longer days, so I hope that helps
make things easier at the shop. No more rainy, freezing, dark evenings
at the airport .. I hope!
Time : 1.5 hours |
| HS and Elevator Tips / Wingtip Lens |
March 11, 2013 |
|
It was WARM tonight! WOW! Even when I left the airport it was still
60+ degrees. What a difference it makes to work on the plane without
having to fight the cold. Yes ... I know you folks up north laugh at
me talking about it being "cold" here. Get over it. :)
Tonight I was close to being ready to install the HS and elevator tips,
but decided they needed a _little_ more filler. This was after a ton
of sanding, and shaping, and testing, and sanding, and sanding, and
shaping, and .... you get the idea. I also got my left wingtip lens
within a hair of being ready to install. However, I decided to leave
that last 1/64th of an inch of trimming to when I was more rested.
All in all, it was a great night to be at the airport working on the
plane.
Time : 3.0 hours |
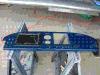
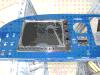
| Panel Install |
March 16, 2013 |
|
My finished panel got delivered from SteinAir on Friday, so I had to go
out and install it today. I had cut all my holes to be -exactly- the right
sizes, so I had to clean out paint and clearcoat to get things to fit. I
didn't want to screw up what was a beautiful finish, so it was a slow
process.
That said, the panel is back in the plane, all switches are reinstalled,
all mounting screws are in place, and the EFIS, autopilot, and Gemini PFD
are installed. At this point only the EFIS is connected to the ship, as
I want to bring everything up very slowly to insure I let no magic smoke
out. But the EFIS powered up fine, so I'm off to a good start. I'll finish
installing everything else tomorrow.
Time : 6.25 hours |
| Avionics Cooling Fan / Wingtip / Empennage Fairing |
March 23, 2013 |
|
Once again it was -freezing- when I started work at the airport. My
wife said she encountered sleet while out walking with the dog. It
was cold. I thought it was spring! Anyway ....
I finished work on the avionics cooling fan. Unfortunately the cooling
port for the transponder was partially occluded by a part of my
subpanel, so I had to lay on my back under the panel with a dremel
tool to open it up. It worked out, but man that is about as fun as
a root canal.
I also spent a little time doing the final fitting of the lense on
one wingtip, and drilled for the screw holes. I need to open up the
face where the landing light will be installed, but ran out of time
as I had family plans tonight.
On a fantastic note, a fellow EAA-1114 chapter member, Jim Dukeman,
flew his restored PA-12 for the first time today! I was fortunate
enough to be at the airport to see his departure, and his return. It
was a very successful first flight putting 1.6 hours of break-in time
on his new engine. Way to go, Jim!!
Time : 4.5 hours |
| Landing Lights |
March 30, 2013 |
|
Last week was a wash ... the cold simply got to me, and while I tried
to get out and work on the plane the _knowledge_ that warmer temps were
on the way caused me to just walk away. However, Saturday morning was
beautiful, and as the day wore on it became quite warm.
I went out with a plan to get my landing lights installed. I finished
trimming my mounting plates, finished opening up the faces where the
plates get mounted, drilled holes in the mounting plate, installed
nutplates in the wingtip, and cut holes for the light screws and 2"
hole for the opening. Wow, that was a lot of fitting and measuring
and cutting and fiddling. I also mounted the nutplates on the MR-16
mounting bracket. The most fiddly part of the whole exercise was
getting the screw spacers with their little offset/angle cut onto the
back of them.
The light kit came with some nylon spacers which needed to be beveled,
but that was going to be tedious as all hell. So I took some AL bushing
material, figured out the angle to which I needed to cut the bevel, and
set up a fence on my disk sander. I left the bushing material long and
fed it into the sander to cut the angle. Then using a fence on the
bandsaw I cut the beveled end off. This gave me a 100% consistent angle,
a 100% consistent length, and allowed me to mostly work with material
that wasn't too short to manage. The last step was to clean up the saw
cut and I did that holding the short little piece with a hemostat against
the Scotchbrite wheel. I'm VERY pleased with my little AL spacers, too!
All in all it went pretty well. See the pix for the results. I'll have
to dismount it all one more time so I can polish the mounting plate, but
that can come later.
Time : 5.25 hours |
| Empennage Fairing (Happy Easter!) |
March 31, 2013 |
|
It is Easter morning, and I decided to get a little work in at the airport
before our family easter dinner. I decided to go back to tackle the
empennage fairing again. It still didn't quite fit. If I pressed it down
on one side so it fit nicely against the HS it would pop up from the
other side ... and vice versa. In short, it just seemed to have too
little material to reach around the girth of the fuselage there. I was
about to just give up, cut off a bunch of material, and commit to glassing
it in to fit. I also looked at the Fairings Inc website to see if I could
just buy one that would fit ... but reading comments on VAF made me realize
that might not be the silver bullet I hoped it would be.
But, I also got reminded that heat might do the trick. It seemed like the
mis-fit was too large for a little heat to fix, and that my hobby-grade
heat gun might not be hot enough anyway. But with nothing to lose I thought
I'd give it a try.
I taped the fairing down in the places where it fit well, and heated the
"problem spot". With my leather work gloves on I started to press and smooth
it into place after I got the whole area nice and hot.
To my deep surprise and pleasure, I found I _could_ get the glass to move
and reshape itself! With a little work I got it to fit up VERY well. It isn't
perfect, but the imprefections look very easy to work with. I marked the
current edge of the existing glass on my HS, and then put down packing tape
for some layups. I got everything ready to go ... then realized that I
needed to head home so I wasn't late got the Easter dinner festivities.
But I'm feeling really really good about how this is playing out. I'm going
to end up with a very nice fit on my empennage fairing, I believe.
Time : 3.0 hours |
| Empennage Fairing / Rudder Bottom / Left Wing Tip |
April 28, 2013 |
|
I was pretty happy with how the empennage fairing turned out, but after
doing a little trimming/shaping I felt it needed a little filler. I mixed
up some SuperFil and blobbed it on. Once I sand it out and shape it to
suit, I think I'll be done with all the glass-work on the empennage fairing.
I also installed the rudder bottom after sanding the micro to my satisfaction.
It went on well enough, but a few of the pop-rivets looked less-than-lovely.
So I adjusted them (read, sanded them down a bit so they didn't sit so proud)
and added some SuperFil to clean them up. Once I sand that down nice and
smooth and shoot some more primer I'll be ready to reinstall the rudder (maybe
for the last time ... maybe ... well, one can hope).
Finally, I finished trimming the left wing tip and got it drilled to the end
of the left wing. Now both tips are clecoed in place and it is looking very
very good. Next, I need to install the ClickBond platenuts, final drill the
wingtip attach holes, and dimple the wing skins where the tips attach.
Oh, and I started reinstalling my ailerons. I got the right one mostly back
on, with only the pushrod left to attach. It'll be good to get all of my
control surfaces back on the plane! It looks weird with them off.
Time : 4.0 hours |
| Empennage Fairing / Rudder Installed |
April 30, 2013 |
|
I sanded the SuperFil on both the rudder bottom, and the empennage fairing. I
think I have a little more to do on the fairing, but the rudder bottom got
some primer and the rudder got re-installed. I also pulled wires through the
rudder bottom and double-checked the electrical connections to the rear
nav/strobe light. The wiring looked good, so I connected up the light and
installed it. A quick test had the nav shining brightly, and the strobe
virtually blinding me.
One other incidental thing checked tonight was the elevator trim. It works,
but on the way home I realized I needed to confirm that it was operating in
the correct direction. I _think_ it is, but I need to double-check. :)
Time : 2.5 hours |
| Empennage Fairing / Center Tunnel Cover |
May 4, 2013 |
|
The empennage fairing, of course, needed more work. I'm probably being too
picky, but there you have it. I sanded more, and then decided to extend a
bit of glass near the front so applied packing tape to the fuselage and
laid up the glass. I hope it cures before tomorrow.
I also spent time getting the center-tunnel cover panel installed. Given
how I was running the prop/mixture controls, I decided to separate the
cabin heat deflector from the center tunnel cover. This made it MUCH easier
to install both of them, and will make opening up the tunnel less of a
hassle in the future.
I also had to trim the tunnel cover to accomodate how I had wiring exit
from the tunnel and head up to the area behind the panel. I've now got
pictures of that area so I can finally order my carpet since I can finally
let them know what changes might be needed to the stock-standard carpet
shape.
Time : 5.0 hours |
| NAV Antennas / Empennage Fairing |
May 7, 2013 |
|
Tonight I spent time starting the installation of the NAV antennas. I got
them positioned, drilled, and the nutplates riveted on. I also spent a
bit of time doing a little more glassing on the empennage fairing. If I
can ever cease wanting to "tweak" it, I'll be done.
I also took a little time and cut down the pilot-side stick. I had
disassembled it from the plane earlier and it just needed to be trimmed.
That went -exceptionally- well.
I'd have done more tonight, but George talked me into going flying a bit. :)
Time : 2.5 hours |
| Wingtips / Empennage Fairing |
May 11, 2013 |
|
Today started oddly. On the drive to the airport there was an incident
on US-1. A horse trailer had gotten loose, but luckily it didn't overturn.
It simply ran down the guard rail and eventually slowed to a stop. The
horses came out (though, one upset horse actually came out the "people
door" up front, and got scraped up that way), and waiting on the road
while we got things settled. Believe it or not, one guy who stopped had
a replacement trailer hitch which would fit into the woman's receiver,
another person stopped who was a large animal vet from the NCSU School
of Veterinary Medicine, and another woman stopped who had a 2-horse
trailer and could help transport the horses. They loaded up and went
to the vet school. Never mind the idiots who wouldn't hardly slow down
even though we were blocking the left-hand lane and had two horses in
the road. Idiots.
Anyway .... I spent time working on the wingtips. I got the NAV/Strobe
lights installed, finished the installation of the NAV antenna, installed
the APRS J-pole antenna, and glassed up a little "doghouse" for the
APRS GPS to live in. That will get glassed into the wingtip tomorrow.
I also installed my ClickBond nutplates. It is an interesting system. I
hope the bond is good, and this ends up not being an expensive disaster!
Time : 5.5 hours |
| Engine Oil / EGT-CHT Check |
May 16, 2013 |
|
I did two things in preparation for first engine start. The first was
to check a pair of representative EGT and CHT probes. I took the CHT
off of #2 and the EGT off of #4, and put them in boiling water.
I needed to figure a way to get water boiling there at the engine ...
so I took a small stainless steel dog bowl, filled it with water,
set it on the handle of a steel cart I have, and used quick-clamps
to clamp a propane torch under the bowl. It was a seriously Rube
Goldberg setup, but worked like a charm (that is to say, I didn't burn
the hangar down). The CHT and EGT probes read 208 and 206 degrees,
respectively. That is plenty close enough for me.
I also drained the preservative oil from the engine and poured in
fresh new oil. I also then removed the oil pressure line from the
transducer and added an extension which then terminated in a random
Gatoraide bottle. I pulled the bottom plugs, reattached the starter
cable, and cranked.
It took a couple of 10-second rounds of cranking ... but on the third
attempt I saw oil coming out the line. By the time I stopped I probably
pumped a half-pint into the bottle. Then getting the extension line and
union fittings removed was a very messy exercise. More oil was spread
around as I tightened the oil line back onto the manifold leading to
the transducer. BUT, I clearly have oil being pumped through the engine.
Woo hoo! A small, but critical, milestone. :)
Time : 3.0 hours |
| Prep for FWF Inspection |
May 27, 2013 |
|
Today was mainly spent on getting prepared for a before-first-engine-start
inspection. There were a handful of things I felt needed doing, all in
the "dusting and cleaning" category. One of those things, however, was
adding a little more fuel to the tanks. I didn't want to try the FIS
exercise with only 2 gallons per side. I added another 3 gallons to each
side, and it all stayed in the tanks as intended. *whew*
Also, just 'cause it looked so pretty I took a picture of the seat cushion
installed with the lap belts in place. :)
Time : 4.75 hours |
| First Engine Start (Really!) |
June 6, 2013 |
|
You'll notice that the entries jump from June 1 to June 6, implying that
I just sat around for 5 days twiddling my thumbs. Not so. It just isn't
worth logging all the time spent where nothing useful was accomplished. In
short, I checked the ignition (multiple times), checked the fuel flow, ran
my battery down multiple times, bought a new better battery charger, and
generally found NOTHING WRONG with the engine. Nothing.
I ended up with other people more frustrated than me, it seems. I had
theories being slung around and then debunked. By the time it was all said
and done I had a grand total of five A&Ps trying to help puzzle out the
problem. I had one of those A&Ps hear about the issue from a friend of
mine and he called me up out of the blue to offer assistance.
The upside of all this? Man, do I have support and friends. Someone was
going to get this engine running for me if they had to rebuild it from
scratch to do so.
I kept being told all it needs is fuel, air, and fire ... and it'll run. If
something is wrong it won't run well, but it'll run. All it seemed to do
well was flood, though. I checked the ignition (fire), and it was totally
fine. I had others check it too. No problem. I had fuel. In fact, I had
fuel puddling in the plugs and running out the exhaust. I _had_ fuel, more
than I could use it seems. I _knew_ .. just _knew_ I had air, because we
are at the bottom of an ocean of air. So how could it not have air?
Notice, I didn't check air. I just assumed it ... and this is someting I
_know_ should have been a red flag. Assumptions should never be made. Are
you getting a hint as to what the problem was?
To drag this story out a little more ... let me give a bit of background.
I built this engine down at Superior. I installed the fuel controller there
and they ran it in their test cell. Then they boxed it up for shipping,
and in doing so removed the fuel controller. They installed shipping plugs
and sent it on its way.
The API fuel controller attaches with an adapter plate which is about 1/4
inch thick. When Superior installed the sump shipping plug it didn't fit
on the opening of the adapter plate, but installed on the sump itself. This
had the plug recessed about a 1/4 into the assembly, and when I bolted the
fuel controller on the engine I didn't have the interference you'd normally
get if you had left a plug in.
Yes ... we were trying to crank with the plug in place. It did NOT have
air. The fact that a few cylinders still fired under that condition is an
indication of how much these engines WANT to run.
And run it did. The idle needs work, but giving it a little throttle had
it singing beautifully. I shut it down as the CHTs started to creep up, as
I didn't want to glaze the cylinders. But it has had two short ground runs
now and that'll be enough for the time being. *whew* What an ordeal. But it
is behind me now.
Time : 3.0 hours |
| Empennage Fairing / Squwaks |
June 9, 2013 |
|
Today I spent a little time fiddling with the empennage fairing, of course.
I'm about done (for now). I can see spots that still need work, but they
are minor enough that I can probably talk myself into leaving them for the
final finishing before paint. Maybe. We'll see.
I also spent time working off a few more squwaks that Tom came up with
during the pre-first-engine-start inspection. Mainly tidying up the plug
wires. This took a bit of fiddling, and working my hands into tight spots,
but it looks MUCH better. I'd long known I needed to get that done and
just had to muster up the energy to do it. One key modification was to
drill out a hole on the back baffle (left side, bottom rear corner) so
I could attach a piece of angle which would let me hang an Adel. This
now has both the plug and EGT/CHT sensor wires nicely supported off the
back of the baffles.
I also re-worked the safety wire on the prop. I had used .032, and really
needed .041 instead. What a nasty job. But I got it done. *whew* That has
been on my punchlist for .. well .. a long time.
Tomorrow I fly out to Oregon for transition training with Mike Seager. I'm
psyched. I'm also visiting Advanced Flight Systems to address a problem I
have had with my EFIS, and will stop in at Van's to pay a $1.90 invoice.
Yes, I bought $1.90 worth of stuff, including postage. Don't ask. :)
Time : 4.5 hours |
| Breather and Inspection Panel Flange |
July 11, 2013 |
|
Tonight I did the last bit of drilling/countersinking on both the inspection
panel flanges. What a long strange trip this has been. Marilyn came out and
helped again, and I set her to fiddling with the engine breather tube that
needed moving/modifying. My inspector didn't like how it was done.
After a LOT of fiddling, we got a new route figured out. This entailed taking
off about a half-dozen adel clamps, re-routing the starter wire (and I like
the new route a lot better, actually), and reinstalling everything. We looked
at about a dozen different routes/orientations for the breather (you would not
think there would be that many options), and finally settled on one that was
fairly direct, and ended up with the breather exit almost right over the
left exhaust. But, man, it took a long time to get the work done.
Time : 4.25 hours |
| Forward Skin / Rudder Reinstalled |
July 13, 2013 |
|
This was a lengthy day, but only because I had a million rivets to install. Ok,
it was exactly 250, but it felt like a million. I also had a lot of drilling,
countersinking, and other operations to do to finish this up. But the work on
the forward top fuselage skin is now done. The inspection panel flanges are in
place, and the inspection panels themselves are dimpled and good to go. About
time!
I also reinstalled the rudder for what I hope is the last time. We'll see
if that holds true. :) Theresa came out to visit, too, and one of the things
we did was stick the N-number on the plane. These are just temporary to keep
me legal until I get her painted, but for now the do the job nicely.
Time : 5.75 hours |
| Riveted Forward Top Fuselage Skin |
July 21, 2013 |
|
Today was a big day. Theresa .. my "Rosie the Riveter" came out and helped me
get that last skin riveted. Isn't that a lovely turn of phrase, "last skin"?
It really is the last skin on this airplane. Wow.
Riveting went great, if slowly. This is a tedious bit of skin to get riveted
since a good bit of it has to be done while laying on my back under the panel.
We actually were able to do a lot more _before_ being forced to lay under
the panel than I had thought we might be able to do. So that was good. But
it was still a lot of slow pain-staking work.
But its DONE! Thanks, Theresa!
Time : 6.0 hours |
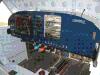
| Pre-Inspection Inspection |
July 24, 2013 |
|
This was a big day for me. Tom is very detail-oriented, and very familiar
with RVs. I'll confess to being nervous, at least a little. :) The plane
got a very serious examination with Tom crawling under the plane, under the
panel, in the back, revisiting the engine, checking the rigging, and in
general going over the plane with a fine tooth comb.
How did we fare? Great! Yes, there are squawks but I'm guessing about 75%
of them could be worked off in a single evening work session. Only one
item was a real airworthiness issue (the aileron rigging was slightly off).
We also spent time working on the engine idle. I had asked Tom to help me
get the idle and mixture set right, so we pulled the plane out and fired
it up. Once the oil was at least a bit warmed up Tom started making
adjustments.
When we started, it wouldn't idle worth crap. It was missing, and surging,
and just misbehaving badly. In short order Tom got it to start behaving
better, and by the time we were done we had been able to get it to idle
smoothly down as low as 550 RPM. It didn't exhibit that classic I/O-360
rough idle behavior, and Tom commented that it was a particularly smooth
idling engine. You might remember that I built the engine, and the fuel
injection system, so I am singularly pleased at this turn of events. :)
We finally set the idle for 650 RPM, and left the mixture a -tad- rich
for the break-in period.
The engine ran idling for about 15 minutes, so I had time while Tom worked
to fiddle with the avionics more. This was the first opportunity to check
things out with the engine running when I wasn't focused completely on
just making the engine run. I made a point to see that the MP was behaving
in a manner that seemed reasonable, that the ammeter seemed to be registering
something useful (i.e. I flipped the landing lights on, then off, and
watched the current draw change appropriately), and other items like that.
So far .. so good.
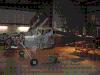
I came to realize that tonight is the first time that this beast has
felt like a "plane" to me rather than a "project". It is a subtle change,
but meaningful to me. In the picture above the plane is more put together
than it has ever been before. Wow, it sure looks real.
Time : 2.0 hours |
| Weigh the Plane! |
August 18, 2013 |
|
I _had_ to get the scales back to Tom, and had intended to get the
plane weighed earlier in the week. But I didn't, so today was the day.
I put the LAST FEW panels into the cockpit, put cups with screws where
they should go instead of installing each and every screw (just to have
to take them out again for the DAR visit), and put the not quite finished
wingtip lens on the wingtip to weigh the plane.
Preparation took the morning, and around 3:30 Wally came out to help
with the actual weighing. The ramps I cut down for Tom's scales worked
fabulously. We horsed the plane up onto the scales, lifted the tail onto
the cinder blocks I had placed on my robust rolling table (they were
darn near exactly the height needed for the tail .. requiring only a
small plywood shim to get us within 0.1 degree of level), and then we
put a LITTLE air in the right tire to get it within 0.1 degree of level
side-to-side. It all sounds so simple writing it down, but it sure seemed
like a big job at the time.
The first round of weighing was tossed out because we realized I had left
the canopy open, and a level laying on the plane. Doh! Fortunately we
realized our error before taking the plane off the scales. After fixing
our mistakes, the results were :
- Right Main : 518 lbs
- Left Main : 509 lbs
- Tailwheel : 71 lbs
This resulted in an overall weight of 1098, and a cg of 80.14. This is
well within results seen by others, and I'm utterly pleased with the
results. :) Time to call the DAR. Sadly, I was so exhausted by the time
we were done with this (it was a hot, humid, day) that I neglected to
take a picture. Dang.
Time : 6.5 hours |
| Data Plate / Registration |
August 21, 2013 |
I did my final bit of prep for the DAR visit tonight. For no sane reason
I had left the data plate engraving until the last minute ... and it did
get done in time, *whew* I mounted it onto the plane tonight, so that is
done. I also got a little clear plastic document holder and mounted it
for the registration. So that is taken care of too. I went over all of my
various forms, have my logbooks in hand, have my POH printed and placed
neatly in a notebook, have my flight test plan printed out, have my W&B
done and printed out ..... I even cleaned up the hangar a bit tonight. I
think I'm about as close to done as I can get. Tomorrow will tell the
tale. Wish me luck.
Time : 2.5 hours |
| Airworthiness Certificate Issued! |
August 22, 2013 |
|
For all of you who wished me luck ... thanks. It worked. Today I had a
visit from my DAR, Bob Woods, and he issued me my pink slip. He did a
real inspection, and looked in the panels I had already removed and
had me take a few more out besides. It was a good inspection, and he
had kind words to say about the construction. All in all, it was a
very positive experience.
Now I just have to reassemble the plane, take care of a few items I
had left on my "todo" list (things deferred because they weren't really
necessary for AW cert issuance), and then get the first flight in. I
am close to the end of the "Completion" section ... and think that the
first flight will do it. I have a bit of work to do to get to that
milestone, but hope to be there very soon.
Speaking of first flight, here is a quick view of my flight test area.
http://tinyurl.com/n4932l-flight-test-area
It isn't exactly what I had in mind, but none the less gives me a very
healty chunk of real-estate in which I can fly. At RV speeds it should
take me just under an hour and a half to completely circumnavigate the
area. :)
It has been 12 years, so I'm proof that as long as you don't quit you
will end up with a plane when you are done. If I can do it, anyone can.
|
| Backup Battery Install |
August 31, 2013 |
|
So, I'm driving to that first flight milestone, but I decided that I really
wanted the backup battery to be installed before I flew. I know that sounds
like gilding the Lilly, and that surely it wasn't necessary, but it was
more a matter of discipline than anything else. I swore to myself (and my
family) that I wouldn't rush .. and it really makes a difference in those
first moments after engine start if you can see your oil pressure. Without
the battery the EFIS reboots during engin start. So, I ended up deciding
it wasn't just a luxury.
But, good grief, it took a lot of work. Mainly because I had to route wires.
And, luck would have it, the wire-routing was almost a worst case scenario.
I had to route one wire from my VP-X Pro box to the other side of the cockpit.
I had to route another wire from the hot side of the master contactor to
inside the cabin. Because it is an always-hot wire I had to fuse it near the
origination of the wire. This meant I had to go get an inline fuse holder
and wire it in. I had to rewire my old backup power setup into the new backup
battery connector. I had to do the mechanical mounting of the battery to the
location where I wanted it in the cabin. And, along the way, I found an error
in the wiring I got from SteinAir (a -rare- find .. I wonder if I win a
prize) and had to swap a pair of stubborn pins on a DB connector.
To top it off, it was a warm day ... not TOO hot ... but humid as all hell.
I was sweating buckets. At one point I was glad I had to run to Lowes and
AutoZone because I _needed_ some time in air conditioning. I was feeling
like I was ready to barf. But that break got me back going again.
The net result? I powered everything back up and the EFIS came up as expected.
Then .... I turned off the master, and the EFIS _stayed_ up. Not a hitch. Not
a blink. After a few seconds it informed me that it was shutting down in 27
seconds unless I pushed a button. This was a clear indication that it was
running off of backup power. I let it auto-shutdown and then went over to
flip my "backup" switch. My SL-30 and backup PFD came up as I had hoped they
would. After 12 hours of work, with a good 9 of those hours being the backup
battery install, it worked as desired/expected.
I also got the left wing root fairing re-installed, and brought both tanks
up to 10 gallons a side. After a little more "disting and cleaning" I may
well be ready to fly. We'll see what tomorrow brings.
|
Total Time : 436.50 hours
|
|
![[ The Frye RV-7 Project ]](images/frye_project_banner.png)