|
|
Finishing Kit
The finishing kit is the last in the series of airframe kits. While the
word "finishing" makes it sound like a person should be at the end, the
reality is that there is a LOT of work to be done after the finishing
kit is complete. There will still be a lot of firewall-forward work as
well as avionics and electrical systems installation to be done. But, it
is none the less a great milestone on the march to completing an RV.
| Finishing Kit Ordered! |
December 9, 2004 |
|
Now that I've started work on the fuselage, I felt it was time to get
the finishing kit ordered. This prompted a number of decisions and actions.
First was an issue of storage. Where the heck was I going to put
the finishing kit parts?? The shop/garage is rather full at the moment,
though I know you folks building in truly tight quarters will look at me
with disgust for saying that. :)
We decided that the thing to do was to get a U-store-it type location to
store the kit in. I intend to put up shelves (which will later be relocated
to the hanger) and inventory the kit at the storage building. Then I can
bring home parts on an as-needed basis. The storage facility is close enough
that this won't be a significant inconvenience either. As I finish up other
parts (thinking wings here, after they are fitted to the fuselage) I can
rotate them out to the storage building as well.
Other activities centered around engine (and to a lesser degree, prop) choices.
ordering the finishing kit mandated a decision about engine size, mount, and
induction. Going with much of my earlier inclinations I am now fairly certain
I'll go with an Aerosport Power built IO-360-B1B with AFP fuel injection. As
of this writing the price for that engine is $22,400 if built with Superior
parts. I've also settled (in a last minute change of mind) on a Hartzell
"blended airfoil" prop. It is $5,500 which is MUCH cheaper than the other
prop I was considering (the Whirlwind 200RV).
(NOTE: I've changed my mind on the engine supplier, and am going direct to
Superior for my engine. The deciding factor is their program that allows the
builder to come assemble their engine themselves. I can't talk myself out of
the opportunity to learn so much about my engine! I'm still going with an
180HP, AFP fuel injection, and a Hartzell blended airfoil prop though.)
The order is in, and now all I need to do is wait for the big box to arrive
at the (I assume) the ABF loading dock. :)
|
| Finishing Ship Date Set |
December 31, 2004 |
|
Just a quick note there to say that I got mail from Van's today telling
me that my finishing kit will be shipped the week of February 21, 2005. I
hope that the next entry will be about the successful (i.e. damage free)
delivery of the finishing kit.
|
| Finishing Kit Shipped! |
February 23, 2004 |
|
I talked to Van's and found out that the finishing kit has been shipped
and should be here on March 4, 2005! Woo hoo! The shipment will come via
ABF freight (the same folks that shipped my fuselage) and the tracking
number is 145042314 and I'll be watching carefully as it makes its way
across the country. Time to make those last minute preparations at the
storage building to uncrate and inventory the parts!
|
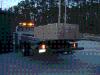
| Finishing Kit Arrived! |
March 4, 2004 |
|
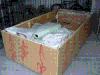
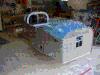
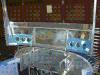
The finishing kit arrived, in good shape (i.e. the box came through
totally unscathed), and has been hauled to the storage building. It
took a little longer to get from Durham to Cary, but in the end we
got it done. It fits in the storage building wonderfully, and tomorrow
we inventory. I'm thrilled to have this last major sub-kit
here! I thought the day would never come. :) (And, yes, I know I
have a LOT left to do .. but this is still way cool.)
|
| Finishing Kit Inventoried |
March 5, 2004 |
|
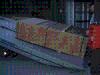
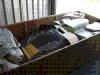
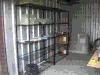
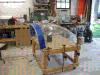
Theresa and I got out early today and in fairly short order got all
the finishing kit inventoried (except for the bags, which I'll do
here at home). It was amazing to see all those big parts like
the cowling, canopy, and engine mount. I hope to finish getting things
arranged in the storage building today .. including taking a few items
(like wingtips) out of the garage which are really not "in play"
at this point in time. No need to use up home-space when I have got
a lot of storage-space available!
|
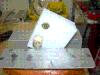
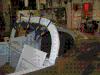
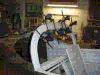
| Complete Finishing Kit Inventory |
March 6, 2004 |
|
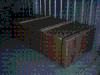
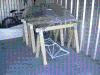
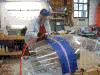
I spent today finishing getting the finishing kit inventoried (all the
bags, that is), getting the canopy up on sawhorses, and getting the
wingtips hung up in the "hanger" (which is what we are calling
the storage building now).
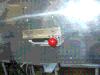
Note the last picture in this section ... the canopy has has a small
chip. This is near the rear of the left-hand side of the canopy down
on the bottom edge. The picture is looking from the inside out. If
you look at the bigger version of the picture you will see that the
chip is beyond the trim-line, and therefore is of no consequence.
*whew* I called Van's to confirm this opinion, and it is absolutely
the case that all that (and more) will be trimmed away.
Now that this is all done, I can maybe actually get back to working on
the airplane itself! (Not that I begrudge getting the finishing kit in
and all set up.)
|
| Started Finishing Kit |
October 4, 2006 |
|
I purchased the finishing kit early (see dates above) because I had the
money then, wanted to get it before any more kit price increases, and
because there are a few items in the finishing kit that are actually used
during the fuselage construction!
However, today I finally broke open the plans and instructions for the
finishing kit and got to work. Tonight "work" consisted of getting the
shop cleaned up, getting the instructions into my notebook, reading
through the updated set of instructions, and generally preparing to
start on the first of the canopy construction. Woo hoo!
Time : 1.5 hours |
| Found/Fabricated Parts |
October 5, 2006 |
Tonight I only had a little time (every little bit helps, though!) but
I wanted to get something done. I spread out the plans, opened up the
manual, and got working on pulling the first set of parts needed together.
I found all of the UHMW blocks I needed, and started fabricating the
aluminum spacer for the tip-up hinge "sandwich" from the stock block of
aluminum provided. I'm not quite done fitting them to size, but ran out
of time and will finish them tomorrow.
Time : 1.25 hours |
| Canopy Release Parts |
October 6, 2006 |
|
Today my group at work had an "FCS celebration lunch". Since for another
couple of weeks my group is long distance (which is to say I'm the only
team member in RTP) my celebration was to get out in the shop and work
on the plane a bit early today. :)
I took care of another lingering cleanup item on the forward cabin deck
then unclogged my shop vac to finish some shop cleanup. Then I jumped into
fabricating the various small parts (mostly from UHMW) needed for the canopy
release mechanism. This included the C-620, C-617, C-618, C-619 and the
AN43-16A which had to be cut/ground to be made into release pins. All in
all it was a good afternoon of shop work. I feel like I am really on my
way on the canopy. (And, yes, there is fear along with the excitement. :) )
Time : 3.25 hours |
| More Canopy Release Parts |
October 7, 2006 |
|
Today it was time to take some of the parts made yesterday and start
to drill them to the airframe. I also match-drilled the center aluminum
spacer (C-617) to the UHMW blocks. This all, of course, took longer than
I would have expected since I wanted to go slowly and carefully. While in
the parts fabricating mode, I decided to work on the steel arms which
attach the canopy release pins to the rotating central shaft (turned when
the pins need to be withdrawn).
The first two cuts went great (i.e. the
first cut on each arm, which was filed to 1/8" width). Then the second
cut on the first arm went awry. Rather than forge ahead I stopped, figured
out what went wrong, then was ready to move forward again. Sadly I now
had a part that would have to (I thought) be re-ordred from Van's.
Then I thought of Marilyn, my friend who is building a welded tube frame
plane and figured she might have some spare steel of the right size ... and
I was right. It did take a drive to Durham (which consumed the rest of my
day) but sure beat waiting until Monday to order the parts, paying for
shipping and handling, and waiting until the middle of next week (at best!)
to get the replacements. Thank goodness for good airplane building friends!
Time : 4.25 hours |
| More Canopy Release Parts |
October 8, 2006 |
|
Can you tell there is a lot to making the canopy release parts? I spent
most of the time this morning working on the steel release pin arms. I
got the slots cut (yippee!!) and mostly filed. I now need to finish a
small amount of filing, and then drill them for the bolts. I should have
them wrapped up this afternoon. I'm not "good" with steel yet, but figure
I could be with some practice. Fortunately ... I won't get much more in
the way of practice on this project. :)
One of the things I did in the afternoon (after finishing up the release
pin arms) was drill the sub-panel half-rib to the canopy hinge blocks.
It is a picky and awkward task, which took a good bit of time to get right.
I also drilled the central weldment to which the steel release pin arms
attach. About this point it was time to head in for dinner and an evening
with the family. It doesn't feel like I got much done, as it was one
of those days of taking lots of time to drill a few holes, and nothing
got assembled for the last time. :) Soon, with luck, I'll be engaging
in the fun of engaging in the making of final assemblies.
Time : 4.5 hours |
| Remade Canopy Release Arms |
October 22, 2006 |
|
Ever read the dimensions of a part *wrong*? Ever catch it after you went
to actually install it? Naaaaa ... you don't do that, but I did. I took
the overall length of the canopy release arms off of the plans. You know,
those dimensions that are between the hole centers?? Right, not the ones
that are the actual full length of the parts.
Arrrrgh.
Third times a charm, right? I went and got some more material from Marilyn's
collection of 4130 tubing, and made it again. I was able to cut down my
long arm to make the correctly-sized short arm, but needed another 9" piece
of tubing to make the new long arm.
I'm kinda glad this happened, as I am much happier with this set. I got the
slots more perfectly in line on the tubing ends, got them better centered,
and the holes for the clevis pins are better aligned. Soooooo ... I would
not have re-made them otherwise, but it turned out well.
Tomorrow I start in my new job (same company, new group). Part of the lack
of progress over the last few weeks has been due to time demands wrapping
up work in the old group, and partially stress from the switch (even if I
was the one who instigated the change of groups). We'll see what the next
few weeks bring in the way of making headway on the plane.
Time : 2.5 hours |
| Installed Canopy Release Parts |
October 28, 2006 |
|
I've changed groups at work (mentioned in the previous entry above) and it
has been ..... interesting. :) I wasn't able to touch the plane during the
week as I worked my way through the transition. It doesn't help that the
group is in a little turmoil right now, but I have confidence it'll get
better soon.
However, the whole family is away for the weekend (Chris is at school, and
the women are at the Fiber Festival in Asheville) so I'm going to try and
make good headway this weekend.
I cut the slot in the center rib needed to allow the left-side canopy release
arm to reach through. I got things opened up enough that everything moves
nicely, and the fit looks good. I'm still scratching my head over how I
want to actuate the canopy release ... as I _still_ want to avoid bringing
the T-handle through the face of the panel if I can possibly manage it. I
have an idea I'm working on, and I _think_ it'll pan out. We'll see. SO
far it is looking good.
I got all the canopy release parts finished and installed. I upon final
assembly (not that this is really the *final* assembly, as it has to all
be taken back out for riveting) I found that one pin bottomed out about
1/8 before the other. I think I'm going to re-fabricate the steel arm
that is 1/8 short rather than try to reposition the UHMW block.
And ... at this point ... I'm finally good at making the little
steel arms. I just need a little more 4130, and this time I'm getting it
from Van's since there is no hurry. (I actually discovered that Ernest,
a local Dyke Delta builder, had lots of spare so I got it from him
instead!)
Time : 5.5 hours |
| Worked on Modified Canopy Release Handle |
October 29, 2006 |
|
Today I worked thorugh more of the canopy release handle mechanism that
I started on yesterday. I'm bringing a piece of 4130 down from the canopy
release cam and then just below the hat section I'm bringing out a 1/4"
bolt as a handle. I'm going to cut off the head and put a nice little
knob on the end to have something to grab. I also need to put in place
some stops and need to fabricate some way to install an interlock so
that the handle can't move until the lock is moved/removed.
Much of today was spent running around and tracking down bits and pieces
for airplane work rather than being in the shop. I had to track down some
nice little wooden balls ($4 from the Woodworkers Supply Store). I also
had to Xerox the drill/cut pattern for the exterior canopy latch mechanism.
Once I had it copied onto a small sheet of paper (took a little fenagling
on a large copier at work to achieve) I took that to Kinko's to have it
copied onto transparency material. I cut out the slot areas and now I can
tape it in place to mark where I need to file and drill. This way I can
see the rivets underneath and know that my alignment is exactly right.
Time : 3.25 hours |
| Finished Modified Canopy Release |
November 4, 2006 |
|
I didn't like the way the pins were going in (one bottomed out before the
other). I took care of that today, finished up getting the handle "just
right", and am painting the ball I'm going to put on the end of the
handle. :)
No ... I didn't make much _forward_ progress, still piddling around with
the canopy release. Why didn't I just put bolts in?? I'm never going to
actually jettson the canopy in flight (unless I'm on fire, probably). I
just wanted to work through it, I guess.
I _did_ go with my son and vote (early) today. I'll be in Dallas building
my engine come election day, so wanted to get my vote in early. Worked out
great! Tomorrow might be thin on airplane work too, becaues it is my son's
19th birthday. Family-stuff might trump airplane-stuff tomorrow. We'll see.
Time : 2.5 hours |
| Canopy Latch |
November 19, 2006 |
Family-stuff has trumped airplane-stuff for a few weekends now. Go look
at my XP-360 Build School page to see
what other work happened in the intervening time ... but other than that
(and acquiring and assembling a engine hoist) little has happened on the
plane. Even so, this evening I went out and finished a little work on
the canopy latch mechanism. I needed to cut the semi-circles out of the
aluminum angles which sandwich the fuselage-side canopy release handle.
I had to make a little jig to get it done and they turned out great.
Time : 1.25 hours |
| Canopy Latch Openings |
November 23, 2006 |
|
I spent a little time today (Thanksgiving day) starting to cut on the
side of my fuselage. Talk about a nervous step to take! I taped the
bit of transparency up on the right spot of the fuselage (after triple
checking the positioning) and colored in the areas to be cut out. I
then took a steel rule and outlined the areas in black, just to make
sure they were perfectly in line and to give a firm boundary. While
the material was in place and nicly marking the rivet locations, I
drilled the holes. Rather than just drilling on the hole locations
indicated I made a drill guide from a piece of light AL angle drilled
on my drill press using a fence to keep the holes perfectly in line.
I then drilled the first/front hole using the transparency as a guide,
clecoed the drill guide in place, aligned it with the last indicated
hole, and drilled. I then did this on the second line of rivet holes as
well. It worked out great. The holes are perfectly spaced and perfectly
in line. Now I just need to finish filing the openings to fit the
canopy latch levers.
That's tomorrow's activity ... for today is to be spent eating Thanksgiving
dinner, watching a movie with the family, and generally being a bum. :)
Time : 1.5 hours |
| More Canopy Latch Openings |
November 24, 2006 |
|
Today I worked on the slots some more. Yes ... I'm going slow, and
sneaking up on them. I took a break mid-slotting and re-made the two
angles used to construct the latch mechanism. In doing some trial
fitting the original ones worked perfectly. They were beautiful. The
were flawless ... except ... the long latch handle has a section that
should protrude about .032 from the angles, and then a section that
should be flush with the angles. The portion that should protrude
was flush, which meant my hole for it was off by about .032. I felt
that I was being awfully picky, but decided to re-make them anyway.
I should have used the latch handle in the first place to get the
spacing right, and that is what I did this time. Fortunately I had
some spare .063x3/4x3/4 angle laying around.
I also trimmed some pieces of UMHW tape to go into the assembly (as
suggested in the manual) and am leaving on the backing paper for now
to serve as the suggested extra shim. It should work out well.
I am sneaking up on the slots slowly, and it is going beautifully. I
almost have the front slot cut. I've confirmed the width/height by
trial fitting the latch mechanism repeatedly. Once the front is cut
to size I'll then slowly open up the rear (long) slot. I expect to
get this finished tomorrow, and then I can drill the whole assembly
into place. Way cool.
Time : 4.25 hours |
| Finished Canopy Latch Openings |
November 25, 2006 |
Once again on this holiday weekend ... there was more family stuff
than airplane stuff. That is -not- a complaint, as we had a great
day. I did get out in the late afternoon and finished up the latch
slots. I am very pleased with how it all came out. It took a
lot of tedious filing to get it just so ... but when it was done, it
was all but perfect. (I don't worry about things being literally
perfect, else I'd NEVER finish this plane!)
Time : 1.5 hours |
| Finished Canopy Latch Handle |
November 26, 2006 |
|
This morning I countersunk the canopy latch angles, dimpled the fuselage
side, and started to prepare to attach the knob. I also painted the angles
white just to hilight them nicely in the fuselage cabin.
I'm also going to pause to do a last small bit of touch-up painting that
I need to do. I hate painting. But as the cabin starts to get more stuff
installed the trouble of managing overspray gets larger. And, frankly, I
have had this crap hanging over my head for months and want to get it out
of the way.
More after lunch ....
Ugh. I hate painting. It came out .. well .. ok, but not great. I'm going
to let it ride as it isn't in -that- visible a spot. Mostly.
After the painting I finished up the canopy latch mechanism, and got the
angles riveted in place (and *didn't* forget to put the UMHW tape on the
anges first). I started to work on the rest of the canopy latch mechanism,
and discovered I can't find my VS-411PPs! Dang it. Time to place (yet
another) order from Van's.
Time : 5.25 hours |
| Finished Latching Mechanism |
January 13, 2007 |
I'm back from messing with engine stuff now
... and can get back onto the canopy mechanism. Today I installed the rear
latching bar (with the two fingers that secure the rear part of the canopy)
and the mechanism that connects it to the canopy latch handle on the side
of the fuselage. The parts need a quick coat of white paint, but I'll do
that tomorrow when I can see.
Time : 3.25 hours |
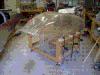
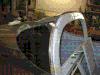
| Started Canopy Frame |
January 14, 2007 |
|
Today I started working on the canopy frame. I pulled the plastic off of the
skins, applied the UHMV tape to the front underside edge of the skin, filed
the "high spots" (as discussed in the manual) from the frame, and did an
initial test-fitting of the skin to the frame to see where the gaps and
mis-alignments might be. I also drilled the forward join plate (but only to
#40 which will be opened up to #30 at a later date).
I now pause to help get stuff ready for some visitors tonight ......
The afternoon was a good one. I clecoed and drilled the canopy frame skin
to the canopy frame. I did some initial test fitting, and _think_ I might
need to do a little filing on the skin to get a good fit. I need to talk
to a few folks first. However, my quick check of the gooseneck position
has the hole (if I were to have drilled it today, rather than just marked
with a sharpie) going right in the middle of the "meat" of the gooseneck
hinge. That is rather encouraging.
I also finished painting the canopy latch parts and got them installed.
I found a handful of hardware I'm running low on, so think I'll pull
together a parts order sometime very soon.
Time : 6.0 hours |
| More Canopy Frame Fitting |
January 27, 2007 |
|
Today was more canopy frame fitting work. I replaced the C-702 skin due
to an unfortunate drop on the floor which wrinkled the forward lower left
corner of the skin. It wasn't a -bad- wrinkle, but I decided to replace
the skin anyway. That is a point of touchy fitting and I wanted to be in
as good a shape as possible for that part of the skin to come down and fit
right when the tip-up is being closed.
Kat helped a bit with clecoing and fitting. There is a lot of clecoing as
I am going slowly "sneaking up" on the right fit. I still need to file the
right-hand spacer in front of the gooseneck hinge to get the fit right ..
or so it looks right now. Hopefully I'll work out more time tomorrow to
move things forward.
Time : 1.5 hours |
| More Canopy Frame Fitting |
January 28, 2007 |
|
You guessed it ... more of the same above. I'm still -barely- touching on
the right-hand side spacer. I put some dry-erase marker on the face of
the spacer and had a "dot" rubbed away, and saw the red "dot" of marker
on the gooseneck. That actually was a local high-spot on the gooseneck so
I filed that down just a tad, and took off some more of the spacer. To
track my progress I would close down one side to almost-touching, and
the would measure the gap on the other. That done I'd close the gap to
almost-touching on the other side and then measure. Yesterday that left
me with 4/32" on the left, and 2/32" on the right, indicating (confirmed
by the dry-erase maker mentioned above) that I had a gooseneck hitting
the right-hand spacer.
Today after my latest adjustments I'm now seeing 2/32" on the left, and
1/32" on the right. Progress! I think one more round will see it hit the
"perfect" point. If not that, maybe two more rounds. I'm in no hurry.
Still, even when this is done you'll see more "Canopy Frame Fitting"
entries, I fear. It is a tedious task.
(Lunch happens .... )
After lunch I spent a little more time working on the fore/aft fit, and
I think I have it nailed now. I also double-checked where the hinge hole
falls after all the trimming and adjusting, and I _still_ have plenty of
edge distance. Very cool. It isn't _quite_ as "right in the middle" as it
was, but I only moved a few 32nds of an inch overall and I'm still good.
I now need to get the relative "heights" of the two skins aligned. I am
(as many people have been) a bit high over where the skin curves down, and
a tad low in the middle. I can shim up the middle easily enough (and my
first attempt at shiming has it _too_ high). How to loser the skin at the
curves is less obvious. The bottom edges near the fuselage canopy deck
are not perfect yet either. Forward they are a bit "high", and rearward
they are a bit "low". I'll pause here and give Van's a call tomorrow to
get wisdom straight from the source. :) All in all I'm happy with how the
canopy frame is fitting up .... even if I am making VERY slow progress.
Time : 1.5 hours |
| More Canopy Frame Fitting |
May 13, 2007 |
I spent a good bit of time today (when not taking care of some must-do
work around the house) continuing to work on the forward canopy frame
fit. I added a shim in the center of the tip-up frame so the tipping
skin will clear the fixed skin. This changed the geometry a bit so I
launched into filing down the canopy frame in those places where the
tip-up skin is high with respect to the forward fixed skin (as was
suggested by Scott at Snf). This will have an added effect of bringing
the edges down a bit too ... resolving two problems all at once. Scott
said a good bit of material (up to about .020) could be shaved off of
the canopy frame since it was quite beefy. Making adjustments with a
file is .. however .. the slow way to do it. That being said, I don't
want to take TOO much off, so that means a series of marking the high
spots, pull it all apart, filing the high spots, putting it all back
together, putting it back on the plane, and marking the high spots
again. Lather, rinse, repeat. *groan* But this is my ONE shot at getting
it as "perfect" as I can ... so I'll take whatever time I need. :)
Time : 3.5 hours |
| Side Rail Fitting / Release Handle |
September 17, 2007 |
|
This evening I did some fitting of the canopy side rails. This was more
an exercise in tweaking (a technical term for bending) the rails and
forward frame to come into happy alignment. I got to where *I* was happy
with it, and then decided to sleep on it before doing any drilling.
I also spent some time doing some finishing work on the canopy release
handle. I didn't want the T-shaped handle coming through the panel, so
have an under-panel (or sub-panel) release handle I've fabricated. To
secure it I wanted to have a locking pin that could be pulled out when
needed, and I needed to create a "channel" through which the handle
arm swings into which I could stick a locking pin. (Pictures will help
explain when I have them.) I got the channel final fitted tonight, and
the handle cut to length and a "ball" fitted on the end for a grip.
Time : 1.5 hours |
| Yet More Canopy Frame Fiddling |
October 7, 2007 |
|
Yesterday there were a handful of need-to-do items around the house, and
today I took Marie for her first flight in the Citabria. Way fun, but not
the most productive with respect to RV-building. BTW, we tried to climb
on top of some widely scattered puffy clouds, and got over some but then
saw we were not quite going to get over some others ahead. The Citabria
is a great little plane, but those 115 ponies up front get really tired
fast and at 6K I decided to quit trying. :) Just reminded me how much
I needed to get my butt back out in the shop and finish the RV.
I did finally (finally!) get my canopy side rails shaped like I want. Good
grief, is that tedious. Since I did a QB fuselage I didn't have the
experience of putting the longerons into a vise and beating them to get
them to curve .. so this was a new experience for me. I was very cautious
and that made it very tedious. *whew* But it is done. I need to put all
the skins back on and final-check all the alignments, but with that done
I'll be ready to drill the side rails to the forward canopy tip frame.
Then .... you know what happens next. Don't you? CUTTING PLEXIGLASS! :)
UPDATE: I found things I wasn't 100% happy with, so just to keep you from
being susprised by the next few entries, I decided to do yet MORE canopy
frame fiddling. I think it may never end.
Time : 2.5 hours |
| More Canopy Frame Fitting |
November 10, 2007 |
|
This morning I took some advice from Ken at Van's and moved forward more
on the suggestion to "just make it fit". In fact, in response to one of
my questions Ken just said "Alls fair in love and canopies".
I had one spot that was still being difficult, and I also wasn't happy
with how the skins didn't curve nicely down to the sides. It made it
very hard to tell if it was all going to align well once the better
clamping power of the rivets was used. I had a suggestion to take a
large rod and cut a slot in it to help curl the skins ... but had always
worried that it would put a bend-line in the edge of the skin.
However, if you only use the rod as a secure handle and lay the bulk
of the skin on a flat surface, you can use that handle to flex the
last foot-or-so of the skin back and forth without actually using
the rod to turn/curl the edge itself. It is hard to describe, but easy
to do once you realize the way to handle it. I now have a nice curl
in the last foot of the skin, and it almost lays down in place without
any clecos at all. I have another skin (the forward-most top fuselage
skin) which got the same treatment ... though I had to cut a more
robust "handle" out of an 1x4 since the skin is so much thicker.
The other problem area was the left-hand side of the welded canopy
frame itself. If I flex things such that the skirts on the side rails
are in alignment, the middle portion of that forward frame ended up
with the skin aligned such that it was a full 1/16th (if not a tad
more) out from the fuselage skin. No good. So taking Ken's advice in
mind (and knowing I had been "gentle" with it earlier, to no avail)
I grabbed my vice grips. Using small wood blocks to keep from scoring
the metal, I clamped one vice grip on the end of the welded frame,
and another in the middle (problem) area. Flexing one in while flexing
the other out kept the end-portion where I wanted it, and moved that
middle in a bit. With the newly-curled skin it all seems on the money
now! Finally. Why didn't I do that ages ago? Beats the hell out of
me. I hope to move forward with some final riveting of the frame this
weekend, which will set the stage for final assembly of the entire
canopy assembly (prior to bubble-cutting, at least).
Right now I have everything clamped up, ready to drill the C-613 splice
plate to the forward canopy frame. I'm going to pause, and sleep on it,
since every time I've done that I've wanted to work on it a bit more
the next day. I want to be _done_, and at the same time I want it as
right as I can get it. *grrrrr*
Time : 2.25 hours |
| More Canopy Frame Drilling |
November 18, 2007 |
|
I had only a little time to work today, because I promissed an old friend
(Marilyn) we would go flying this afternoon. It was a bit hazy but we had
a great flight. She has not flown in quite a while, and out of the back
seat of the Citabria there is -no- way to see the instruments. But she did
*super*. Held altitude and flew where we decided we wanted to fly just
fine. Got us all the way back to Sanford when we decided it was time to
get the horse back to the barn. What a nice time! And what is the deal
with all the haze lately! Look at the DATE! It is mid-November for goodness
sakes! I thought us folks in NC had a deal with the weather gods to put
up with summer-time haze for perfect fall/winter flying weather! (Except
for the winds, and the ice storms, and the cold rain .. ya know. But NO
HAZE!)
Oh, yeah, this is an RV building entry .. so I should talk about that. I
did finish the drilling of the canopy frame. I got the two holes on each
side drilled through the C-613 and the shim "wedges". I also got all the
1/8" rivet holes countersunk ready to rivet. I hope by the end of the
thanksgiving holiday weekend I'll have the canopy frame completely put
together. We'll see how that works out.
Time : 2.0 hours |
| Finished Canopy Frame |
November 24, 2007 |
|
Today Theresa and I got out in the shop and wrestled with the four
rivets which go through the wedges in the C-613 splice plate. I don't
know what it was, though my guess is that it was the angle of the
rivet and the overall geometry there ... but we had a rough time of
it. Only one rivet went in cleanly the first time. Dang it. But maybe
I just needed practice in drilling out rivets since I've not done it
in a long time. In the end, we got them set in a manner that we found
suitable.
Then with that done, the next step is to start cutting the canopy
itself. This means ... today the bubble came home. About freaking time!
I could not be more thrilled. With luck we'll make the first cuts on
it tomorrow.
Time : 2.5 hours |
| Initial Canopy Cutting |
December 1, 2007 |
|
I started my initial "practice cuts" on the canopy. As much as anything
else it allowed me to make sure I had all the stuff I needed for canopy
cutting together and in hand. Much of the 2.5 hours was spent just in
the process of getting everything ready. I drew the centerline down the
canopy, marked center-marks on the fuselage, peeled some of the plastic
back from the edges, tracked down all the tape/cutoff-wheels/etc. that
I needed to get the job done. Discovered even in the terrible-awfull
heat (by the time I was done the thermometer in the shop was showing
93 degrees!) I still needed long sleeves because the die grinder threw
hot nibblets of plexiglass as it cut.
But I got the first cut off the front edge of the bubble done. This was
just a cut to the clamp marks on the canopy, and are _clearly_ not even
_remotely_ close to the final cut location. The plexi is thick, so the
cutting is a bit slow and tedious ... but not difficult at all. (NOTE:
That was with the cutting disks I had laying around, but once I dug up
the much thinner ones from Van's, the cuts went a lot faster. Just a
word to the wise.) Once you score the initial line unless you screw up
badly the cutting wheel wants to follow that initial groove. No biggie.
Unfortunately we need to drive to the mountains to take my son his car,
so this is -probably- all I'll get done on the canopy this weekend. Maybe
I can get the family to fire up the space heaters when I leave from work
so the shop will be good and toasty when I get home so I can do some
work on the canopy in the evening. 'Tis a thought!
Time : 2.5 hours |
| More Canopy Cutting |
December 11, 2007 |
|
I intended to be cutting on the canopy last weekend, but we spent the
bulk of the weekend dealing with a flat tire on the Citabria. Ain't
airplane ownership fun?? (Actually, it is fun ... which shows what a
fool I am.) I also flew down to Monroe (EQY) to look at Radomir's
canopy ... and it was worth taking time out to do that. I came away
with some new insights that will prove to be -extremely- useful.
This is a Tuesday, and I had time to work on the plane because I took
the day off to drive Theresa to Danville. We had a nice trip up, and
it is just as well that the plane was down waiting for new shoes as
the weather went from pretty to down-to-the-ground-nasty just a few
miles south of the VA border. Go figure.
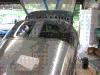
We put the canopy on the plane for the first time today, and got to
see what things are going to look like soon. It looked good (pictures
soon, I swear). Really good. I made a few trimline marks, took it off
again, and got another trim in before we had to call it quits. I find
the trimming to be -exhausting-, somehow. I think its the stress of
making sure your hand -never- slips the least little bit! But in the
end the trimming isn't going to turn out to be that big a deal. I'll
just go slow and careful and will get it done. Hopefully this week!
Time : 2.0 hours |
| Yet More Canopy Trimming |
December 22, 2007 |
|
With the rear fuselage skin in place, I put the canopy back up on the
plane and marked a "do not cut" line where the rear skin edge meets
the canopy. I know this isn't a final positioning, but it gives me a
good visual reference for roughly where the skin will fall (and the
instructions say to do it, anyway). I then marked a line a couple of
inches from there ... well back from the final cut location ... and
then trimmed the canopy to that line.
I still need to rough-cut down the sides, and trim a little more from
the front, but will do that this afternoon. Time for a shower to head
out to a birthday lunch!
(Maybe more later ... )
Yep. More later. I did another round of setting the canopy on the
plane and trimming and tweaking the fit. I'm still at roughly an
inch from the roll bar, and feel I should bring it down a *bit* more.
But I may post on the RVList to get some feedback. It is .. however
.. looking -very- good.
Time : 3.0 hours |
| Reinforcement Kit Flanges |
December 28, 2007 |
|
You don't see an entry for yesterday, because I screwed up a part. I bent
the flanges on one of the reinforcement pieces, and then went to double
check it on the plane. I got "turned around" and _thought_ I had bent them
the wrong way, reversed the bends, then realized I had it right the first
time. At that point I was unwilling to bend them _again_ since I feared
it would simply work-harden the metal .... and since it was a Thursday, I
called Van's and had them FedEx (overnight) a replacement. I figured since
it was a "zero-progress day" I'd just not count the time. Given I was
on such a roll (NOT!), I went and did other things with my day instead.
Today I got the replacement and spent a good bit of time carefuly making
the flanges on the parts. It was slow and tedious (though not as tedious
as it could have been since I made a very handy "flanging tool" to help
with the job). I did some test fitting, and ran out of time before I
could get started drilling. The parts are just set in place right now
and are ready to drill. That'll be tomorrow's task.
Time : 3.25 hours |
| Started Pitch Servo Install |
February 10, 2008 |
|
Today I started the install of my pitch servo I got a week or so ago. Yes,
I decided to go with some form of altitude hold (whether I get an AltTrak
or an ADI Pilot II is still under debate, but the price difference is only
a few hundred dollars .. so ..). I had to pull out the elevator bellcrank,
drill it for a rod-end bearing, and then measure for the location of the
servo mounting plate. I'll need to drill out 4 rivets from the aluminum
angle on the center spine of the fuselage and will add 4 new rivets on
the bottom of the fuselage. All in all an easy install SINCE I'm doing
it before riveting on that last top skin behind the baggage compartment.
That was, of course, the motivation for deciding now rather than waiting.
After lunch I finished laying out the holes on the bottom flange of the
mounting plate, drilling and countersinking them, drilling out the -4
rivets where the mounting plate will go, and match-drilling all the holes
for the mounting plate. I ran out of time needing to dimple the four rivet
holes on the bottom of the fuselage, but hope to get them this week. Once
that is done, everything can be re-assembled.
It is a beautiful day for building. The sky is blue, the temps nice, and
it is too freaking windy to go fly the Citabria anyway (at KTTA it is
currently reporting 250@22G33!) :)
Time : 3.25 hours |
| Finished Pitch Servo Install |
February 13, 2008 |
|
With Theresa's kind help we got the servo mounting plate riveted into
place, and then I finished up the install of the servo. I went ahead and
mounted the servo, safety-wired the bolts, re-installed the bellcrank,
and installed the rear (big) elevator pushrod (which had, before this
point, simply been "stored" in the aft of the fuselage).
It was good to get this done tonight, because I'll get _no_ work done
this weekend. I'll be out of town in DC taking my daughter to check out
some schools. Along the way we also intend to hit College Park Airport,
the National Zoo (pandas, ya know), and the National Air and Space Museum.
In fact it was my daughter who suggested the NASM commenting that she
had not been there since she was in the 5th grade. I think she is just
trying to be nice to her old father. :) I'm not complaining, though!
Time : 2.75 hours |
| Painting! |
May 25, 2008 |
|
Another crazy month. My son and his girlfriend were in China during the
massive 7.9 magnitude earthquake. They were, in fact, in Chengdu when
the quake hit which was only 60 miles from the epicenter. Good grief.
We spent a week-plus fretting, though we thankfully got word the first
day that they were -fine-. Even so, they were still in the quake zone
and until they got away from there (it took some time, as you might
well imagine) I worried. Between that, trying to get a round of paint
whose color actually -matched- the first round, and a host of other
distractions ... another month with little work done.
However, I will not quit. I will finish. This plane will fly, and I
am going to love it. :) That much I feel absolutely sure of.
So ... painting. I had to finish up painting the canopy frame before
installing the plexiglas. As I noted above, the last round of paint
I got was NOT the right color. I took pieces back to the paint shop
and we used the color from the original batch to get it dead-nuts-right.
Once they had the color itself to match, those guys are good.
I dare say I had the most relaxing, enjoyable, paint session today
that I have ever had. I'm letting the parts dry while I go get a hot
dog with my daughter .. and then we'll see if I need another coat. But
I'm thinking maybe not. We'll see.
Time : 2.5 hours |
| Re-Assembly, Plus a Little |
June 8, 2008 |
|
With that last bit of painting (successfully) out of the way, it was time
to start putting stuff back together. I had been forced to pull many parts
off the plane to avoid masking nightmares for the painting, and today
they all went back on (and then some).
What went back on? The roll bar, and the attachment points needed to
attach the roll bar. This entailed about a six bolts/screws per side
and each fastened inside the roll bar, which makes it a "fiddly" sort
of operation. I wish I had even smaller hands sometimes. I also drilled
for, and installed, the canopy latching spacer plates. This is a minor
modification I added to the canopy structure due to my desire to use
glue to attach the canopy.
When glue is used you end up with a small
(1/8 inch) gap between the plexi and the front half of the roll bar,
and I've seen cases where the canopy sags or "drifts" downward. Having
positive stop-blocks against which the locking lugs pull insures that
the canopy latches in the exact same position every time independent
of any closing forces on the plexiglass itself.
I'm off now to the movies with the family (the latest "Indiana Jones"
movie, and I'm prepared to be disappointed, too!).
Time : 3.5 hours |
| Gas Struts Attached |
June 28, 2008 |
|
I have actually worked on this mess/insanity/frustration off and on
over a number of days. Much of the time has been spent figuring out
how the hell I'm going to get the nuts on. Today I pushed to get it
finished ... come what may ... and got them on. I have a few pictures
to commemorate the occasion.
Take a look at what I had to do to get a wrench up behind the rail
where the nuts were. I also held on the washer with a dab (easily
broken once torque was put on it) of superglue. Good grief. It didn't
help that it is 81 degrees out, with 70% humidity. I need a shower
now.
Time : 3.5 hours |
| Back At Canopy Trimming |
July 17, 2008 |
|
July has been bad for building. Between many summertime activities, a
lot of work stress, and many other distractions, RV-work has halted. Yes,
I know this happens to me all the time. But I ain't quitting! I'm
once again back at it, and it is time to start making plexiglass snow
again.
I spent a couple of hours tonight making snow, and I'm getting closer
to making the "Big Cut (tm)". Not close enough yet, though. As all
first time builders seem to be ... I'm paranoid. So I take off tiny
bits at a time knowing I can take it off, but I can't put it back. I
think another evening of gradual adjustments will get me ready for
the you-know-what (yeah, yeah, the big cut).
Time : 2.0 hours |
| Ready for The Big Cut (tm) |
July 19, 2008 |
|
I carved out a little time today to get back into the shop, and did a
bit more rough-trimming of the canopy. I'm now convinced it is close
enough so duct-taped it down as well as I could and marked for The
Big Cut (tm).
Because I'm using the Sikaflex glue technique I had to account for the
gap desired by the glue. This affected how low I wanted/needed to bring
the canopy to the roll bar. I taped garden-hose washers in place to use
as spacers, and things are looking good. I'm calling it quits for tonight
only because at this point I'm tired and I want to do the big cut when
I'm fresh. Tomorrow will be the day.
Time : 3.0 hours |
| The Big Cut (tm) |
July 20, 2008 |
|
As planned, I went out and did The Big Cut (tm) today. Given how I had
prepared it was a piece of cake. I followed my tape lines and did an
initial shallow cut just to set the line. Then I had Theresa come out
and lend a hand for the final cut.
Following back over the existing groove I simply let the cutting wheel
sink down into the plexi cutting all the way through for an inch or two
at a time. Every 6-9 inches Theresa put down some tape to hold the pieces
together. As I made those final cuts at the bottom of the canopy Theresa
held the floppy back part and held it when it finally was cut loose from
the main canopy.
Getting this done was a -big- deal. Now I just have to do the finishing
cuts and then it'll be time to glue.
I also spent a little time laying out the drill pattern on the side skirts
and starting to get a sense of where I'll need to trim them. This is
likely the last bit if work I'll get done before Oshkosh 2008. The kids
and I are road-tripping up, with a multi-day stop in Chicago beforehand.
Gonna be fun!
Time : 4.25 hours |
| Final Canopy Shaping |
September 14, 2008 |
|
Today I intend to get out there and do the REAL final shaping of the
canopy. Along with the two "fat spots" I talked about above, I decided
that the ride side needed to come up another 1/16". As I have trimmed
more and it has fit better and better, I have progressively been able
to clamp it up more accurately. This last round allowed me to clamp
it all down the side with the reinforcement angles I made, which had
it going into its final position. It is -really- close, but I could
get it even closer with more shaping. This is going to eat into my
time today, but I want it -right- (or as "right" as I can make it).
I thought I had more belts for my hand-held belt sander, but it turned
out the spare belts were for the bench sander .... so a quick trip off
to Ace is mandated. Back soon .......
With replacement belts I finished shaping the canopy to suit me, and got
that last 10% of tweaking done. I was able to cleco on the side skirts
(along with the reinforcement angles) and with a little duct tape to make
sure everything stayed in place ... tiped up the canopy. It looked great!
I had thought I might NOT trim down the side skirts to be in line with the
top of the canopy side-rail, but realized that if I didn't there would
be a gap there as the canopy started to curve inboard. So I marked the
skirts, and trimmed them down to size. This was the second thing to eat
into my time today, but again, I wanted to do it as "right" as I could.
I spent some time doing the first items on my list of canopy gluing steps.
This was mainly marking where I needed to mask. masking off those areas,
scuffing with sandpaper, etc. It got late with me still needing to finish
masking off the inside of the canopy ... so rather than do it tired, I
called it quits. If I had not had some unanticipated items crop up today
I'd have gotten the first round of glue put down, but rather than rush at
this late a date, I'm going to take my time and do it in a way that I'm
happy with.
Time : 5.75 hours |
| Canopy Gluing - Phase 1 |
September 20, 2008 |
|
Today is the first round of canopy gluing. I had some final prep to do (more
masking and sanding) which got done in the morning. It was a bit of a
tedious process, but I wanted to be careful about it as you only have one
shot at getting it right.
Slathering on the primer was tedious, and nerve wracking. BUt only 'cause of
my tendency to worry that I was (a) getting enough on, (b) not getting too
much on, and (c) getting it all in the right places. :)
Then came the gluing itself. Not too bad ... but since I wanted to glue it
-on- the fuselage, getting the glue into the roll bar area was a real pain.
I used a flex-tip I bought and was able to look in the gap and watch the
glue seal it up as I pulled the trigger. Getting the canopy in place was
accomplished by help from Marie and Kat. It is -great- to have extra hands
at a time like this!
Tomorrow, it'll be Canopy Gluing, phase 2. I'll be filling in the gaps and
pulling off the masking tape. That can all be done with the canopy OFF of
the plane, which will be a LOT easier. I mean to say, a whole lot easier.
Time : 6.5 hours |
| Canopy Gluing - Phase 2 |
September 21, 2008 |
|
This morning I got right out and started work. I wanted to do a few more
things while the canopy was on the fuselage, simply because that had it
at a convenient height/orientation. I cleaned the areas to take more glue
with the cleaner, and then filled the gaps along the front of the canopy.
The side skirts then came off and got cleaned/primed. This was my first
chance to get a sense of how well glued the canopy was, and without the
side skirts in place it didn't -budge-. My sense was that it was already
pretty solid. Even so I continued with the plan to fill the "joggle" area
under the side edge of the canopy with Sikaflex, as well as putting a
"smear" of it on the side skirt to have adhesive completely wrapping around
that bottom edge. I wiped off the squeeze-out after clecoing on the side
skirts and am going to take a break for lunch.
After lunch we pulled the canopy off, fliped it upside down, and completed
the gluing exercise. I put a bead on the inside of the forward
edge of the canopy, and then finished gluing it to the roll bar. This is
one of the most visible places so I went slow and got the fillet looking
nice. It ain't -perfect-, but I'm happy (and the few less-than-perfect
areas can probably be cleaned up without much trouble, as well).
Time : 3.75 hours |
| Canopy Skirt Rivets Finished |
September 25, 2008 |
|
I had a friend wander over tonight (Joe Sumakeris) to lend a hand with
various bits of work, and to just hang out a while. With his assistance
I got all the rest of the canopy rivets installed. The last two on each
side had to be driven ... so Theresa came out to assist with those.
With those in, I positioned, drilled, and riveted the lift handle on the
pilot's side of the canopy. This is the little piece of shaped angle that
is used to lift the tip-up canopy from the closed position.
I still need to fiberglass the forward edge of the canopy, need to install
the center latch, and clean up some cosmetics for the canopy to be totally
done. But ... man am I ever close! Woo hoo!
I also clecoed the rear skin back on, and did a very quick-and-dirty
trial fitting of the rear window. Honestly, over the months since I
did the initial shaping leading up to the "bit cut", I worried that I
might have taken too much off the back. The quick look-see tonight
confirmed that I had NOT taken off too much, and that I'm in great
shape. I'm going to finish up shaping of the rear window (even if I
don't install it right now) while I'm in "plexiglass mode".
Time : 2.5 hours |
| Krylon on Plexi / Center Canopy Handle |
September 30, 2008 |
|
Tonight I spent some time flying the Citabria, which (of course) cut into
work on the RV. However, when I got home I wanted to start a test that
I needed to engage in.
When I pulled the masking tape off of the canopy, I had been forced to
let the primer dry pretty well. Of course, this means that the line was
"jagged" and everything came out _so_ perfectly I wanted to clean up this
one cosmetic problem. I could have simply re-masked and dabbed on a bit
of primer, but I thought that if I could re-mask and shoot the edges with
real paint .... AND overshoot the primer after sanding it smoother ....
I could end up with a really nice consistent and clean look.
The trick, of course, was to find paint that would not be antagonistic
to the plexiglass or the primer. I called the Sika folks and they said
just about any normal formulation of "auto paint" would be fine. But had
no clue about the plexiglass. So I called the Airplane Plastics folks (who
are the individuals who make Van's canopies) and they pointed me to a
new Krylon product. It is formulated for plastics, so it tends to adhere
better (which seemed to be about the ONLY issue Jeff at AP seemed all
that worried about). It is called Krylon Fusion for Plastics, and I got
a can of flat black at my local TrueValue Hardware Store today. As a
note, I also got feedback from the RV-List that Krylon was safe on
the plexiglass, so it wasn't a total shock when Jeff recommended it.
I took the scrap that I had practiced on with the primer and masking tape
and got working. I -agressively- sanded both the plastic and primer, to
the point of taking the primer back down *to* the plastic. I wanted this
to be a worst-case most-evil test. I then masked off one little stripe of
plastic to see how the mask-line would look, and shot it with the Krylon.
After one coat it looked a little thin, so I took it out and shot it
again .. and was pretty heavy-handed. It came out -great-. Now all I
have to do is leave it a while .. just to make sure there is no negative
impact on the plexi or the primer.
I also tracked down and pulled out the various pieces of the canopy center
handle/latch mechanism and started work on that. I marked for the first
holes, and will match drill the rest. It started to get a bit late so
after a small amount of futzing around I called it a night. A small bit
of work is better than nothing!
Time : 0.75 hours |
| Odds and Ends |
October 4, 2008 |
|
This morning was spent over at JNX taking my plane to participate in
a Girl Scout aviation event. The girs could not fly (GSA doesn't like
the liability) but we did show them planes, show them how to preflight,
and let them sit inside a bit. The girls, all of them, seem pretty
excited. I also spent some time talking with a local RV-8 builder
about fiberglassing, and got some good tips on how to proceed.
Once I got home I worked on the center canopy latch, and this is the
first foul-up I've made in a while. Ok ... it is not so much a foul
up (i.e. it would work as-is) as it is I just don't like how it turned
out. I'm going to re-order a part and do it again.
I also spent a bit of time thinking about whether I really do want to
dig into shaping the back window or not, and may have talked myself out
of doing it right now. I start to think it might be better to do the
shaping when I'm ready to install. We'll see. I'm going to sleep on that.
I also drilled the NACA fresh air vents, and will finish installing
them tomorrow. Then I need to decide what I'm doing next. I'd start on
the fiberglass for the canopy, but after talking with Mark I need to
place an order with ACS. Maybe it is time to start FWF work. Ya think?
Time : 2.5 hours |
| NACA Vent Installation |
October 5, 2008 |
|
I first spent a little time marking centerlines on the side of the
fuselage centering the NACA vents. With these marks I used each opposite
side vent to check the positioning of the rivets on each side (since
they were match-drilled together, the rivets patterns on the opposite
side vents were identical, so they could be used as a layout guide on
the outside of the fuselage). Once I was satisfied that the layouts were
on the money, I drilled two holes using the opposite side vents on the
outside of the fuselage. With that done, I could swap the vents to their
correct sides, cleco them in place with the two holes there were drilled,
and match-drilled all the rest of the holes. Nicely enough all the sharpie
marks from the initial does-this-look-right evaluation vanished as the
drill bit came out at the exact correct spot. Nice.
I countersunk the NACA vents, dimpled the fuselage, and pop-riveted them
in place. I want used a little RTV to seal them up nicely, but the pop-rivets
will be doing the bulk of the work holding them in place. I used little
"backing plates" on the pop-rivets (they look like fat little washers) so
the pop-rivets were not putting load on the sides of the soft plastic
vent material.
It took so long because I was paranoid about
getting the layout _just_ _right_, and I started with #40 holes which were
then opened up to #30s for the CS4-4 rivets I used.
It isn't much ... but these are two more parts that are installed and never
have to be thought about again. This moves me another estimated 0.001% closer
to completion. :)
Time : 4.25 hours |
| New Tailwheel Fork |
October 8, 2008 |
I installed the newly-arrived
Screaming Eagle tailwheel I bought to replace the stock Van's tailwheel
fork. I got just the replacement fork, and it was a perfect fit. This will
give me slightly better clearance, and will eliminate the "bottoming out"
problem that many have reported with the stock tailwheel.
Time : 0.25 hours |
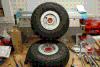
| Gear Legs and Wheels |
November 18, 2008 |
|
I spent a little more time tonight figuring out exactly how the brakes
are installed on the gear leg. With virtually no help from the plans (they
are not the best that Van's delivers) I got it puzzled out. Thanks you
guys who document your work on your websites!! I couldn't find the tubing
needed to fabricate the spacers, so I couldn't finish up the assembly, but
new tubing will arrive from Van's in a few days and I'll get it then.
I also put the inner tubes in the tires, and the tires on the wheels. Now
once I get my spacers fabricated I can finish the wheel/gear assembly and
will be ready to put the plan on its feet.
Time : 2.0 hours |
| More Rear Window |
May 19, 2012 |
|
Today I got more done on the rear window, trimming it to fit perfectly.
Given I had already riveted on my skin, I was a bit concerned about
how I might get it slipped into place. I hit upon an idea of taking a
bit of thin AL and using it as a "shoehorn" in the tightest spot (which
was the area between the upper center brace over the baggage compartment
and the skin). It worked like a champ.
I smoothed the edges first with my hand belt sander, then hand-sanded
for the final finishing. I then used the belt sander to slowly take off
material where needed with multiple trial fittings. At this moment the
window is in place, clamped, but not drilled. I decided to leave drilling
til tomorrow so that I could come back at it fresh and -insure- that
everything was fit correctly before committing to drilling.
I also spent some time today updating the code and maps in my AFS-5600. I
am trying to keep it up to date as I go.
Time : 3.5 hours |
| More Rear Window |
May 27, 2012 |
|
This was another day of fitting work. In the end I realized that the
fit will be a -little- different with the forward top skin installed, so
pulled it off the shelf and laboriously clecoed it back in place. Sure
enough. that stiffened up the front a bit and caused the canopy to fall
at a spot slightly further back. So I did little more trimming, fitting,
and left it clamped up while I fiddled with other things.
I had laid out a possible cowl pin cover on my CAD program earlier, and
printed it out on sticky-back paper to use as a pattern. I cut out the
first one from some .063 and used the scotchbrite to shape it to size. It
looks pretty good, and now I need to do the 2nd one.
Time : 2.5 hours |
| Rear Window Installed |
May 28, 2012 |
|
I ended up happy with the fit, so it was time to drill. Theresa helped
me with the drilling (sitting in the baggage compartment pushing the
glass out). I then pulled it back out, opened the holes in the skin,
and dimpled for #6 screws. I also countersunk the screw holes in the
plexiglass, then opened them up slightly larger than #6 screw size.
The next step was painting/priming in prep for the adhesive. I hate
painting, but it went .. well .. good enough. That primer for the Sika
is funky stuff. Once it was dry I put everything back in place, clamped
it up, insured the screw holes were aligned, and we did the install. I
got Theresa to help with the screws and once that was done .. I put in
the first round of adhesive. It will set up over night and then tomorrow
I will remove the clamps/spacers and do the next round of applying of
adhesive. It -should- be the last round, too!
Time : 5.5 hours |
| More Cowl Pin Covers / Wire Gemini PFD |
July 7, 2012 |
|
Yet again some more pin cover work today ... as I said yesterday, glassing
is slow. Today I just added a few layers of glass cloth to reinforce it
all. Tomorrow I'll try bonding in some nuts, then once that is solid I'll
finish it off by opening up the holes _just_ _enough_ to make it easy to
get the pins in/out. Maybe I'll actually be done with the pin covers by
tomorrow afternoon .... or Monday night, at the latest.
I realized that now was the time to go ahead and finish wiring for the
TruTrak Gemini PFD. Stein included the GPS data wire, but no power/ground
wiring so I had to add that in today. Given I wanted to route it through
my backup switch on the panel it took a lot longer than it would have
otherwise. God bless the wonder of having correct tool, though. I just
purchased a "wire spoon" and it is a lifesaver. :)
I also spent a little time fiddling with the seat belts today ... in
particular, the crotch strap. Van's assumes a crotch strap that needs
an AN-5 bolt, and the Hookers I bought want an AN-4 due to a bushing that
is pressed into the tongue. Someone commented that they just pressed the
bushing back out, and then the Hookers fit in the standard Van's setup.
So this morning I took my crotch strap and tapped out the bushings, and
the person on VAF who made the comment was -right-. That sure is easier
than the alternative!
Time : 4.5 hours |
Total Time : 349.75 hours
|
|
![[ The Frye RV-7 Project ]](images/frye_project_banner.png)