|
|
Wing Kit
The wings are the "soul" of an airplane, or so it seems to me.
The rest of the airplane is important, with the engine being the heart
and other portions playing critical supporting roles. But the wings have
a special role to play and, for me, are the most exciting part of the plane.
One decision that I have made over the last few weeks (from reading on
the various lists, and talking with other builders) is to build both
wings at the same time. Since I have the space to actually pull that off,
it sounds like it is more efficient in that you get to perform work on
both wings at the same time at each stage of construction. That way the
operations on the right and left wings are not spaced out in time ... and
you don't have to struggle to remember how you solved a problem
at a particular point on the first wing when you get to the same point
on the second wing. :)
| Ordered the Wings |
February 25, 2002 |
|
You can see my comments in the General section of the logbook, but I
also wanted to put an entry in here about our decision to buy the
wings. Today I faxed in the order and start the wings on their way.
Time to really leap in whole hog!
|
| Wings on the Way! |
May 14, 2002 |
|
I just got a call today from ABF Freight saying that my wings would
be delivered on Tuesday, May 21. My shipping number is 145881317 and
the freight bill will be a (very reasonable) $258.61 as delivered to
my house. Woo hoo! Exciting. :)
|
| Wings Arrived! |
May 21, 2002 |
|
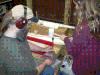
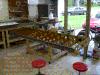
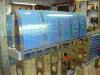
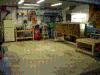
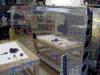
As promised, ABF delivered the wing kit today in two fairly hefty
boxes. There was little damage to the outside of the boxes and none
to the sheeting which makes up the box sides themselves. I have to
make some room in the garage before I can uncrate the stuff, though!
Life/work has been too busy for me to take care of that yet, so I
am left with two big boxes on the floor until I get a few shelves put
up later today!
|
| Wing Kit Inventoried |
May 22,26, 2002 |
|
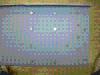
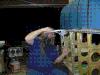
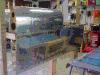
I started the inventory of the wing kit (with Theresa helping a bit
early on, but Chris hanging in with me 'til we were done) by diving into
the short-fat box first. I know everyone marvels at how Van's packing
crew both stuffs parts into every nook in the box, but also packs things
in such a way that the parts are perfectly secured and safe. I know you
are probably tired of hearing folks marvel about this, if you have read
many web-based builder's log. But I have to marvel too. They do an amazing
job!
We inventoried everything except the bags, which will be done tonight.
Upon getting home from work, I felt rather rotten ... but Chris suggested
that working on the plane (even if it was just doing an inventory) would
make me feel better. The suggestion was half in jest (he is 14, ya know)
but he was right. :) The work didn't actually make me feel, physically,
any better, but it sure was fun and made me feel better about feeling
bad. If that makes any sense.
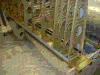
Oh, and I have to marvel at the spars, too. They are a work of art. I am
going to have to admit that I am really glad I don't have to drive those
rivets.
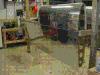
After the work that I did (with a lot of help from Theresa) on getting
the garage straightened up ... finding places to store all the parts, even
the large wing skins, ended up being no problem. Theresa is a great
organizer, and I'll be borrowing her again to help get some other areas
in the shop a bit more organized.
It is now Sunday, the 26th, and after a break caused by the removal of
all four wisdom teeth (which had me out of sorts for a few days) the
bags are now inventoried too. Nothing missing, nothing back-ordered.
Now that everything is inventoried, I can go back to finishing
the empennage. (Yes, I'm slow ... wanna make something of it?? *grin*)
Time : 3.5 hours |
| Wing Ribs Deburring Started |
July 16, 2002 |
|
At this point we are still working on the elevators, but my son has a
few weeks off between middle and high school, and I was trying to think
of worthwhile things he could do on the project during the day. Even
though we aren't yet really working on the wings ... it occurred to me
that he could get some of the prep work out of the way independently.
I asked him to debur the wing ribs, and pulled all but the leading edge
ribs down for him to work through if he felt like it. I came home tonight
and discovered that in a few work sessions (totaling about an hour all
together) he had completed a round of deburring all of the ribs
I had gotten down for him! Fantastic. :)
Tonight I pulled down the batch of wing leading edge ribs, and we'll see
if he gets around to deburring them tomorrow or the next day. My guess
is he'll do as great a job on them as he did on the first batch!
Time : 1.0 hours |
| Wing Ribs Deburring Started |
July 18, 2002 |
Chris did get around to the second set of ribs (the leading edge ribs)
and finished them as well. As a note, I'm not marking the wings as being
"started" on my front page project quick view simply because
we are only marking time and not working on them yet as a primary
activity. Still, this prep work will help when we do get to
the wing work as our primary focus!
Time : 0.75 hours |
| Empennage Finished, Taking Down Jig |
December 1, 2002 |
We are just getting started here, but the start on the work has
begun. I hope to have the garage re-worked in time to get a lot of work
done on the wings over my Christmas break. I/we traditionally take off
the whole week between Christmas and New Years, and that'll be a great
time to get a good start on the wings!
Time : 0.25 hours |
| Wing Rib Deburring (Redux) |
January 6, 2003 |
|
Take a look at the "General "
section to see what happened to my
holiday break. No wing-work at all, but LOTS of work on the garage. These were
needed upgrades, so I'm actually thankful that I had a long break that
I could spend focusing on the work. Still, it took a LOT more work than
anticipated due to the amount done (and some domino effect as one change
would sometimes mandate more work elsewhere ... like finding storage for
displaced items).
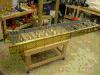
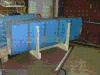
The only thing remotely wing-related that got done was the pairs of 4x4s
which make up the wing construction stands got put up. I still need to
secure them to the floor, however.
We decided that we needed to Scotchbrite the wing ribs, so I spent a
little time this morning using the die-grinder with a small Scotchbrite
wheel on the flanges and lightening holes. I got half of the main ribs
done, and will get the other half tomorrow. Who knows? I might even get
the leading edge ribs done too! After that we will check the flanges
to be sure they are square, and will flute where needed.
Time : 0.5 hours |
| Wing Rib Deburring (Finished) |
January 8, 2003 |
I spent the morning build-time finishing up the debur of the ribs. It
really plays hell on the Scotchbrite wheel (see picture when I get it
uploaded) deburring all those flanges and holes. Still, all my edges
are silky smooth now. Next is checking the flanges to insure they are
square, and then fluting. The leading edge ribs are the most warped
and will need significant fluting to be made straight. No big deal, but
there is clearly a little work to be done there!
Time : 0.75 hours |
| Wing Rib Fluting |
January 11, 2003 |
Chris and I spent about 3 hours straightening the flanges and fluting
the ribs. We got all the main ribs done, and then a small handful of
the (more annoying) leading edge ribs done. We would have gotten further
but a friend of my wife brought her son over (as he has serious airplane
fever) and we spent some time showing them around the shop and talking
about airplane building. I also let him flute a bit. Not exactly the
most exciting of airplane-building activities, but it was the work that
we had on hand right then!
Time : 3.0 hours |
| More Wing Rib Fluting |
January 14, 2003 |
I got some more time tonight to flute wing ribs, and have them about
done now. This is (as usual) a busy week so I don't know if I'll get
the last few done before the weekend or not, but I'm gonna try!
Time : 1.0 hours |
| Started Countersinking Spars |
January 18, 2003 |
|
While the title says spar countersinking, the day started with me drilling
some steel angle that I'm going to use to anchor my "goal posts"
to the floor. I also spent time today (not reflected in the total above)
working with my son to build a "tennis ball mortar". This
entailed acquiring tennis balls, 4-inch PVC pipe, and building a stand.
While it didn't further the work on the plane, it is good father-and-son
fun. :)
After lots of careful looking, measuring of holes, practice countersinking
in scrap, careful study of the spar, I did countersink some holes on the
spar. I got all the rivet holes countersunk on one flange on one spar. I
also drilled the pilot hole for one platenut and then riveted it on. I
really wanted to see at least one platenut riveted in place today!
Time : 3.0 hours |
| More Platenut/Spar Work |
February 1, 2003 |
|
First, I want to mention that today was the day we lost the Columbia
space shuttle. I was coming back home from picking up some breakfast
for the family when I heard the news on the radio. A very sad way to
start the day.
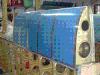
I continued work on the spar mounting the remainder of the platenuts on
one flange before flipping it and countersinking the rivet holes for
the other flange. I got a few platenuts on there as well, but then had
to spend the remainder of the day helping Marilyn work on her bellcranks
and shopping for a paint gun at Northern Tools. Once that was finally
done it was dinner and family time. We'll see if I can get all the
platenuts finished tomorrow though!
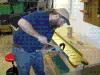
Oh ... and I did get propane for Mr. Heater, and it makes a world of
difference to have heat in the garage! With the temps (regularly around
freezing) we have had lately it isn't possible to work out there without
the heater. With it I eventually have to take my sweatshirt off. :)
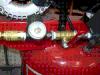
I also did a small upgrade on my compressor. Originally the regulator was
set immediately after the compressor controller, and it was hard to get
to the adjustment knob. Also, there was no way to take the pressure off
the line (so the tank would bleed down fairly fast) and, finally, the line
was screwed in so it was hard to disconnect the tank to drain water. I
added a ball valve and quick connect which also had the effect of moving
the regulator out a bit further.
It is MUCH easier to use now, and I can use the ball valve to take pressure
off the line and leave the tank with pressure all the time without running
the compressor to death. Now when I want air I just turn the ball valve on
and go to work! A really nice change from having to fill the tank every
time.
Time : 2.5 hours |
| More Platenut/Spar Work |
February 2, 2003 |
It was a busy day (and not with airplane work) but I was able to
carve out an hour this evening for working on the plane. I got the
rest of the tank platenuts installed on the first spar and am now
ready to go to the next. Countersinking of all the #8 holes will
wait until I've got all platenuts in place.
Time : 1.0 hours |
| More Platenut/Spar Work |
February 4, 2003 |
I spent a little time after dinner (but before other commitments)
getting the second spar down, countersinking one flange for the
rivets, and installing a few platenuts. Every little bit counts!
Time : 0.5 hours |
| Platenuts Finished |
February 9, 2003 |
It is amazing how a busy/stressful/hectic week can make the time fly
by. I finished installing all the platenuts on the last flange on the
last spar. My daughter, Katherine, helped! I also spent
some time setting up (and testing) my countersink cutter for cutting
all the #8 countersinks. I think it is at the right depth now, but
want to do one more test cut before I dive into the spars. Once I have
that set up, I don't -think- it is going to take more than an hour
or so to cut all the #8 countersinks ... but we'll see if I'm right
or not. :)
Time : 2.0 hours |
| Spar Flange Platenuts All Finished |
February 15-17, 2003 |
|
I got a little time to cut some of the countersinks, and it is going
great. Using the platenut as a center for the pilot is working out just
fine. During the first round of work (squeezing in a little time before
the family went out for lunch together) I got a dozen cut in about 30
minutes. These are turning out to be fairly easy to do. As of Sunday
night I only have about one more flange worth of countersinks left to
do.
On Sunday (the 17th) I finished up the tank countersinks and then
attached (and countersunk) the inspection plate platenuts. I was also
ready to install the MK1000-4 platenuts on the front side of the spar,
but used up all the REST of my available time hunting for the darned
things! They are in with the bazillion other platenuts ... which I did
not discover until finally looking at the parts list to see how many
I might need to order.
Time : 7.0 hours |
| Spar Face Platenuts (Center Section) Installed |
February 19, 2003 |
I "stole" a little time before dinner and installed the four
platenuts that go on the face of the spar near the center section. I also
started work on the tiedown attachment points ... which means I found
the parts in the pile of wing-parts and cut off one 2-inch section from
the aluminum bar provided for the spacer.
Time : 1.0 hours |
| Inspection Plates Dimpled / Tiedown Attachments |
February 21-22, 2003 |
|
Home with a cold is not the -best- time to work on the plane, but when I
had a little energy I would go down and do things that were "safe"
to work on. By that I mean things that were so simple that even someone
with a cold would likely not mess them up!
I got the wing inspection plates
cleaned up (much deburring was needed) and dimpled. As many have said before,
don't forget that the forward edge needs dimples for #6 screws, and the
rest are for #8 screws.
I also cut out the tiedown spacers, using a bimetal 1 inch hole saw to
remove the material from the center. Worked like a champ.
Time : 1.5 hours |
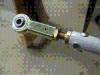
| Left Wing Tiedown Attachment Completed |
March 2, 2003 |
|
I'm finally back working on the plane after a number of days lost to a
cold. Last week was rotten, with everything being harder due to much too
much lost sleep because of the cold. At least I didn't get the horrible
flu that others I know have gotten!!
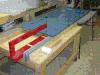
We spent today working on the wing tiedowns. Work went great right up to
the point where I mis-drilled the right wing tiedown! Time to place another
order from Van's! We did get all of the spacers drilled, so at this point
all we need to do is get a replacement W-731 and drill it appropriately.
We lost very little time, because only the first few holes had been drilled
in the tiedown bar before we noticed our mistake.
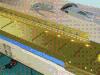
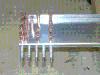
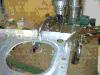
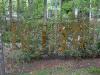
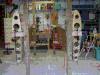
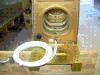
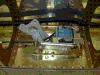
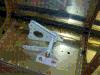
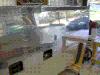
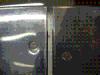
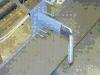
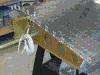
One picture here shows the tiedown drilled and tapped, and the other shows
it installed. It looks great, if I may say so myself. :)
Time : 3.5 hours |
| Started Rear Spars |
March 3, 2003 |
|
Tonight I had prior commitments, but was able to squeeze in a little
time before dinner. :) I first found all the parts for the rear spar
work (not an easy task, as they are stored in various parts of the
garage) and started the deburring process.
We are going to work on the rear spars while waiting for a replacement
W-731 to arrive. Fortunately, while I'm out $3.83 for the replacement part,
little time had been invested in that part and we can continue to work on
plenty of other stuff without it!
Time : 0.5 hours |
| More Rear Spar Deburring |
March 4, 2003 |
I deburred the other reinforcement fork, as well as all the other rear
spar reinforcement pieces. I might even get back out to debur the rear
spars themselves ... but if you see this line still in, it didn't happen!
Time : 1.0 hours |
| Drilled Left Rear Spar Reinforcements |
March 5, 2003 |
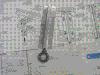
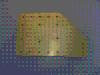
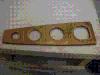
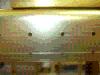
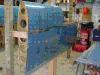
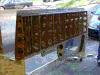
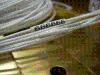
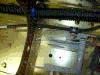
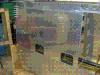
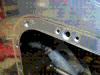
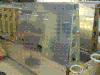
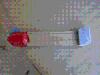
I deburred both of the rear spars and then drilled the center and outboard
reinforcement plates on the left spar. Where you see the red in the picture
to the right is where I have to "carve out" the oblong hole to
match the one in the spar. The aileron control tube exits through this hole.
Time : 1.5 hours |
| Finished Drilling Rear Spars |
March 8-9, 2003 |
I finished drilling various reinforcement plates to both spars, deburred
all new holes, and dimpled the flange on the spars where the reinforcement
forks would prevent dimpling after assembly. I also opened up the two
aileron control tube holes on the center reinforcement plates. Basically,
everything is ready to assemble once the requisite parts are alodined and
primed.
Time : 4.0 hours |
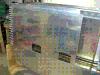
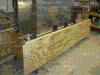
| Alodined Rear Spar Reinforcements |
March 10, 2003 |
|
I've started alodining some of the wing parts, particularly those that
are not alclad. Tonight I alodined the rear spar reinforcement parts
and the look like they turned out nicely. Once they are dry I'll give
them a quick coat of the "rattle can primer" just to finish
them off.
The pictures here are a tad darker than I would like, and I might replace
them with better (brighter) ones if I get a chance. But, this is my first
try at alodining and I'm fairly pleased with the results.
Time : 2.0 hours |
| Alodined Spars |
March 16, 2003 |
I've been lax on getting airplane work done over the last week due to
having caught some sort of bug. It isn't bad enough to have me out of
work, but has been leaving me extremely tired at the end of the day. So,
little progress this week, unfortunately! That being said, Theresa did
help me get the rear spars alodined today. We used the "slop it on,
rinse it off" technique and while the coverage is ok, I think it
could have been better. We got all the shiny aluminum to turn brown but
only faintly so. Not nearly as dramatic as the parts we were able to
dip. But ... it'll do.
Time : 0.5 hours |
| Primed Rear Spar Parts / Tiedown Redux |
March 17, 2003 |
|
Nasty sleep-robbing bug or not, I wanted to work on the plane tonight. I
had some easy work to do ... so figured that even feeling poor from lack
of sleep I could do this safely. I primed the rear spars and reinforcement
plates and have them ready to rivet.
With the replaced W-731 Christopher and I drilled it to match the spar,
this time remembering to check the measurements to the outboard edge of
the spar before committing drill to metal! After getting that drilling
done ... I ran out of time and energy. Furthermore, I had a rash of
home sysadmin stuff to do which consumed the rest of the evening.
Ok ... I got the sysadmin stuff out of the way and got another hour of
work in. I finished drilling the rivet holes for the platenuts on the
tiedown. I deburred, cleaned, and primed the tiedown parts. They are ready
to rivet and install now. I also clecoed the rear spar reinforcements
in place and the rear spars are ready for the first round of rivets also.
But, thats it for me tonight. I'm bushed!
Time : 2.25 hours |
| Finished Tiedown / Riveted Left Rear Spar |
March 18, 2003 |
I completed the tiedown assembly and got it mounted on the spar. Chris and
I also did the first round of riveting (i.e. all those rivets we are allowed
to install right now) on the left rear spar. The riveting went great!
Time : 2.0 hours |
| Riveted Right Rear Spar |
March 19, 2003 |
Even though I'm dragging from a head cold (my chest cold which has morphed)
I wanted to get SOMETHING done, and riveting seemed easy enough. With my
son Chris' help, we got the rivets on the right rear spar finished up
quite easily.
Time : 1.0 hours |
| Clecoed Left Wing Main Skeleton |
March 25, 2003 |
I had a huge delay in work due to the cold mentioned in the previous
entry. It turned out to be nasty causing not only lost days at
work, but lost days of working on the airplane. Even today I'm not 100%
but I wanted to do a little ... and clecoed the left wing main skeleton
together. It looks great!
Time : 0.75 hours |
| Drilled Left/Right Wing Skeleton and Drilled Pitot/Static Holes |
April 18-19, 2003 |
|
I got slammed after getting back from
Sun-N-Fun 2003 and it has taken a while to
get caught up (on work, on rest, on sanity) and get working again. *whew*
That being said, I'm back working good now!
I match drilled the ribs to the front and rear left wing spars and then as
I removed them (with help from Theresa) I used my electric scribe to mark
each one. They are numbered 1L through 14L starting from the inboard rib.
We then clecoed the right wing together, drilled, and upon removing we
marked these ribs (1R through 14R) as well. The hope is that these marks
will still be visible after alodining! (Time will tell .. right?)
Once that was done I drilled the holes in the first 10 (from the inboard
end of the spar) ribs to
run the pitot/static lines. They are high on the ribs just after of the
first large lightening hole. This will allow me to run the lines well
away from the aileron control rod once the top skins are riveted in place.
It will also allow me to install the
Gretz Aircraft Parts pitot in the
bay just outboard of the aileron bellcrank such that I can get to the
connectors by reaching through the lightening hole in case I ever need
to remove the pitot for service. The wires for the heated pitot will be
run through those holes which were intended for the aluminum pitot
line.
Since I'm making mention of that, I'll also mention that on the right wing
I'll use those same pre-drilled holes to run the wires for the TruTrak
roll servo. How handy! :)
Time : 3.5 hours |
| Drilled Conduit and Coax Holes / Deburred Ribs |
April 20, 2003 |
|
I went through all the ribs and drilled the holes for the (Van's black
corrugated) conduit. I'm installing it in the forward top corner of the
ribs and have drilled the holes just large enough for a good friction
fit. I also drilled a set of holes large enough for the SB437-4 snap
bushings into all the ribs about 2/3s of the way back on the rib. This
will be for the coax to the wingtip antennas.
Additionally, Chris and I deburred all the drilled rivet holes as well
as the holes cut for the conduit, pitot/static lines, and the antenna
coax. All that is left now with respect to wing rib prep work is to clean
(de-sharpie, degrease, and scotchbrite) them and then it'll be time to
alodine.
Time passes while we engage in various Easter activities ...... then ......
In the afternoon (early evening) Theresa and I launched into
clearning and Scotchbriting the ribs after all. Once that was done we
decided that today was the best day to alodine (knowing the rest of the
week would not give any single large block of time) and got that
done too. The results are great! I am glad to have that job behind us
now. On to riveting!
Time : 6.5 hours |
| Started Riveting Ribs to Spar |
May 4, 2003 |
|
Theresa and I started riveting the ribs to the spar. We got three ribs
done but then the cold she has had over the last week (a nasty one) got
the better of her and it was time to rest.
Since I had time to kill I straightened up the shop some more and anchored
the uprights to my wing construction supports like I had been planning. I
got some concrete screws, wood screws and some angle iron. I made little
brackets and then screwed it all together (after checking it all out with
my SmartLevel to make sure they were plumb!).
I've also decided that the 2x rivet gun is fine for the 3/32 rivets, but
it has to work too hard for the 1/8 rivets. I'm going to order a 3x from
Avery ASAP. No need working harder than ya gotta!
Time : 1.5 hours |
| Riveted a Rib :) |
May 16, 2003 |
Determined to get SOMETHING done (it has been a dry spell, ya know) I went
out to the garage and, with Christopher's help, did a little riveting. It
wasn't much, but at least I found a few minutes to touch the project. I'm
going to have to find a lot more minutes soon if I hope to get ready
for the arrival of the fuselage in December!
Time : 0.5 hours |
| Riveted Left Wing Ribs to Spars |
May 17-18, 2003 |
|
With help from Theresa, we got all the ribs riveted to the front left spar. We
were rusty on driving 1/8 rivets as it has been a while, and had to drill out
two along the way. In the end, we got it done though!
It is my hope that I can squeeze the rivets on the rear spar. While that will
take some time, it is much more consistent a method than driving (for me at
least). After a break I also went out and set the rivets in the rear spar.
You sound take care to not do what I did (see
"Too Many Rivets")
and get ahead of yourself by not reading ahead, and/or reading and
forgetting some items!
As a note, switching to the 3x rivet gun for the larger rivets made (again,
for us) a huge difference. I now wish I had gone with a 3x from the start.
Time : 4.5 hours |
| Started Riveting Right Ribs/Spar |
May 19, 2003 |
|
We had only a little time (with family obligations and all) but Theresa
and I went out and started on the ribs for the right wing. We are truly
in the groove on riveting (finally!) and attached three ribs in about
20 minutes. Another 10 or so minutes were consumed getting set up (i.e.
pulling out the rivet gun, bringing the drawer of rivets over, etc.) and
we had 15 perfectly driven rivets.
Practice does make perfect, and these early rivets on the right wing are
much nicer than the early ones on the left. I think this is one advantage
of doing the two wings together ... as if we had waited months to rivet
the right wing, we might have had to find that "groove" all over
again. Right now it is fresh in our minds (and hands), and this has
truly convinced me I did the right thing with setting up to build both
together.
Our goal is to get the right wing skeleton completed by the weekend so
that we can start drilling the skins.
Time : 0.5 hours |
| Four More Ribs / Right Wing |
May 21, 2003 |
|
Once again we had only a little time before dinner but Theresa
and I riveted on four more ribs. We are back into the section of
the wing with the narrow reinforcement bars, and it is all
too easy to have the bucking bar leap up onto one and get off of
the shop head. (See above where I had to drill one out, and made
an "oopsie" that had to be repaired. *sigh*)
Near those reinforcements the regular drill now will be to just do
single trigger-pull hits until the rivet is setting well and the
bucking bar is below the edge of the flange. Then we can finish
setting that rivet without fear. It goes without saying, of course,
that tape on those reinforcements is mandatory to keep from damaging
the beauties.
Time : 0.75 hours |
| Finished Riveting Ribs |
May 26, 2003 |
Theresa and I got out and finished riveting the ribs to the main spar.
I then riveted the rear spar to the ribs too. After I repair one oopsie
we'll hang them on the construction supports! Exciting! I did start on
repairing the oopsie ... and got it mostly done. Still, I hate having
to deal with mistakes!
Time : 2.5 hours |
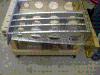
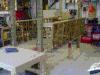
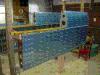
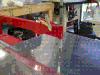
| Wings Hung on Construction Supports |
June 1, 2003 |
Theresa helped me rivet a repaired spot, and then helped me horse the
wings around the garage. I got them hung on the construction supports
and then supported the middles to eliminate the "sag" that
occurs over the span from one support to the other. Both wings are up
and I'm ready to drill the skins to the wings!
Time : 4.0 hours |
| Leveled Wings (again) |
June 5, 2003 |
|
I had used a pair of bottle jacks to support the sag in the wings, but
was a bit concerned that they might bleed down over time. So .. I left
the fishing line in the holes and watched over a few days that I had
been too busy to get out and work on the plane anyway. Sure enough, they
did bleed down.
So, tonight I went and build a support that used a bit of 3/8 threaded
rod. Much less likely to "bleed down" than the bottle jacks! I
hated to burn the time messing with this, but it had to be done. :)
(I'll get some pictures tomorrow ... I'm too tired tonight!)
NOW I get to drill the skins!
Time : 2.0 hours |
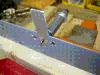
| Mounted Skins |
June 7, 2003 |
|
I got the skins mounted on the wings skeletons today. This meant getting
them down from their storage location and figuring out which was which. I
drilled the wing-walk doublers .... and mis-drilled the first one.
I discovered I didn't have enough clecos to get both wings ready
for drilling. I need about 250 more #40 clecos if I want to do that. At
$0.38 each, that would come to about $95! I decided, instead, to drill
one wing and then (since the top skins have to come off anyway) I could
use those clecos to get the second wing ready.
If I wasn't going with a QB fuselage, I might spring for the clecos. As
it is, I'll never need that many again and $95 just to save me a little
juggling clearly isn't worth it! Tomorrow I start drilling the skins!
Time : 6.5 hours |
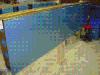
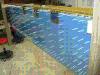
| Drilled Right Wing Skins |
June 8, 2003 |
|
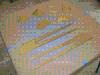
I got the right wing skins drilled, and am ready to drill the left wing
bottom skins. I'm having to do a lot of juggling of clecos to make
it all work out, but I'm crossing my fingers that I can get it done. I
may have to take some of the clecos out of the right wing bottom skin to
get the left wing top drilled, and then when I take the left wing top
skin off I can move the clecos back to the right wing bottom skins again
so they are "well clecoed" in place. I think all of
this juggling is worth saving $95 on buying more clecos, but I'm starting
to be not so sure! :)
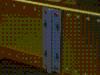
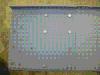
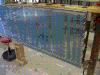
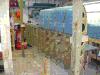
In fact, the reason the right wing top looks so sparse
with respect to clecos is because I had to steal them to be able to get
both bottoms skins clecoed at the same time.
Time : 2.5 hours |
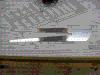
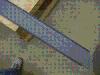
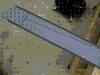
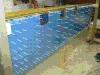
| Drilled Left Bottom Wing Skin |
June 9, 2003 |
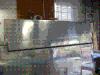
I had a little time and quickly drilled the bottom left wing skin. I also
started cutting a little wood for the leading edge cradle. The drilled
left wing skin is shown here all done.
Time : 1.0 hours |
| Started on Leading Edges |
June 14, 2003 |
I was feeling under the weather today, but wanted to get at least a
little done. I pulled out the leading edge skins (getting them loose
from the tank skins ... which are -very- heavy), and picked out the
ribs. I put the right-side skin in the cradle and checked the fit of
the ribs. Then other duties called .. and that was all I got done for
today.
Time : 1.0 hours |
| More Leading Edge |
June 15, 2003 |
|
Christopher and I went out and worked on the right wing leading edge
a bit .... and I finally gave in on the clecos. I cried "Uncle"
and sent my order in to Avery. I give up trying to work with too few
clecos! I've now got another 300 on the way.
That being said, we got most of the right wing leading edge clecoed. We
ran out (actually, just didn't feel like stealing any more from the wings)
with all but one rib clecoed. There are warnings that these ribs are
hard to cleco near the leading edge, and they do not lie! It took some
real work to get them into place. Eventually, though, they all went on
in.
Work may be halted until mid-week waiting on clecos. There may be some
other things I can do (I'll have to read ahead a bit in the manual) but
I'm waiting on both clecos, and on a wing-walk doubler replacement at
this point.
If you decide to build both wings at the same time .... just go ahead
and buy more clecos. Just do it. Don't even worry about trying to do it
without 'em unless you really are amazingly pig-headed! :)
Time : 1.0 hours |
| Left Wing Doubler Drilled |
June 17, 2003 |
|
I got my replacement wing walk doubler material from Van's today and
as soon as work was over I went out and did some drilling. Christopher
helped and then using what cleco's we could steal started to cleco
the top skin (with doubler) back on the wing skeleton. I only got about
half of the top inboard skin clecoed and then ran out ... and didn't
feel like stealing any more from other locations. We have a lot
in the first leading edge ... and I am not willing to pull
those out! I'm just going to wait until Thursday when the clecos are
scheduled to be delivered and I'll get back to working then.
Come Thursday, though, I'm moving forward full speed! We'll see how much
"Real Life (tm)" lets me work on the plane this weekend. :)
Time : 0.75 hours |
| Left Wing Skins Drilled / Right Leading Edge Attached |
June 19, 2003 |
|
I finally got my clecos (thanks Avery!) and could reattach the left top
skins and get them drilled to the skeleton. Once drilled I took the top
skins off and stored them. It would have gone faster if I had not mis-read
the directions and mistakenly taken off the BOTTOM skins first. Oh well.
I got to exercise my new clecos a little more!
I also finished assembling the right leading edge and put it on the spar.
It looks WONDERFUL! If my helper had not turned in for the night already
I would have done the left leading edge too. Oh well, I'll get it tomorrow!
Time : 3.75 hours |
| Left Wing Leading Edge Attached |
June 20, 2003 |
As I intended, I got the left wing leading edge clecoed on. Next step is
to put the join plate in place ... but I had no time to work on that today.
I was lucky to get done what I did (with Christopher's help)!
Time : 1.0 hours |
| Join Plates / Leading Edges Drilled |
June 22, 2003 |
I fitted the join plates and drilled the leading edges today. It was a bit
slow and tedious getting the join plate to fit just right, but
with a few iterations of measuring all around ... adjusting ... and then
measuring all around again ... and adjusting again (etc.) I got it all in
place. Both right and left wings are ready to start tank fitting. I decided
that was a good place to pause for the day. :)
Time : 3.5 hours |
| Reworked 408 Left and Right Ribs |
July 3, 2003 |
Well, the join plate in the entry above was perfect (still is) but I was
not happy with how the ribs turned out. Drilling blind and having to just
measure for position left me a bit too close to the web to suit. So, I
bit the bullet, got more ribs, and redrilled the new ones. Now not only
are the join plates perfect, but so are the ribs. I'm happier now. :)
NOW we can press on to the tank fitting!
Time : 1.5 hours |
| Pause on Main Wing Construction for Tanks |
July 3, 2003 |
|
We pause in the main wing construction so we can work on the tanks. If
you want to follow along in construction order
click on this link and you'll go to the
Tank construction pages.
|
| Back on Wings, Deburred Right Leading Edge Ribs |
July 26, 2003 |
I took a little time this morning and deburred the ribs on the right
wing leading edge. I'm going to finish up the leading edge so I can
put it back on the spar and get it out of the way. As I say over on
the tank page ... building two wings is an exercise in space management!
Time : 0.5 hours |
| Right Leading Edge Prep |
August 17, 2003 |
|
Ok .. it isn't much, but I'm back working on the project after a long
break brought about by many "Real Life (tm)" interruptions.
I used a soldering iron to strip the plastic off of only those spots
where rivet or screw holes go. As I said, not a big deal but at least
it is done. Now I'm ready to debur and dimple the skin.
One thing that ate into my building time today was wanting to go take a
look at Joe Giallo's project. He is building an RV-7A QB and is just on
the other side of town from me. He had some questions about his spar
center-section, and had Mitch Lock come down and take a look at it. As
it turns out, there is a mis-alignment but it is (fairly) easily fixed.
Mitch has even offered to come back when it is time to make the fix and
lend a hand!
It was nice to get to see Joe's project (and his really nice basement
shop). I'm glad to have also had the chance to meet Mitch, a three-time
builder (RV-3, RV-6, and RV-7). What a wealth of experience there, and
a willingness to share. RV builders are a great bunch of folks!
Time : 0.5 hours |
| Right Leading Edge Deburring |
August 19, 2003 |
Theresa spent some time today (our 24th wedding anniversary!) deburring
the outside of the right leading edge skin. This is only one of a
great many examples of why I really picked a great wife/partner when
we got married oh so many years ago! :)
Time : 0.5 hours |
| Alodined Right Leading Edge Ribs |
August 21, 2003 |
An easy enough job .. but tedious. The ribs need to be cleaned and then
the alodine "assembly line" needs to be set up. The alodining
itself is fast ... just a few minutes per rib. However, cleanup is a
pain. I had been trying to not alodine just a few parts, but these
six ribs needed treatment so I could assemble the right leading edge
and get it out of my way!
Time : 1.5 hours |
| Started Riveting Right Leading Edge |
August 23, 2003 |
|
Theresa and I started preparing to rivet the right leading edge this
morning. This meant we clecoed the ribs back in place and then did some
test riveting before launching into the "real thing". This
is the first time we have tried to set 3/32 rivets with the new 3x
gun, and we wanted to make sure we had the technique right.
I set about 35lbs of pressure on the line and adjusted the on-gun regulator
to give what felt like a good hit when test-firing against a wooden block.
We then set 4 rivets in a test piece and they came out great! I like the
new 3x gun so much the old 2x may be sold on eBay.
Time for lunch now ... but more riveting afterward ....
Back from lunch we riveted the right leading edge. It went quite well, with
one small exception. I forgot the tank join plate! Damn it. Luckily all
those rivets "unziped" quite easily. I now need to dimple the
join plate and install the nutplates then we can (finally!) finish the
right leading edge. *whew*
Oh, and one more thing that got done is the hole for the tiedown ring got
opened up with my UniBit. A handy tool, that UniBit. :)
Time : 5.0 hours |
| Prepared Right Wing Tank Join Plate |
August 24, 2003 |
I Scotchbrited, dimpled, countersunk, and primed the right wing join plate
this morning. I then attached the nutplates and clecoed the whole assembly
back together. It is now ready to rivet ... but that waits until Chris can
help me. All the riveting yesterday left Theresa's hand sore and we want
her to lay off riveting until that gets better! :)
Time : 2.5 hours |
| Finished Riveting Right Leading Edge |
August 25, 2003 |
I came home promptly today and started getting things ready for a quick
riveting session. Once Theresa got back from running an errand we went
right to it. This was the re-riveting of the inboard leading edge rib
but this time with the tank join plate! The riveting went great
and we put the leading edge back up on the spar 'cause it looked pretty
that way!
Time : 0.75 hours |
| Back to Tanks |
August 2003 |
|
Flipped back to working on the tanks ... go look there. :)
|
| Return To Working On The Wings |
October 5, 2003 |
|
Now that I'm done with the left wing tank drilling exercise (with long
delays during September due to life-insanity) I'm back to working on
the wings. In fact, I think I'm going to set the tanks aside for a while
and finish the main wing structure first. :)
Today I deburred and dimpled the leading edge/tank join plate. I drilled
the rivet holes for the platenuts. I then scotchbrited, cleaned, and primed
the join plate. It is now ready for countersinking for the rivets and then
to have the platenuts attached.
I also disassembled the left leading edge and deburred the ribs. Once that
was done I pulled out the handy-dandy pneumatic squeezer and put dimples
into each of the ribs. They now just need some Scotchbriting and alodine
to be ready to rivet.
Time : 2.75 hours |
| Worked on Join Plate |
October 6, 2003 |
|
I had a little time waiting to go out to dinner, so I spent it in the
shop. I countersunk the rivet holes for the nutplates on the tank/leading
edge join plate. I then started attaching the nutplates .. and got three
done before it was time to head out to dinner.
One thing that I did, however, was find a better way to hold the nutplates
in place for riveting. The first join plate was a pain, with clecos getting
in the way and not holding the nutplate flush against the dimple. I came
up with a way to (after aligning it with two clecos in the nutplate ears)
hold it in place with a single cleco through the center of the nutplate
(see picture).
This got the cleco out of the way, held the nutplate square, and setting the
rivets is a snap now.
Time : 0.5 hours |
| Finished Join Plate |
October 7, 2003 |
I woke up early today and spent a little time finishing attaching the
nutplates to the leading edge/tank join plate. My little arrangement to
clamp the nutplates in place for riveting (see picture in the previous
entry) continued to work great. This went much better than the first
join plate ... which turned out fine, but was more frustrating to get
assembled. Go figure.
Time : 0.5 hours |
| Scotchbrited Ribs / Deburred Leading Edge Skin |
October 8, 2003 |
I scotchbrited and cleaned the ribs getting them ready to alodine, but
then decided that the rain outside was going to make it too inconvenient
to actually do the alodining after all. I stripped plastic from the rivet
lines on the left leading edge skin, and then deburred the skins. Now
all I need to do is dimple the skins, and alodine the ribs, and we will
be ready to rivet.
Time : 2.0 hours |
| Alodined Left Leading Edge Ribs |
October 14, 2003 |
|
The break from last Friday is due to a party we had this weekend. Sadly
the party itself and then the post-party cleanup/exhaustion (but thankfully
no hangover!) consumed the whole weekend! Oh well. That is the price for
continuing to have a "Real Life ™".
I had a little time before we went out to dinner tonight so I quickly set
up my alodine production line and went to work. I only had six ribs to do
and got them done pretty quickly. Sadly, the setup and cleanup times are
constant no matter how many parts you do ... and the cleanup is the part of
the whole process I hate! :) But, I got it done. I intend to dimple the
skin some time this week so we are ready to rivet this weekend.
Time : 0.75 hours |
| Dimpled / Riveted Left Leading Edge |
October 17-19, 2003 |
|
With a little work done Friday, and then a good bit on Saturday, we finally
of the left leading edge skin dimpled. We also riveted most of the ribs
to the skin on Saturday, finishing up the last one and one half ribs on
Sunday.
I did NOT rivet the inboard-most rib (the one with the tank join plate) right
now. I have some small fit issues with the tank, and MAY have to rework
the join plate. If that ends up being the case, I do not want to have to
drill out rivets. I can finish putting that together any time prior to
attaching it to the spar.
Time : 3.75 hours |
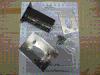
| Started on Pitot Mount |
October 19, 2003 |
I also took a little time on Sunday to start on the pitot mount. The
picture here is the kit. I needed to Scotchbrite the edges of the two
stamped pieces as they were a tad rough. It also looks like I'll need
to open up the teardrop hole a small amount to actually allow
the mount mast to fit. After that a little priming will have us ready
to install.
Time : 0.25 hours |
| Primed Pitot Mount / Adjusted Mounting Plate |
October 20, 2003 |
I had a little spare time before we headed out to dinner (this being our
normal night out away from the kids!) and I did a few small odds and
ends. The mounting plates for the pitot mount didn't quite allow
the pitot mount through, so I used my dremel and a file to make some
very small adjustments to the opening. I cleaned up the changes with
my small Scotchbrite wheel on my die grinder. I also cut a small bit
of angle to be used to support the pitot mounting plate off of a rib,
and cleaned (Scotchbrite and alcohol) the pitot mount tube for priming.
I then shot it with rattle-can primer (NAPA 7220) which has it ready
to attach the nutplates. Not bad for a half-hour of randomly available
time!
Time : 0.50 hours |
| Fitted Pitot Mount Plate / Deburred Left Top Skins |
October 22, 2003 |
|
Today was quite a day. Theresa, Christopher, Katherine, and myself went
to the NC State Fair. It was a Wednesday so we took a day off of work
and school (Katherine was already tracked out) and had a great time. In
the evening I had planned on having Pete Beal (a co-worker, and prospective
RV builder) come over and get his feet wet working on an airplane.
We got a lot of work done. I got the pitot mount fitted to the
wing including the cutout in the bottom skin for the mount to fit through.
As you can see in the picture I used a few pieces of angle to indicate
where the skin would lay. This let me position the mount plate accurately
Christopher was a huge help on this, assisting with the drilling and the
fitting.
While we did that, Pete got the tedious job of stripping the plastic from
the top skins and deburring. He used the new debur tool I got from
Cleveland and got both top skins and the wingwalk doubler deburred. He
even went away wanting to come back and do more! I figure we'll have him
do some dimpling next. :)
Time : 3.5 hours |
| Odds and Ends / Pitot Mount |
October 22, 2003 |
I decided to try and squeeze some work in between hot-tub cleaning
and dinner and pre-planned house maintenance activities tonight. I
did get rib and angle bracket for the pitot mount dimpled, the pitot
mount plates primed, the mount angle bracket primed, the mount angle
riveted to the rib, and the corner platenuts riveted to the pitot
mount itself. Not bad for having no time to work! :) The pitot mount
is now done until it is time to rivet on the bottom skins.
Time : 1.5 hours |
| Started Deburring Wing Ribs |
October 23, 2003 |
This falls into the "every little bit helps" category, but
it is true that every little bit helps! While talking with me
on the phone this morning (me at work, and she at home getting ready
for a hiking trip) Theresa deburred one side of the ribs on
the right wing. :) It was the top flange on all the ribs on the bottom
side of the wing. While it may not sound like much, that leaves me with
a good hundred fewer holes to debur now! Thanks, Theresa!
Time : 0.25 hours |
| Deburred Ribs / Dimpled Ribs / Dimpled Skins |
October 28, 2003 |
We had a whole host of folks working on the plane today spread over the
whole day. Theresa spent some time today deburring the rest of the ribs
on the left wing. Tonight Pete came over and dimpled the wingwalk doubler
and the left inboard top skin. I dimpled the top side of the left wing
ribs, and half of the bottom side of the ribs. It was a crazy/busy night
so when it hit 10:00ish we all decided we were pooped and called it a
night. Still, we are slowly but surely closing in on the big day where we
will rivet on the first set of top skins! Maybe this weekend?? Actually,
I doubt it, but surely by the next! Woo hoo!
Time : 2.25 hours |
| Left Wing - Dimpled Ribs / Countersunk Spar |
November 1, 2003 |
I had time before we all headed out for the day and spent it finishing
the dimpling on the ribs and countersinking the holes for the rivets. It
took a couple of sessions (including one 1/2 hour stint just before we
headed out the door to a party tonight) but I got all the rivet hole
countersinking finished on the left wing today. Way cool.
Time : 2.5 hours |
| Riveted Remaining L.E. Rib |
November 2, 2003 |
It was a day when many other "real life items" ended up at the
top or the priority list ... but Theresa and I did take a little time and
do some riveting on that remaining rib on the left wing leading edge. As
soon as we got started (it seemed) though it was time for dinner and we
had to put it down again. Maybe another 15 minutes tomorrow will see it
finished. :)
Time : 0.25 hours |
| Started Right Wing Spar Countersinking |
November 8, 2003 |
Once again I had a little time to spare and started cutting the right spar
rivet countersinks. Time flies when you are having fun, though, and I only
got a little done before I had to call it a night.
Time : 0.5 hours |
| Finished Riveting Left L.E. / Preped for Riveting to Spar |
November 9, 2003 |
Today Theresa and I spent a little time finishing up the riveting on the
left wing leading edge. I then worked on getting ready to rivet the leading
edge to the spar. This meant clecoing the ribs to the spar and making sure
everything was aligned.
Time : 1.5 hours |
| Got Ready to Rivet Left Leading Edge |
November 11, 2003 |
Tonight was more prep work. I drilled the rib/spar holes to size and
deburred. I then clecoed the leading edge onto the spar (for what should
be the last time). I also took time out to sand/file/scotchbrite the
"scarf joint" on the lower inboard skin. Once it was brought
down to size I then shot a little primer on the abused bit of skin.
The inboard skin (and wingwalk doubler) are clecoed in place ready to
rivet. (However, I think I might pull the doubler back out and alodine
and prime it ... since it is part of a "sandwich" and any
water trapped there could cause corrosion. Hmmm ... ) Finally, I also
set the few of the forward-most rivets in the main ribs where the tank
skin would be covering them up. I saw no reason to not add these
few rivets in ... so I did.
Time : 2.5 hours |
| Attached Left Leading Edge / Dimpled Left Outboard Top Skin |
November 13, 2003 |
|
I was going fly Marie to Clemson today, but the winds were really way
too bad for me giving I'm still getting back into the groove of flying
after my long layoff (and working on my instrument rating is one way
to get back into that groove). The winds were forecast to be 20k gusting
34k and while I used to be able to deal with that, it'll be a
while before I'm back up to that again. Sadly, she had to drive.
So I worked on the airplane instead. :) Theresa dimpled the outboard
top skin so that task is out of the way. I riveted the leading edge to
the spar. I knew that if I tried to use solid rivets I would make
a mess of them ... it was just way too close in there to do the job
right. So, I ground down a cheap blind rivet puller and put in LP4-3
given Van's has said this is an option. They went in sweet (after I got
my puller ground down enough .. and it took a lot of grinding
to get it to fit in those tight spots!) and got the job done.
I then used my spiffy Cleavland "Main Squeeze" to set all
the 3/32 rivets in the skin along the spar. It seems like I should have
gotten more done in 3.5 hours, but that is it! Each of these little
tasks takes longer than you would ever expect to complete.
Time : 3.5 hours |
| Worked on Right Wing / Start Riveting Left Top Skins |
November 15, 2003 |
|
Today was quite a day. We had to alodine and prime the wing walk
doublers (see above) so got them alodined before lunch. Lunch while
they were drying, and the priming them after we got back. While the
primer was drying we started removing plastic from the right wing skins.
Deburring came next and we got the inboard skin completed. During
other bits of time I had open .. I cut a few rivet countersinks on the
right wing spar.
I also finished the outboard part of the scarf joint on the top left
skin and then finished the dimpling. With that done we just need a shot
of primer where the scarf joint was made, and that skin will be ready
to rivet.
In the evening we started riveting the inboard top skin on the left
wing. That is going great, and we hope to be able to finish the whole
top skin tomorrow ... though we'll have to see how the time goes since
I've also planned to help a friend bring a plane back from Rock Hill,
SC. With luck, we might be able to get these wings done and into the
cradle before the fuselage arrives!
Time : 5.5 hours |
| Riveted Inboard Left Top Skin / Deburred Last Right Top Skin |
November 16, 2003 |
|
We only had the morning to work since I need to go help a friend pick
up a new plane her purchased (and Theresa had a meeting to attend this
afternoon) but we jumped right in and got a lot done. Theresa deburred
the final top skin for the right wing and I primed the "scarf
joint" on the outboard skin.
We then started riveting (after our 9am "Sunday morning early
riveting start time") the inboard top skin on the left wing. It
went great with us trading off bucking and driving. We did all the
driven rivets we could before it was time to cleco the outboard top
skin in place. The rivets on the inner-most rib and the rear spar
will be set with the squeezer, so they are left clecoed at this
point. I'm leaving them because (a) they can be done when work needs
to be quiet like late at night and (b) they can be done solo, without
a helper.
Time : 2.5 hours |
| More Riveting on Left Top Skin / Dimpled Inboard Right Top Skin |
November 17, 2003 |
|
Theresa went out and started dimpling the inboard right top skin this
afternoon. Once I finished working I went down and started squeezing
the rivets on the wing root rib (taking care to NOT rivet the holes
to be left open for the wing root fairing).
Once she finished dimpling I worked with her to drive some more rivets
in the left top skin. We have only 6 more ribs worth of rivets to drive.
After that all that will be left is some squeezing, which I can do in
my "spare time" (what is spare time again??) and when
we have to do work that won't wake up the neighbors. :)
A little later I went out and started squeezing some of the rivets on
the rear spar. I discovered that as I went inboard the rivets from the
rear spar reinforcement plates started to get in the way. My no-hole
thin-nose yoke was not deep enough to reach .. so I ordered a deeper
yoke. *shudder* They sure are expensive, but I don't see how to get a
bucking bar in there either ... so .....
Time : 3.5 hours |
| More Riveting / Countersinking Right Wing Spar / Dimpling |
November 19, 2003 |
|
Did more countersinking on the right wing spar before dinner. After dinner
we went back out and got a few (3?) more ribs riveted. Needing a break from
the rivet gun (and given that the day had left both Theresa and I totally
pooped) we worked on a few other items. Theresa finished the dimpling on
the last top skin (except for the few dimples where we need to make the
"scarf joint") and I did a little more countersinking.
If it seems like we are jumping around a bit ... we are. The idea is to
get both wings with their top skins on and in the wing cradle by Sunday
so the Fuselage can come home on Monday. To that end there is a fixed
collection of work to get done, and it all has to happen. Therefore we
are working on what seems most handy at any given moment. If we get
tired of riveting, we break and do something else. If there is only
one of us around and we can't rivet, we do something else. Otherwise
we rivet. See? :)
We have a game plan and really think we can make our Sunday deadline. If
not, I'm taking Monday off and finishing up then!
Time : 2.25 hours |
| Finished Left Top Skin Riveting / Finished Csks on Right Wing |
November 20, 2003 |
|
Except for the inboard-most rivets on the rear spar, all the rivets on
the top skins are finished! With Theresa's help we finally got it all
done! Woo hoo! I am waiting to set those inboard-most rivets
for when my new deeper throat no-hole thin-nose yoke gets here tomorrow.
I also finished countersinking all the rivet holes on the right wing
spar. I shot some primer over the countersinks so we are now ready to
rivet the leading edge onto the spar. Once that is done it'll be time
to start riveting the top skins on.
Speaking of top skins, Theresa finished up the dimples on the last right
wing top skin. Once we get the "scarf joint" taken care of they
will be truly ready to go.
Time : 2.5 hours |
| Finished Left Top Rivets / Attached Right Leading Edge |
November 21, 2003 |
|
I got my new 4 inch deep no-hole thin-nose yoke from Avery today and
finished off those last few rivets on the rear spar (inboard, where
the doublers on the spar start to get in the way a bit). Worked like
a champ!
I riveted the right leading edge to the spar, a task that took a
while but was easier than the left leading edge (at least). I went
at it just the same way as the leading edge on the left side (see
above) and it went great.
I then made the "scarf joint" on the top skins and shot a
little primer on them. I think we are ready for a "Rivet Fest"
tomorrow! These were all the things I had slated to get done tonight
so I can say with confidence that we are on schedule for the weekend
plans. The goal is to get the wings into the cradles by Sunday night!
Time : 3.0 hours |
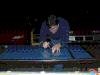
| Finished Riveting Top Skins! |
November 22, 2003 |
|
Today was intended to be a major airplane construction day, and
it was. Theresa, Christopher, and I worked all day on the wings. In the
morning I realized that we had not yet dimpled the ribs, so that had to
be done first. I also set the "forward most rivets" on the
spar which would eventually get covered by the tank skin (as I did on
the left wing, detailed above). Also, to finish up the prep work we had
to scotchbrite the edges of the skins and roll the edge of the outboard
skin where the outboard skin overlaps the inboard skin.
That all done, Theresa and I started riveting. After a bit Chris came
out and helped by squeezing the rivets on the edges. We had to take a
number of breaks .. but in the end, we got it done. Other odds and
ends that I took care of were popping in the snap bushings for the
pitot and AOA lines, as well as for the coax that'll be run out to
the wingtip antennas. I also discovered that I needed to tap the
tiedown bolt holes a little deeper, and took care of that (checking
to make sure I now had enough depth).
Along the way today Theresa and I did a run to Lowe's to purchase the
wood for building the wing cradles. Tomorrow those get put together and
the wings come down off the stands. At that point the old construction
stands for the wings are (mostly) history. I can't believe I'm at the
point where these get to come down! I will save two posts (cut down to
just above the wing support arm) so that I can clamp them to my bench
and have an "instant wing jig". Being able to get a wing out
of the cradle and putting it up on a stand will make it MUCH easier to
do things like install the tanks. Having the "stand" be
removable, however, will really help with space management in the shop!
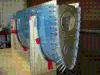
Oh, and the talk on the RV e-mail list now is that the plastic should
be removed from the skins after all! *shesh* Since I thought that pulling
the strips off was a bit anal to begin with, I ripped the rest of the
plastic off without much of a qualm. The wings are beautiful with
that ugly blue plastic off!
Time : 9.5 hours |
| Constructed Wing Cradle / Took Down Wing Supports |
November 23, 2003 |
|
Today was a woodworking day. (And, yes, I count that as a part of the
airplane building project to be logged!) We built a fairly classic sort
of cradle patterned after the one on Dan Checkoway's site. It went
together fairly easily.
We then did the nervous-making thing of hand carrying the wings to the
cradle, flipping them nose down to put them in place. While it was a bit
frightening carrying them, they went in quite easily.
The final bit of work needed was taking down the massive wing construction
rig. I had screwed the uprights into the ceiling and had tied it all
together with crossties, and screwed it into the concrete with anchors.
I guess I didn't want the structure to move while the wings were up on
it. :) Therefore, taking it all down was quite a job. I saved two posts
but trimmed them down just above where the wings were clamped on .. so
I can have the "instant wing jig" I mentioned above. This will
come in handy when I start to attach the tanks to the wings.
We cleaned up the shop, and now have room for that massive fuselage crate
to be delivered tomorrow! Wow!
Time : 6.5 hours |
| Left Wing Conduit Installed |
November 28, 2003 |
I took a little time out from working in the tanks to pull this conduit. I
needed a break from some really tedious (and tiring) countersinking! This
was tedious as well, but I confirmed that I have enough conduit to do both
wings as I had hoped.
Time : 0.5 hours |
| Right Wing Conduit Installed |
November 30, 2003 |
Theresa jumped in and decided to pull the conduit for the right wing. Near
the end I gave her a hand, and we got it done pretty quickly. Faster than
when I did it earlier on the left wing!
Time : 0.25 hours |
| Switch Full-time to Tank Work |
November 2003 |
You'll see at this point there is a HUGE break between the previous
entry and the next. During this time I was working on
tanks,
ailerons, and
flaps
.... and it (as does everything) took much more time than I
ever anticipated. Once I finished all those activities I came back to
the main wing work again.
|
| Started Mounting Roll Servo in Right Wing |
October 6, 2004 |
|
I spent a little time (after playing with ProSeal) to start mounting the
roll servo. I opened the package and realized that I didn't *QUITE* have
all the hardware I needed. They don't provide (oddly enough) the bolts
and/or screws to mount the servo to the bracket. They also don't mention
what is needed/desired, so I'm going to call and ask.
Update: I did call, and the helpful TruTrak folks e-mailed me a
hardware list. There was just a small handful of items that I needed to
order ... so I did, and added in a large handful of other items I have
been wanting (but not really needing, yet) as well. I'll get back to this
when my nuts-and-bolts order comes in next week.
Time : 0.75 hours |
| Pulled Coax through Wings |
October 8, 2004 |
I crimped two coax bulkhead BNC connector onto the ends of two pieces of RG-400
and then pulled the coax through the wings. I had to enlarge the hole in
the root rib (with my Unibit) to 1/2 inch to accommodate the bulkhead BNC
connector. It wasn't much to get done, but it had to happen sometime ...
and it filled (nicely) the spare hour I had between work-time and family-time
tonight. :)
Time : 1.0 hours |
| Installed Roll Servo Bracket / Pulled Pitot & AOA Lines |
October 9, 2004 |
|
I first spent a little time installing the roll servo bracket and torquing
the bolts correctly. I am a little unsure about what bolts go where, so will
wait until I can talk to the TruTrak folks on Monday before I finish the
install of the roll servo (the TruTrak instructions could be a little more
explicit, though maybe someone more experienced would have no problem).
I also pulled two aluminum lines through the left wing. One line is for the
Dynon pitot, and the other is for the Dynon AOA port (which is also on the
pitot mast). I left tubing stubs sticking out the end of the root rib and
will eventually tie the NylaFlow tubing in at that point. I've decided to
use the outer-tube-with-hose-clamps approach for transitioning from the
aluminum tubing to the nylon. It is simple, and foolproof, even if it looks
kinda like a kludge. :)
Later in the evening I determined how long I needed my roll servo wiring
harness, and cut the wires to length. I also installed the machined D-sub
pins on the ends of the wires ... but then ran out of time. Tomorrow I'll
finish fishing the wires through the wing, installing the pins in the D-sub
connector, and installing labels on the wires.
Time : 1.75 hours |
| Installed Roll Servo Wires |
October 10, 2004 |
I spent some time today installing the roll servo wires. One by one I put
each pin into the D-sub connector, ran it through the wing, and then I put
a piece of printed heat-shrink on the wire to label which pin it connected
to. I used my handy-dandy Kroy K2000 printer to print on the heat shrink,
and I love it. This would have been a very pricey tool, except I got
it for cheap on eBay. I had to let a half-dozen go by on eBay before I won
a unit for a low price. If I remember correctly it wasn't listed with a
title that was exactly the same as the others ... so I think it got
somewhat less attention than the others. But, this is going to be a great
way to label wires. The 1/8" tubing shrinks down nicely even onto the small
22AWG wire, and the printing is still quite readable. You can see the results
in the picture included here. Way cool.
Time : 3.25 hours |
| Worked on Installing Roll Servo |
October 12, 2004 |
Pete was coming by to look at progress, so I spent some time working on
getting the roll servo and aileron bellcrank in place. I had to ream the
bushing so that the AN4 bolt would fit through it (and this seems to be
standard practice). Once I had things installed, I was not happy with
the ease of movement so am going to call Van's in the morning to double
check that I'm right about that.
Time : 1.25 hours |
| Finished Installing Roll Servo |
October 13, 2004 |
|
I called Van's and they said that it is not uncommon for the aileron
bellcrank to have some "stuff" inside it from the welds. The
thing to do is to chuck a piece of steel rod into a hand drill (I used
my cordless Porter Cable on low speed) with a section of emery cloth
attached .... and run this through the fitting to smooth out any high
spots. Worked like a champ.
I got everything reinstalled, but am unhappy with how my roll servo
wiring is running. I'm going to get some large diameter heat-shrink
and re-route it under the bellcrank rather than over. I think this will
be a much cleaner way to go. More later ... as I'm working on the plane
today (on PTO from work) while I fill time between family-tasks I need
to do.
I did come back after running family-errands and finished with the roll
servo install. I had to pull the servo wires out of the wing (pulling off
my wire-ties to do it), slip some hit-shrink tubing in place up near the
connector to the servo and down by the bellcrank, then re-route the wires
back through the wing. I guess I'm not totally done because I
want to retie the wire-ties and install an Adel clamp (still missing in
the picture included), but essentially
the roll servo is installed. On to flap/aileron fairings/braces now!
Later this evening ....
Before the last presidential debate, I was able to carve out another hour
to work on the plane. :) I re-laced the wiring for the roll servo and then
cleaned up the left wing aileron bellcrank (getting the crud and any small
irregularities out from where the bushing goes) and mounted it. I torqued
all the bolts and marked them as having been torqued.
I also pulled down the aileron hinge brackets and did a trial fitting. Looks
to me like they will be a piece of cake to install. However, before I do
that I think I'll prime them and that will have to wait until tomorrow
because it is t'storming outside right now (well, and the debate is to
start in a few minutes, too).
Time : 3.75 hours |
| Drilled Aileron Hinges / Trimmed Flap Brace |
October 14, 2004 |
|
Tonight (with the little time I had) was spent mostly preparing and drilling
the aileron hinge brackets. To prepare them I cleaned up the edges with my
big Scotchbrite wheel. I then scuffed them to prep for priming, and drilled
them to the wings. Drilling also required me to lay out the holes for the
lower outboard edge of the outboard hinge brackets and drilling them to the
outboard ribs.
I also marked and did a rough trim of the flap braces, and identified the
material to be used for the aileron pushrods (mainly pulling the tubing
down from the overhead storage I crafted many months ago when my wing kit
arrived).
Other odds and ends done was the safety-wiring of the two bolts on the
underside of the roll servo bracket, and installing a missed rivet over
which the outboard aileron bracket will be installed.
Time : 1.5 hours |
| Aileron Hinge Brackets and Flap/Aileron Braces |
October 15, 2004 |
I spent some time this evening priming the aileron hinge brackets, and
begin riveting them in place. I also drilled the flap and aileron braces
and deburred the edges. Deburring included finishing the trimming of the
"wedge" from the flap brace. Once I finish riveting the aileron
hinge brackets and deburring the drill holes in the braces, I can rivet
the braces in place. Once the countersinks are cut in the rear spar we
will be ready to rivet on the right wing bottom skins! Wow.
Time : 2.5 hours |
| Aileron Hinge Brackets Riveted (partially) and More Bracing |
October 16, 2004 |
|
I continued setting rivets on the aileron hinge brackets .... at least
those that I could squeeze. I also deburred the drilled holes in the
flap/aileron braces. I'll need to get some help to drive the remaining
rivets that I can't get to with the squeezer .....
.... and handily, Chris had a few minutes after lunch before he had to
run. He came out and helped me set the remaining handful of rivets that
would have been in the way of the aileron brace. He even had enough
spare time to start helping with the riveting on the flap brace, too!
His help is greatly appreciated.
I continued on setting the rivets in the aileron braces, and got them
all completed. Once I have riveting help again, I'll finish up attaching
the flap braces.
I'm down to a few small odds and ends that need to be
done before starting to install the bottom skins. The list is down to
cutting countersinks in the bottom rear wing spars, and dimpling the
right wing skin. I might also finish the aileron pushrods first, but
that is not essential.
Time : 4.5 hours |
| Prep for Right Bottom Skin Riveting |
October 17, 2004 |
I cut the countersinks in the right wing rear spar (an operation that takes
forever, and which I did in spells). I cut the aileron pushtubes to length.
After much messing about (I realized I didn't have anything *good* to use for
mixing the Valspar for the inside of the tubes and had to go hunting) I got
the inside of the tubes primed. I pulled string down the conduit for later
use in pulling wires (and discovered along the way that putting the shop
vac at one end of the conduit makes an amazingly loud whistle!!). I
also dabbed some RTV on the conduit where it passes through the ribs to
help reduce wear that would come from vibration.
Time : 4.25 hours |
| Installing Threaded Ends in Pushrods |
October 18, 2004 |
|
I was having trouble getting the threaded ends into the pushrods, so called
Van's to see if they had advice. It seems I have a "worst case"
situation where the tolerances between the tubes and the threaded ends are
off in exactly the wrong direction. :) After talking to the tech support
guy at Van's we concluded that turning the parts in my drill press to dress
down the outside dimension with emery cloth would be the easy solution. I
went to the hardware store at lunchtime, got a cheap hardware store bolt
and nut, and cut off the head to make a threaded mandrill for the parts. I
threaded this onto the tube end, used the nut to lock it in place, and put
it into the drill press. I was able to dress it down to the point where I
could install one into the pushrod, though needing a fair bit of force still.
I'm now out of time, but will try and dress down the others and get them
installed as well. Hopefully they'll all go in without TOO much trouble!
Time passes ... and after work I continued working on the rod ends. They
did go in without too much trouble at all. The trick of chucking them
in the drill press and using emery cloth worked like a champ.
I also pulled some tape around the ends and marked the diameter, then used
the tape (and my handy-dandy rivet fan) to mark off the spacing for the six
rivets. I pilot-drilled them on my drill press with a #40 bit, then hand
drilled them out to #30. I've started pulling the blind rivets, but had
to stop when my wife got home from her long-weekend of hiking. Spending
time with the long-gone-wife wins out over pulling blind rivets. Go figure.
I'll finish the rest of them some time tomorrow. :)
Time : 2.75 hours |
| Finished Large Pushrods / Finished Flap Brace Rivets |
October 19, 2004 |
|
I spent some time tonight early in the evening working on finishing pulling
the rivets in the large aileron pushrods. They went in great (how hard could
they be, anyway?) and that task is done. I then tried drilling the holes for
the small pushrods ... and came away totally unhappy with my first attempt.
I'm unhappy enough that I put the job aside (avoiding screwing up the second
of the two pushrods) and will order replacement parts for the first pushrod.
Pete came over and helped me finish up the riveting on the flap brace as well
as the few remaining rivets on the end aileron hinge bracket. Except for one
stubborn rivet, it went extremely well and we got done in no time.
I also spent a little time cutting the countersinks in the flap brace, but
it is a very tedious job and I'll keep working on it over time. I
also spent some time looking at how to secure the wires for the roll servo,
and have concluded that I need to re-route the wires in the wing bay where
the servo resides. I want to be absolutely sure that the wires do
not get in the way of the aileron bellcrank, nor that the wires chafe. To
do this I need to move where the hole for the snap-bushing is (higher) and
re-route the wires through it. Tedious, but it is the right thing to do.
Time : 3.5 hours |
| Re-routed Roll Servo Wires / Dimpled IBD Bottom Skin |
October 23, 2004 |
|
This morning I did the re-routing of the roll servo wires. I drilled a hole
a little higher in that first rib, and moved the snap bushing up. I added
an Adel clamp to make sure nothing moved, and re-routed the wires. They are
now totally clear of the aileron bellcrank and I feel better about
it.
Preparing to rivet the bottom skins on, I finished cutting the countersinks
in the flap brace on the right wing. I also pulled down the right inboard
skin, pulled off the plastic (with Christopher's help), and started to
dimple. That'll probably be it for tonight, but I can finish the dimpling
tomorrow .. and if Theresa is feeling better, we can start to rivet (Chris
has to work, so he isn't an option as a helper tomorrow).
Time : 2.25 hours |
| Finished Dimpling Right Inboard Bottom Wing Skin |
October 24, 2004 |
Today I finished what I started yesterday .. and got the inboard bottom
right wing skin dimpled. I also spent some time with the scotchbrite
wheels and my die grinder on the edges, and got all the skin edges silky
smooth. We are ready to rivet (and if my two main rivet-helpers were
available today we would start .... except for the fact that my daughter
has her first cello recital today, which would have nixed riveting
anyway!).
Time : 1.25 hours |
| Riveting Right Inboard Bottom Skin |
October 30, 2004 |
|
Theresa and I started riveting the right bottom inboard skins this
morning. We have the wing-walk rear spar rivets done, as well as a
little beyond just that point (some rear spar rivets beyond the wing
walk, and some of the wing-walk rib rivets). However, it is very
slow going! Those wing-walk rear-spar rivets are a ... well ... I
will just put it politely, and say they are rather difficult. We
are taking a break now (and had to take a break to help our neighbor
look for her dog that wandered off), but will be back at it after
we have lunch.
After lunch Theresa and I did a lot more riveting, getting into the
easier sections. We riveted everything *except* the rivets along the
front spar before we ran out of time. We'll finish them tomorrow!
Time : 5.75 hours |
| Finished Riveting Bottom Skin / and Misc |
October 31, 2004 |
|
Theresa and I got out early and finished riveting the inboard bottom
right skin. The one thing I have left to do on the skin is to squeeze
some rivets on the root rib, but the plans are not really clear on
exactly what needs to be done there, so I'm going to wait and call
Van's on Monday to double-check. I think it is just a rivet every
third hole, but there is no reason to not be sure before I start to
set rivets. All in all it went pretty quickly. I then pulled out my
new paint gun and primed the aileron tubes. That, too, went like a
charm.
We then got a bite of lunch, and afterward I went to look at a new
RV-7 that a local guy brought home this weekend. It is outfitted with
a 180HP engine and a constant speed prop ... just like what I want to
use. What I need to do next (and, he has said he is more than willing)
is cage a ride off of him so I can see exactly what that engine
and prop combination feels like. His opinion is that I'll really
like it. :)
This afternoon (along with helping Theresa make progress on a small
metal-working project of her own) I fabricated the bellcrank spacer for
the large aileron pushrod and got it installed. I cut the spacer a
bit oversize with a hacksaw, then "whittled" it down to size using
80-grit paper on the table of my drill press. Just chuck the spacer
into the press and lower it to the paper ... just taking off a bit
at a time. Once I had it really close, some 120-grit emery paper fixed
it up nice and pretty.
Time : 4.75 hours |
| Started Prep on Outboard Skin / Fabricated Aileron Pushrod |
November 4, 2004 |
|
I spent some time this evening getting things ready for riveting on
the bottom skin. All I really had for was to get the skin out of
storage, and pull off the blue plastic (ugh!).
I also spent a little time fabricating the small aileron pushrod
tonight. I had screwed it up the first time, and then used the
now-scrap tube to practice getting the drilling right (straight,
mainly). With that practice done I was able to put one together on
the next attempt with no trouble at all. Thank goodness. I
have replacement parts for the ones I messed up on the way, and they
should arrive the middle of next week. In plenty of time for work
on the left wing. You can see the picture here to get a look at a
finished pushrod end.
Time : 2.25 hours |
| Dimpled and Riveted Right Outboard Skin |
November 6, 2004 |
|
This morning bright and early (well, not too early, as I didn't want
to wake up the neighbors and piss off the family) I got out and deburred
the skin edge and dimpled the rivet holes. I was on my game today and
I did NOT accidentally dimple the screw holes for the wing tip! Those
I'll do later when I install the nutplates for the tips.
Theresa and I got started riveting ... and the one lesson that comes
out of this all is that you should go slow, and think ahead about how
you will physically get to each spot. Fortunately, we have been good
about this so far, and I think we'll finish the wing today. But if
you are rash, then unless you have really thin/strong/long arms, you
can end up with really difficult to buck spots!! Take care. :)
More after lunch ......
After lunch we finished the riveting. All in all it went quite well
but by the time we were done .. we were bushed. As a note (and you can
see this from the pictures) we did our riveting with the wing in the
cradle. Down on the wingtip end the portion of the cradle that holds
the leading edge was a tad bit too tall. I put a thin strip of
wood against the skin, and used my belt sander to shave off just
enough so that we could flip the skin out to reach in and rivet.
Note the picture with the "enhancement" to the C-frame tool. Stealing
a great idea from F-1H Rocket builder Vince Frazier, I added a small
laser-pointer to help position the holds for dimpling. I was not sure
how much this would really help .. so you can see that I invested very
little effort in putting it together. Random bits of aluminum, an Adel
clamp, a little duct tape, and a wooden clothespin. The clothespin is
perfect for holding the pointer because it not only clamps it in place
it also keeps the button depressed so the light shines non-stop. I
found it to be a huge help, and dimpling went faster because of it.
If I had more than just 2 wing skins left to dimple, I might make it
more "real" ... but ... hey ... the duct tape and clothespin will do
for so few holes that need dimpling. :)
Time : 5.25 hours |
| Left Wing Tank Installed |
November 7, 2004 |
Today I had a visitor, Dean Matlack, who is thinking about building an
RV-7 but has never seen an RV under construction. With his help I tested
the left wing tank (the one I've had the most trouble with) and found it
to not leak. So we brought the wing in, set it up on the temporary stand,
and put the tank on. I had Dean installing AN bolts with me coming after
with the torque wrench. All in all it went pretty quickly.
Time : 2.5 hours |
| Right Aileron Hung |
November 13, 2004 |
|
I spent the morning getting the right aileron hung. As it turned out my
counterbalance (aka: water pipe) was a tad too long. It was flush
on one end, but overhung about 1/8 of an inch on the other. I got out my
die grinder, a grinding wheel, and shaved off the extra so it would not
hang up on the aileron bracket.
I then put the aileron up on the wing and slipped in a couple of bolts
to keep it from leaping onto the ground. I fabricated the spacer needed
for the inboard bracket, and slowly-gently slipped all the washers and
the spacer into place. This one went fairly easily, and then I replicated
the same trick on the outboard hinge bracket. I had just purchased a set
of "washer wrenches" from Cleveland, and they were a huge help in
getting all the washers into place! It would have been a totally frustrating
job without them.
The real trick ... since I didn't want to take the wing out of the cradle
(I'm working pretty much solo this morning) was attaching the aileron control
rod. I had to reach on the other side (the bottom faces out) of the wing
to slip the washers in, and this is where my new washer-wrenches saved the
day. I don't think I could have accomplished this task without the new tools.
The biggest trick was slipping the spacer into place, as the bolt had to
have two washers in there to begin with, and the spacer took up (true to
its name) all the extra space in the gap. So I had to gently slide the bolt
back out, with the spacer riding in the gap to hold the washers in place,
and then once the bolt was fractionally out enough slip the spacer into
alignment and slide the bolt in. I dropped it once, but got it all into
place on the second try. Using the new washer wrenches I got the washer and
nut (I know, they are not called "nut wrenches", but I used it anyway) in
that crowded area tucked by the tip rib. Fortunately I could get an open
end wrench there to hold the ny-lock nut, and torqued it all down.
I now need to go get something long enough that will act as a straight
edge ... and ... I need lunch. :)
After lunch I finished adjusting the aileron push-rod using a long piece
of steel strap as a "straight edge". Worked great. Then I started fitting
the flap to the right wing. I realized that the extra washer I had put
under the heads of the bolts on the aileron hinge bracket had to go! They
reduced the clearance for the flap. Darn it. So, I got my washer wrenches
back out and re-installed (and re-torqued) the two bolts without the
washer ... which is, of course, how it is shown in the plans in the
first place.
I clamped the hinge bracket to the wing, carefully checked for the distance
between the flap and the aileron, carefully checked to see that the trailing
edges lined up, and marked the hinge for positioning. I took the hinge off
of the flap, clecoed it on, drilled, deburred, and riveted. I then started
to put the flap on ... but the hinge pins were a total bear to get in
place. I have read about this on other sites, and decided rather than
to force it ... being tired, and surely screwing something up ... I would
call it a day. I'll likely give the pins a good scrubbing with a bit emery
cloth and then Boelube them for the next attempt at getting them to go in.
Time : 5.5 hours |
| Right Wing Finished (for now!) |
November 13, 2004 |
The hinge pins are still tough to get in, but with a little more work (and
Bolube) we'll get there. I'm not going to fight it too much right now. I am
not sure I want to leave the flaps on for now anyway, but we'll see. I also
installed the platenuts on the openings for the inspection panels. I used
some platenuts that had pre-dimpled ears and they went in like a charm.
Time : 2.25 hours |
| Preping for Left Inboard Skin |
November 20, 2004 |
|
I pulled down the left inboard skin, pulled off the plastic, and dimpled
the skin. The laser pointer was a huge help once again. I then started to
cut the countersinks in the rear spar, and in the flap brace.
Time for a lunch break now .. and I'll be back at it after ....
... and after lunch I finished cutting the countersinks in the left wing. I
then cut the small aileron pushrod to length, and primed the inside. I need
to wait for the primer to dry, and then I can install the rod end bearings
on the ends.
Time : 2.75 hours |
| Small Left Aileron Pushrod Finished |
November 22, 2004 |
I only had a little time this evening, so went out and finished putting
together the left aileron pushrod. Installing the ends went quite easily
and that is now done and ready to be used. I may have to start on the
fuselage (if I end up with any spare time this week) while I wait for
a good time for one of my assistants to help with the left bottom inboard
skin riveting job.
Time : 0.5 hours |
| Riveted Some on Left Inboard Bottom Skin |
March 20, 2005 |
Theresa was in the mood to rivet, so we spent a little time working on
some of the harder rivets. These are the first ones you have to rivet
along the trailing edge on the inboard end (where the wingwalk lives).
This is a tight set of spots to get into, but after having done it once
before .... it wasn't that difficult this time. I guess we do learn
as we go, don't we? :) In fact, it was a lot of fun getting back to
doing some riveting on the wing. We'll finish this up soon.
Time : 1.0 hours |
| Started Pitot Installation |
May 20, 2005 |
|
Theresa and I are going to spend some time finishing the riveting
on the left wing tomorrow, so I wanted to see if I could finish up
my pitot installation (or at least make sure I'm ready to finish
closing up the inboard skin). I dug out my recently delivered
Dynon pitot (non-heated, to be swapped when they finally get the
heated one available), my Gretz mount, and started scratching my
head a bit.
I had worried that I would need to provide a bracket, but the AN
tubing size adapter (3D to 4D) I have really isn't a bulkhead fitting
and the more I looked at it, the more I thought it made sense to
just terminate the 4D tubing near the top of the rib, close to the
rib to reduce flexing. Then the smaller 3D size tubing coming out
of the pitot is long enough to reach that far, and I'll just tie
them both together there with the union. No bracket, just a simple
union joint. I like this approach better and will finish it up
as I have time. Now that I know what I want/need to do, it can wait
until we have completely riveted the inboard skin.
I will run the wires for the pitot, though, in preparation for
the heated unit. That'll make it easy to install when the time
comes.
Time : 0.75 hours |
| Riveted Left Inbd Skin / Preped Left Outbd Skin |
May 21, 2005 |
|
Theresa and I spent a bit of time today and finished riveting the
left inboard wing skin. This was some of the more annoying riveting
demanding some arm and body contortions to get the rivets in place.
But, we got it done in fairly short order.
I then flared the pitot and AOA lines, remembering to put the AN
hardware on before flaring. I torqued on the reducer needed
for the Dynon pitot, and have left the pitot unaltered from the
factory for the moment. I used it to make sure I could get it
installed after the wing skin was riveted ... and now that I'm
sure of that, the actually installing of it can wait a bit longer.
I also pulled down the left outboard wing skin, pulled off the
(oh so stubborn) plastic, and deburred the drill holes. I need to
dimple (having left it undimpled for storage without scratching
other skins) the skin and then we can get it riveted on
and the wings will be done.
Time : 4.5 hours |
| Deburred/Dimpled Left Outboard Wing |
May 22, 2005 |
|
Yesterday evening I pulled (at great effort) the blue plastic off
of the left outboard bottom wing skin and deburred the rivet holes.
This morning I deburred the edges (and hit a few other parts while
I was at it) and dimpled the rivet holes. I feel compelled to stop
(unfortunately) because I'm a bit under the weather this afternoon,
but I was determined to get this skin ready to rivet .. and it is!
I also burned a little time today getting a make-shift shelf put
up to hold the skins, and to free up space on one of the full/real
shelves. It worked out GREAT, and I now have room for those various
assemblies I'm pulling together than get built .. then have to be
stored. :)
Time : 3.5 hours |
| Riveted Left Outboard Bottom Wing |
July 3, 2005 |
|
Finally got some time with my riveting helper (Theresa) to start
nailing down the outboard bottom left wing skin. This is a slow
tedious process ... because you have to reach deep inside the wing
and hold the bucking bar in awkward ways. We got a good bit done
and have the worst (slowest, most painful) parts behind us.
One suggestion I'd make is that as you rivet the wing panels if
you ever get to a point on a line if rivets where they become
*easy* to reach ... stop and go on. Make sure they *stay* easy
to reach (say, from an inspection panel) as you go but as long
as they are easy .. don't rivet them. That way you retain the
most flexibility (and I mean that literally, as you have to flex
the wing skin to reach many spots) as you go. Come back to the
easy ones when you have no hard ones left to drive. Just my $0.02
worth on the subject.
Time : 2.0 hours |
| More Left Outboard Bottom Wing Riveting |
July 4, 2005 |
Theresa and I spent a bit more time riveting today, and almost
got it finished. Have I mentioned before what a pain the the rear-spar
rivets are? My arm is bruised from reaching through lightening holes
to rivet! Theresa's rivet-gun-hand got sore and my bucking-bar-hand
started to cramp .. so we quit with maybe 45 minutes more to do. We
hope to finish that up tomorrow.
Time : 2.25 hours |
| Finished LOBW Riveting / Installed Nutplates |
July 7, 2005 |
|
We had a short bit of time waiting for a t'storm to roll in and
we decided to try and finish up the wing-skin riveting before the
power got knocked out. :) We were able to do the last little bit
in a scant half hour. DONE!
We got that done so quickly (and the t'storm had not knocked out
the power .... yet) I then decided to install the inspection panel
nutplates. I had to drill/dimple them all, and then riveted the
nutplates in place. It is nice to have that done too.
Time : 1.25 hours |
| Install Left Aileron and Flap |
September 25, 2005 |
|
Today I flipped back to the wing and installed the aileron. The only
challenging part about that is fabricating the spacers, and they are
not much of a big deal now that I've learned how to adjust them in small
increments by chucking them into the drill press and lowering them onto
(first) 80-grit sandpaper and then emery cloth to final polish. I even
move the drill press stand out of the way on the last adjustment to run
emery paper along the edge ... which breaks any sharp edge that might
be there. Kinda nice. :)
I installed the aileron, used it to position the flap, drilled the flap
hinge, deburred, and riveted the hinge to the wing. I then finished up
by installing the aileron pushrod and using the positioning gage to set
the pushrod length correctly. I had to take the right wing out of the
cradle to get to the pushrod connection on the aileron ... since the
aileron/pushrod connection area is a really tight spot to work in.
Time : 5.25 hours |
| Installing Wing Root Platenuts |
November 19, 2005 |
I keep flip-flopping between the wings and the fuselage, because I am
working at the interface between the two. I started working on installing
the platenuts on the wing root ribs. Work was stalled by helping my
daughter work on a school project (and, I must say, it has been a lot of
fun to work with her). I also mis-interpreted the plans which made me
install the wrong platenuts .... so today's work was partially negated
by having to drill a bunch out the next morning. Oh well. :)
Time : 2.0 hours |
| Installing Wing Root Platenuts (cont.) |
November 20, 2005 |
I drilled out the platenuts mentioned above, and installed the rights ones
in their stead. I also drilled the bolt hole for the tank attach bracket,
and installed the platenut there. The bulk of the afternoon was taken up
by helping Kat finish her project, and other family chores. I had hoped
to get more done ... but finishing up on Kat's project consumed the rest
of the day. However, it is DONE and I think she did a GREAT job. There is
always next week (and Thanksgiving weekend) to work on the plane. :)
Time : 2.0 hours |
| Installing Wing Root Platenuts (cont.) |
November 24, 2005 |
|
It is Thanksgiving Day, and along with many many other things I'm thankful
for, I am thankful to have a beautiful day for working on the airplane. I
finished up the platenuts on the first wing, and with help from Chris we got
it back in the cradle .. and the other wing on the sawhorse.
I started (and finished) installing the platenuts on the top-side of the
wing .. in the wing-walk area .. before T'giving dinner was ready. Chris
came out and helped me flip the wing, and the bottom-side will get done
after we eat (assuming I can move, of course).
Well, some got done but not a lot. I got all the spots ready for platenuts
but only got a couple riveted on before the family all wanted to get out
for a drive. We have had a lovely day, and begrudge not one minute spent
with the family. The rivets/platenuts will wait 'til tomorrow.
Time : 2.75 hours |
| Finished Wing Platenuts / Tank Bracket Platenut |
November 25, 2005 |
|
I finished up the wing root platenuts this morning, as planned. I also
installed the tank bracket platenut so the wings are done. To have them
REALLY be done, we needed to drive one rivet that I discovered we had
not fully driven when we installed the bottom wing skin on this wing.
I think we drove it, thought it was set well, and moved on. When I had
the wings on the fuselage it was clear that this rivet wanted to dangle
down and was NOT set well. It was not in the most handy position either,
being in one of the bays *between* the ones with inspection plates. That
meant I couldn't just reach up there easily and put a bucking bar onto the
rivet in question. I managed to attach a bucking bar on a board with some
double-sided tape, and using that "extension" was able to reach the rivet.
We set it quickly and with little fuss after that.
Time : 2.25 hours |
| Riveted Stray Rivet |
November 26, 2005 |
In the process of installing the wings I discovered that we had a rivet
on the rear spar of the left wing that had not been fully set. Sadly it
was NOT in a bay with an inspection hole, so we had to get creative. See
the picture of the "bucking bar extension" to see what I had to do to reach
the rivet. That is double-stick foamy tape you see around the edge, and
that is what holds the bar to the stick as well. :) With this goodie I
was able to easily reach the rivet, not bang up the metal inside the wing,
and with a quick shot from Theresa the stray rivet was set. *shesh*
Time : 0.5 hours |
| Assembled Wing Transport Side Panels |
December 17, 2005 |
I acquired/cut wood to make some "guards" for the wings. The idea is that
the cargo straps should not touch the aluminum when they are strapped into
the U-Haul tomorrow. Thank goodness for my nail gun as that means most of
the time was spent in acquiring/cutting wood and not the assembly itself!
Time : 2.5 hours |
| Transported Wings to Airport |
December 18, 2005 |
|
With the help of the whole family along with my good friend Pete Beal, we
transported the wings to Pete's hanger. Yes, Pete is being so kind as to
let me store some "big pieces" in the back of his hanger. It'll really
help make room in my shop at home!
We picked up a few items from the storage building (canopy and shelves,
mainly) and then drove the U-Haul to the house. We iterated through a few
ideas on how best to load the wings ... and in the end elected to take
the wings out of the cradle, lay them on blankets, move the cradle into
the truck, and then carry each wing one at a time and place it in the
cradle. Easier said than done, but we got them loaded with little real
trouble. Once in the truck, we carefully strapped everything in place
and headed for the airport.
Unloading was even easier, and in short order we had the wings (and the
canopy, and the shelves) in place in the back of the hanger. No problem!
Everyone was fantastic, pitched in, and really made it happen today. I
am very thankful for all the generous help of my family, and Pete. This
is a real milestone. The next time those wings move we will (I hope!) just
roll them down the taxiway to MY hanger for final assembly. Way cool. :)
Time : 4.25 hours |
Total Time : 277.50 hours
|
|
![[ The Frye RV-7 Project ]](images/frye_project_banner.png)