|
|
Fuselage Construction
This section documents the work on the fuselage. Given that I've decided that
I am the slowest builder ever ... I've opted for the QB fuselage. We'll see
how much that ends up helping me in the long run!
| Ordered the QB Fuselage |
May 1, 2003 |
|
You can see my comments in the General section of the logbook, but I
also wanted to put an entry in here about our decision to buy the
fuselage. Today I faxed in the order and start the fuselage on it's way.
To complete the process I still need to ship my wing center-section back
to Van's.
If I had known for sure that I was going to go with a QB fuselage
I could have told them in advance and they would have kept the center-section
there at the factory. However, at that point I had not made up my mind. This
means I have to ship it back before the next boat to the Philippines. The
center-section needs to go to the Philippines because it needs to be built
into the fuselage, and that is where the QB kits are actually assembled.
If I ship it back now and catch the mid-June shipment to the Philippines
then I'll get my fuselage back in a reasonable time frame. However, if I
were to miss this boat we would add another three months onto the lead
time waiting for the next shipment overseas! So ... it was time to order,
and that is just what I did. :)
UPDATE: We have an estimated delivery date of some time in December, 2003!
That is just an estimate, but it is surely an exciting one! :)
|
| QB Fuselage Ready to Ship |
November 7, 2003 |
|
I just got word today that my QB fuselage was ready to ship! This is very
exciting ... even if it is a month and a half early. :) I may have to find
some place to store it while we finish up the wings. Oh well, we'll deal.
The plan is to have it delivered to the ABF loading dock and I'll get our
regular auto mechanic (who has a roll-back flatbed tow truck) to help us
transport it from there. Right now it is a race to see if I can get the
wings into the cradle and off the construction stands in time!
|
| QB Fuselage On The Way |
November 11, 2003 |
|
I got e-mail from Barbara today saying that the fuselage is on the way! I
don't know whether to be excited or terrified since I am not ready
for it! Oh well.
UPDATE: I talked with the ABF folks, and even though the fuselage is going
to be on the dock on Thursday, they'll let me pick it up on Monday. This
will give us enough time to actually get the wings finished enough to put
them in the storage cradle and make room for the fuselage crate! *whew*
So, we pick the fuselage up on Monday, November 24. Wow.
|
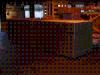
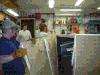
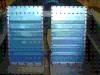
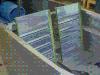
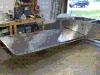
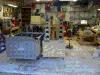
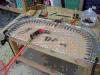
| QB Fuselage Comes Home! |
November 24, 2003 |
|
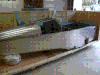
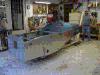
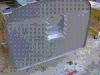
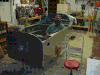
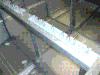
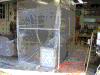
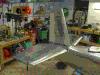
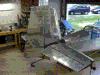
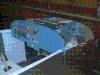
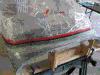
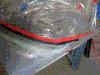
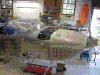
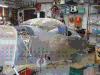
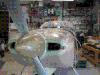
The fuselage arrived at the loading dock last week, and we took the weekend
getting the wings out of the way. With that done, and room in the shop, we
could put the fuselage there instead of storing it elsewhere. I'm really
glad we made the effort too! Note that while you can see some pictures
here, the full set of pictures taken during the delivery are available
at the
Fuselage Delivery Album
elsewhere on this web site.
I have to admit that I was really nervous about the fuselage. Did it survive
the shipping? Would there be any shipping damage? Would I be able to work out
the logistics of having everyone where I needed them when the time came?
Would we have any problems get it to the house? Getting it unloaded? Really
having enough space? In the end, my worries were unfounded ... as the whole
transfer could not possibly have gone better. :)
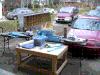
A collection of us met at the ABF freight terminal in Durham, NC at 4:00.
I paid for the shipping, and the actual weight on the crate was less than
estimated .. by quite a bit (I hope nothing got left out!). Therefore, the
final shipping charges were less than anticipated ... only $962.58 when it
was all said and done.
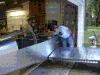
As it turned out, we needed no extra hands there as the freight guy was able
to simply push it onto the tow truck with his forklift easily. We pulled the
tow truck cable over the top of the crate just to secure it, and drove off.
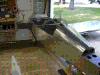
When we got back to the house we backed down to the garage and lowered the
truck bed. At this point Pete and Mr. Eakes took some long poles and levered
the lower end of the box up so I could put a dolly under that end. We were
then able to nudge it down the ramp by lifting the back with the bars and
"rowing" it forward. When it got almost to the bottom of the
bed they levered it up again, and Theresa slipped the other dolly under
the other end.
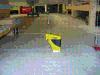
At that point a few more nudges lowered it to the floor ... and we were
able to wheel the huge box around the garage easily! It didn't take five
minutes to accomplish the actual unloading of the crate.
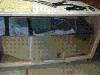
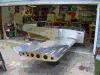
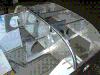
We then pulled off the forward right side panel of the crate. We did this
following the instructions provided by Van's ... but the selection of that
one panel (out of four possibilities) proved to be the lucky choice. All
of the other panels had stuff attached to them ... with this being the
only unused panel! This avoided damaging any parts stored in the box.
We tracked down the packing lists, and then left everything else pretty
much alone. We need to make more room on the shelves in the shop before
we inventory and store all the components. Hopefully we'll get that done
over the long Thanksgiving holiday weekend!
And exciting, and memorable, day .. for sure. :) I want to thank all the
folks who came out to help ... Marilyn Hays, Pete Beal, Chris Martin, and
of course my family. This is an amazing step forward for the project!
|
| Fuselage Kit Inventoried |
November 27, 2003 |
|
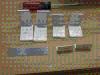
Theresa, Christopher, and myself spent the morning unpacking the crate
and running through the inventory. All parts accounted for (except for
one bit of AL which wasn't on the packing list .. go figure .. we got
a "freebie" I guess). We did not go into the bags
themselves, only making sure that each bag was present.
After the inventory we stored the parts, and I found space for them with
less trouble than expected. Now they can stay safely out of the way while
we work on the rest of the wings. That is it for the fuselage for probably
another month or so (and we'll see if that prediction is even close when
we get back to working in the fuse again!).
NOTE: See the dates between this entry, and the one titled "Started Fuselage"
and you'll see it was a few months ... about 12 of them, in fact, if you
want to call that "few". The fuel tanks and control surfaces took MUCH
longer than I ever anticipated, with the fuel tanks taking up the lions
share of the time. Life intruded too, and along the way I finished up my
instrument rating and had business and family duties take their share of
time. I do NOT feel even remotely bad about the time it has taken. My goal
is to just not quit, and to make steady (even if slow) progress. If I can
keep that up, I'll have a plane when I'm done. :)
|
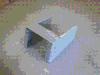
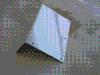
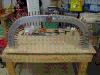
| Fuselage Cradle Constructed |
January 4, 2004 |
|
I could not let the holiday break go by without getting at least one
specific task completed. I badly wanted to get the fuselage out of
what remained of the shipping crate. I had thought of leaving it in
the partially disassembled crate until starting work on the fuse,
but ended up hating how much space (visually as well as physically)
it took up in the shop.
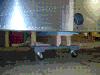
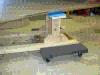
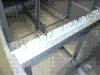
With much help from Christopher, I took the two furniture dollies and
used them as the basis for the cradle. I build a 42" support on one
dolly upon which the spar carry through could rest. I build another support
on the other dolly upon which the tail (right at a handy bulkhead)
could rest. The height of the tail was built (with a WAG at the correct
height) to attempt to have the fuse sitting level .. and I was within
0.2 degrees of level when it was all said and done. The fuselage sits
less than a foot off the ground, and can be wheeled around the shop
with very little effort. I'm quite pleased with the final result.
Time : 4.5 hours |
| Started Fuselage |
November 23, 2004 |
I finally started work on the fuselage. I'm waiting for the weekend (when
I'll have help) to finish the riveting of the inboard bottom skin on the
left wing, so with nothing else on the wing to do ... I started on the fuse.
Except for one small item, I have now completed the section of the manual
entitled "Assembling the F-601 Firewall".
Time : 1.0 hours |
| Inventoried Bags |
November 24, 2004 |
The one thing I had not done earlier was inventory all the individual contents
of the bags. I did that tonight, sorting most of the "generic" hardware into
my small parts drawers. The rest I left in the bags, making notes on many of
them so I would not have to go back and cross-check against the parts list
TOO much to find out what was in each bag at a later date. :)
Time : 2.5 hours |
| Fabricated/Riveted F-601TD |
November 25, 2004 |
|
I fabricated the F-601TD brake line reinforcement bracket, drilled it to
the firewall, cut the holes for the brake lines in both the bracket and
the firewall, and riveted it in place. The firewall recess was dimpled
and riveted together, though it isn't supposed to be installed yet so will
go on the shelf.
I also spent a little time doing
a little more organizing and labeling of the new parts in the fuselage kit.
I was stopped in my labeling efforts by the Kroy needing to have its
batteries recharged. :)
Time : 4.25 hours |
| Miscellaneous Work |
November 26, 2004 |
|
I spent a little time going through the manual, checking off those items
that are already completed on the QB fuselage. This takes a little care as
I don't want to miss anything, requiring that I identify each assembly
called out by first finding them on the plans .. then finding the completed
assembly on the plane. Though a bit tedious, it is still MUCH faster than
doing the assembly work myself (so I'm not complaining!).
I got to the point where the seat adjustment brackets are to be assembled,
and that is not yet done on the QB fuselage. I started to collect up the
parts needed and then ran out of time. I'll get more done on that tomorrow.
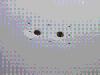
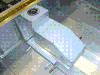
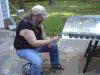
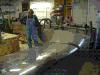
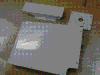
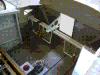
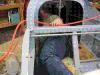
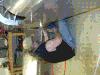
Oh .. yeah .. I finally put a "floor board" in the fuselage so
I feel safe climbing in. I had to get in and make the obligatory airplane
noises. :) And just to make sure the moment is never forgotten (as if it
would be) I've included a picture. How embarrassing. :)
Time : 1.5 hours |
| Seatback Adjustment |
November 28, 2004 |
|
Today I cut the angle, shim, and plate needed for the seatback adjustment
pieces. I'm hoping to take a look at Denny's plane before I do any drilling
on the fuselage itself to make SURE I have it all straight in my head. If
I can do that, I'll keep working.
I was fortunate enough to catch Denny in, and I went and looked at how his
plane (well, the seatback adjustment pieces) was put together. He has
generously offered to come by any time to take a look ... and there is
no replacement for looking at something actually put together if you have
the chance. I can't thank him enough for his generous assistance, but
feel that his gracious help is what I find best in the EAA family.
I came home, drilled the angles for the seatback adjustment, and clamped
the "shim" in place. I also got into the fuselage (for the first time!) to
see how easily I can back-drill the shim. Looks like a piece of cake, and
I hope to get to it tomorrow. (Might spend my lunch hour on it. *grin*)
Time : 2.25 hours |
| More Seatback Adjustment |
December 12, 2004 |
|
I've had a bit of a break due to various reasons, so did *not* back-drill
the shim as quickly as I had suggested in the previous entry, but am back
at it now. I finished bending and dimpling the .040 seatback adjustment
top-piece and c-sinking the shim. I scuffed and primed those parts, and
then drilled the seatback adjustment angles to the fuselage cross member.
Bending those small pieces without a bending brake is a pain in the butt. I
would like to find out an easier way to do it! Few folks go to that much
detail on their web sites, however, and I just clamped-and-hammered it into
submission rather than worry about researching it too much. They came out
fine.
Time : 2.5 hours |
| Yet More Seatback Adjustment |
December 13, 2004 |
We are going out for dinner tonight, but I had a little time between finishing
with work and going out ... so I worked on the plane. I got the seat adjustment
angles preped and primed, and got the holes for the angles (in the bulkhead)
deburred. I'm now all ready to rivet, and hope to get that done maybe as
early as tomorrow.
Time : 0.75 hours |
| Riveted Seatback Adjustment / Drilled Flap Blocks |
December 16, 2004 |
I cut loose a little time tonight (weeknights are the toughest time to get
out and work on the plane) to rivet the seatback adjustment parts onto the
bulkhead, and drilled the holes into the flap bearing blocks.
Time : 2.25 hours |
| Unpacked Fuel Pump / Confirmed QB Assembly Steps |
December 17, 2004 |
I spent some time today unpacking and inventorying a fairly good shipment
from Van's. This was my AFP electric boost pump kit, a flap control kit,
and some other odds and ends. I also went out to the shop and spent some
time verifying the next steps in the instruction manual, and making sure
I'm not missing any steps I need to perform. It was only a half hour, but
every little bit helps. :)
Time : 0.5 hours |
| Started cutting the "Mouse Hole" |
December 27, 2004 |
The Christmas busy season is finally past (we had a great Christmas, and I
hope you did too!) so I'm back working on the plane. I pulled out my tailwheel
spring assembly, and started cutting the "mouse hole". I'm tired of laying
on my back on the cold garage floor, so am taking a break to get that creeper
I have promised myself I would get. Back soon.
Time : 2.0 hours |
| Finished cutting the "Mouse Hole" |
December 29, 2004 |
I was under the weather the last few days, but was feeling better today (and
the temps were MUCH nicer to boot) and I finished cutting the mouse hole. If
I can get someone to help me hold the tailwheel spring mount in place I'll
get it drilled today too, but we'll see if I get that lucky or not. With
it being vacation/holiday time most of the crew are off doing their various
own things. :)
Time : 2.5 hours |
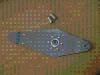
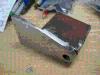
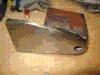
| Drilled Tailspring Mount |
December 31, 2004 |
I carved out a little time from the New Year's festivities to do a little
work on the plane. I drilled the forward-most two holes into the tailspring
mount. Warning .... that steel is very hard stuff. I had dulled one
of my 'E' bits before I knew what had happened. Eventually with care I got
the holes drilled, and am very pleased with how it came out. Hopefully I
can finish this particular assembly tomorrow.
Time : 1.25 hours |
| Finished Tailspring Mount / Continued Fuse |
January 1, 2005 |
|
I spent some time this afternoon working a little more on the tailwheel
spring mount. I drilled it to the rear bulkhead, then preped (Scotchbrited,
cleaned, degreased) and primed both the tailspring mount and the rear
bulkhead. I did the bulkhead simply because it was out, available, and
will see a lot of external weather and abuse.
The decision was made to wait to perform final installation until I can
determine if I want/need to drill an access hole in the bottom of the fuse
to get to the tailspring nut. I think it makes sense to do this,
but want to either look at an existing installation or talk to Van's. My
uncertainty comes from seeing that an adequately sized hole that will
allow a socket to get to the nut will be large enough to encroach on the
bottom-most rivet on the next-to-last fuselage bulkhead. I might well go
look at Denny's plane tomorrow to see what they did.
I continued working through the manual marking off stuff done on the QB
fuselage. I stopped when I ran out of time and got to some parts that look
like they need fabricating. I really enjoy fabricating parts from raw stock
though I also realize that it is a skill I am still developing. :)
Oh ... and ... Happy New Year!
Time : 3.25 hours |
| Mounting Tailspring |
January 6, 2005 |
|
Tonight was spent mounting the tailspring, and almost getting it
done. I had to drill out the bottom-most rear rivet from the next-to-last
bulkhead and remove the tab from the flange through which that rivet
passed on the bulkhead. This was so I could Unibit out a hole to clear
the bolt on the tailspring mount. That went fine, but being a bit on
the conservative side I really need to (now that I have it all bolted
and clecoed together) open the hole up a little larger. As it is I can
not QUITE get a socket onto the nut. Rats.
So I'll have to un-cleco the rear bulkhead (again), pull it out, unbolt
the tailspring mount (again), and open up the hole one more step with my
Unibit ..... then put it all back together again. The upside is that at
that point I'll be ready to rivet. :) But that is for tomorrow night
at the earliest, as I have to call it a night tonight.
Time : 2.5 hours |
| Finish with Tailspring / Forward Bulkheads |
January 15, 2005 |
|
I pulled apart the tailcone again (or those bits I needed to pull
apart) and opened up the mouse hole, as well as opening up (just
a tad) the hole for the tailspring nut. I put it all back together
again, and torqued the bolts. I'll rivet later when it is clear I
won't need to pull anything apart here again.
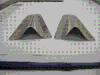
I started working on the F-796B angles. I got them measured to length
and cut from angle stock .. and started to shape them. I hope to get
them all finished tomorrow (along with their cousins the F-796C and D
shims).
Time : 3.25 hours |
| F-796B/C/D Fabrication |
January 16, 2005 |
I was feeling very much under the weather today, but was determined to
get some work done on the plane. This fact has good and bad aspects to
it. The good is making forward progress ... the bad is making mistakes
(and moving very slowly, in the process).
I mis-drilled my first set of F-796B angles, so made two more. I was
able to get to the point where they were clecoed to the fuse, and got
them match-drilled with the holes in the fuselage side. I also cut out
and cleaned up the .063 and .032 spacers, but have not yet drilled those
two pieces. I'm quitting while I'm ahead, before I make any more mistakes
which cause me to make parts over again! :)
Time : 4.25 hours |
| F-796B/C/D Finished / Brake Pedals |
January 22, 2005 |
I finished fabricating/drilling the F-796B/C/D components and set them
aside as instructed. I then started on fabricating the angles for the
brake pedals, and cleaning up the pedals themselves. This took a LOT of
Scotchbriting, particularly since I have ordered the co-pilot side brake
pedal option (meaning I have twice as many parts to prepare). It doesn't
help that I feel anal and am using my small Scotchbrite wheel to polish
out the insides of the lightening holes in the pedals rather than leave
them rough from the punching done at the factory!
Time : 4.5 hours |
| Brake Pedals (continued) |
January 23, 2005 |
|
I finished preping the brake pedals themselves, trimming the angles and
smoothing the edges on the angles. I also drilled all the parts together
(all four sets of pedals), and countersunk those parts that needed to be
countersunk. It doesn't *sound* like much, but there are lots of little
niggly steps that consume time ... and if you don't take care with each
step you don't end up with the kind of results I really prefer.
If I had more time today (but I don't!) I'd scuff them with
Scotchbrite pads, prime, and rivet. But, hopefully I can get that all
done this next week. We'll see. :)
Time : 3.25 hours |
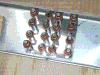
| Assembled Brake Pedals |
February 4, 2005 |
|
I cleaned and scuffed the brake pedal parts this morning, and got them
primed. After lunch with the family I'll assemble them, then start on
the rudder pedal assembly.
The latest big break in work was due to my "Real Job (tm)" moving into
an insanely busy mode, me being under the weather, and a get-away weekend
to the GA mountains (without the kids!!). But, this weekend is looking
good for airplane work, and I'm having fun. :) More updates after lunch,
I hope.
Ok ... its after lunch now. :) I finished assembling the brake pedals,
and am *very* pleased with how they look. It took a while, slowly putting
in all those rivets, but they are now four (I have co-pilot brakes too)
complete assemblies. I pulled the rudder pedals out, installed them in
the UHMF blocks backward, pulled they out of the blocks, switched them
around, and eventually got it all clamped up on my bench at a handy working
height. Time to go to a friend's for dinner, so work stops again, but I
hope to be back at it tomorrow.
Time : 4.25 hours |
| Mounted Brake Pedals/ Started Rudder Pedals Install |
February 5, 2005 |
Today I clamped the rudder pedal assembly (bushing blocks, torque tubes,
etc.) off the edge of my bench so it/they would be easy to work with. I
then mounted (temporarily, as they'll come off again to be painted) the
brake pedals on the rudder pedals, and finished up mounting the brake
master cylinders. I drilled the bearing blocks, and cut the center one in
half on my bandsaw. I trimmed the F-6118 center support bracket and got
ready to drill the lightening holes. Unfortunately I'm out of time for
the day, so am stopping here (just short of firing up the fly cutter!).
Time : 5.25 hours |
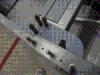
| Drilled (Incorrectly) Longerons for Rudder Pedals |
February 12, 2005 |
|
Today I was going to drill the longerons which support the rudder pedals.
I had finally settled on a 1.25 inch spacing, with three positions. Since
I have a QB fuselage, I match-drilled some scrap aluminum angle to serve
as drill guides, and clamped them in place. The left side went without a
hitch, and after I drilled the first two places on the right side .... I
realized that I had made a mistake. My positioning of my marks was off
by an inch! Damn. I re-measured and re-marked the longeron, and drilled
the correct holes. It wasn't pretty, but I thought I could live with it
since none of the holes actually intersected.
I then went to drill the F-6118 center brace, and realized after I drilled
the first two holes that my UMHV block was not quite positioned right! This
was not my day, and I immediately quit working on the plane. I had not been
feeling all that well all day, and clearly I was not on top of my game. It
was time to cease cutting aluminum before I ended up with a plane that
more resembled swiss cheese than a reliable airframe. *sigh*
Time : 2.0 hours |
| Repaired Mis-drilled Longeron |
February 13, 2005 |
|
I decided I couldn't live with the mis-drilled longeron. It was just a
short piece at the forward-most portion of the cabin. While it is already
riveted into the structure, the surrounding skin rivets are not installed
(they are just tacked in place with a few throw-away pop-rivets) and it
should be easy to get it out. So .... I'm taking it out, fabricating a
new piece, and re-installing it. I realize this isn't *needed*, as what
I have now will work ... but it pisses me off to have it be wrong and I
want to fix it. We'll see how this goes.
Time passes ....
It went pretty well. I was able to drill out the F-719R without too much
trouble, and fabricated a new one from some stock .063 angle I had. It is
all fabricated, drilled, countersunk, joggled (what a pain that was), and
is now clecoed back in place ready for riveting. I'll press Theresa into
work sometime soon to get that done ... then I'll be right back where I
was on Saturday morning! (Don't you hate it when you spend the weekend
working just to end up back where you were when you started ... except
with a few extra pieces of scrap aluminum??)
Actually, that isn't quite fair. I *do* have the longerons drilled on
both sides now for the rudder pedals. Unfortunately, I also still need
to rivet the right side longeron in place ... so it really hard to assess
whether any forward progress was really made this weekend. :)
Time : 3.5 hours |
| Finished Rudder Pedal Brace |
February 21, 2005 |
This last week folks have been under the weather in the house (ok, I
have been under the weather), and this long holiday weekend we spent
most of our time throwing a party for friends, and spending family
time. However, I did get out and get back to work on the fuselage and
finished up the rudder pedal center brace. It is all ready to rivet
in, and the rudder pedals are ready to bolt in (however, I'll wait to
do so until I get final paint the break pedals).
Time : 1.5 hours |
| Fabricated/Finished F-757 Gusset and F-635 Bellcrank |
February 26, 2005 |
|
I cut the square holes (for the tip-up latch mechanism to go through
when the canopy is closed) needed in the F-757 gussets. I primed the
gussets, and clecoed them into place. I'll rivet as soon as I can get
a helper (and, yeah, I could do it solo ... but why if I don't have
to?).
I then pushed on to assembling the F-635 elevator bellcrank. I made
the spacer, match-drilled everything together, primed the aluminum,
and riveted. Nice and simple. While I was waiting for primer to dry
I also trimmed the F-688 gusset as indicated on DWG 26.
It finally got late/cold enough that I called it a night. But for a
day that was a bit fragmented (went flying in the morning, did lunch
with some of the family, had to make an emergency tux run for my
son as he needed a vest exchanged and was running late for the
school formal!) I still got quite a bit done. I'm pleased.
Time : 4.5 hours |
| Gusset Work |
February 26, 2005 |
|
I cut the square holes (for the tip-up latch mechanism to go through
when the canopy is closed) needed in the F-757 gussets. I primed the
gussets, and clecoed them into place. I'll rivet as soon as I can get
a helper (and, yeah, I could do it solo ... but why if I don't have
to?).
I then pushed on to assembling the F-635 elevator bellcrank. I made
the spacer, match-drilled everything together, primed the aluminum,
and riveted. Nice and simple. While I was waiting for primer to dry
I also trimmed the F-688 gusset as indicated on DWG 26.
It finally got late/cold enough that I called it a night. But for a
day that was a bit fragmented (went flying in the morning, did lunch
with some of the family, had to make an emergency tux run for my
son as he needed a vest exchanged and was running late for the
school formal!) I still got quite a bit done. I'm pleased.
Time : 4.5 hours |
| Fabricated Spacers :) |
February 27, 2005 |
|
Most of my morning was consumed with making some changes to the stand
where I normally store my kayak. This was technically to make progress
on the airplane .... as I need to get the kayak out of the storage
building where the finishing kit will be unpacked. But, I really didn't
feel like that time was "loggable".
I did find time to fabricate the spacers used for mounting the elevator
bellcrank. These are small bits of tubing that needed to be cut and
smoothed on the ends. Cutting was a particular joy today as I picked
up a new 18TPI metal cutting blade at my local Lowe's (in the aviation
department) for my little bench top bandsaw. It cuts like a dream.
Time : 0.5 hours |
| Installed Bellcrank |
March 6, 2005 |
|
If you are wondering why the big break between fabricating the spacers
and now .... I've been sick and received my finishing kit. About
a week and a half got consumed with a vague nasty exhausting virus (or
so we are guessing). Then I got the finishing kit late in the day on the
4th, and spent Saturday and most of Sunday inventorying, organizing, and
storing all the parts (see the finishing kit section for details).
I'm not totally over whatever it was I had, but
I had to get something done (other than inventorying and organizing,
which needed to be done, but doesn't end up with anything actually put
together) on the plane itself. So ... I installed the bellcrank. Took
all of 15 minutes to make a final adjustment on the spacers, ream the
hole, install the parts, and torque the nut. But, hey, it is forward
progress. :)
Time : 0.25 hours |
| F-774 Match Drilling Prep |
March 7, 2005 |
I wanted to get my hands dirty tonight, and started the process of
match-drilling the F-774 to the J-stringers, support ribs, and the
F-757 gusset. HOWEVER, first I had to drill out the pop-rivets that
are in the QB fuselage. I also needed to draw a centerline on my
J-stringers, and was fed up with the Avery tool I bought (the ONLY
Avery tool to not give 100% satisfaction) ... and I made one myself.
It works MUCH better, even if it looks .. and is .. kinda kludged.
Time : 1.0 hours |
| F-774 Ready to Drill |
March 12, 2005 |
|
It has been a crazy week, and the weekend won't be much better. I
unfortunately have pressing "Real Work ™" to do before
Monday. However, as I was waiting with Theresa for her ride to arrive
(she is going hiking this weekend) I finished clecoing the F-774 in
place and double checked that the F-757 gusset was positioned correctly
for drilling.
The centerlines on my J-stringers wander a bit (the line is straight, but
the stringers want to twist when unattached to anything) so I'll have to
tug them straight as I drill .... but that'll be fine as long as I do
not drill my finger while holding a stringer in place. I have not
drilled a finger yet, and intend to be the exception to the rule that says
everyone drills a finger sometime during a project. Note to self .. watch
the fingers.
Time : 1.0 hours |
| Drilled F-774 Skin / F-757 Gusset / Baggage Floor |
March 13, 2005 |
|
Today is beautiful here in NC, and I'm out working in the garage. The
only problem is that I've got a case of "tennis elbow" (and
I don't even play tennis!) that is killing me. Clecoing and pulling the
drill trigger all make the arm/elbow unhappy. However, I was determined
to get the skin/gusset drilled.
After drilling everything I pulled the F-757 gusset out and countersunk
it for later riveting. I'll have to remember to NOT dimple the structure
under the gusset, and intend to mark the holes to not be dimpled once I
pull the skin back off again.
I also drilled out the pop-rivets holding the baggage floor pieces in
place to prep them for final installation. I need to countersink where
the platenuts go to prep for platenut installation. It took a little
bit of work to get those temporary pop rivets out, and then I had to
do some careful head-scratching (and taking a quick trip to Denny's
to double-check something on *his* RV-7, just to make sure my understanding
was correct). Better to go slow, than screw something up. :)
After confirming what I thought was the correct way to proceed by
looking at Denny's plane (and thinking a bit more, and studying the
plans for particular details) I think I got it straight. I clecoed
the baggage floors back in, and started to match-drill. Shortly after
that Theresa came home from a hike, Marilyn came over to see what
progress had been made lately, and dinner was ready. My work-time was
over for the day. :)
Time : 6.75 hours |
| Match-drilled Baggage Floors |
March 19, 2005 |
I had a little time today (and it might be the only time I have this
weekend) and went out and got a little done. I finished match-drilling
all of the various holes in the baggage floors. I countersunk a few
rivet holes, and then had to quit for the day.
Time : 1.0 hours |
| Started Seat Back Braces |
April 24, 2005 |
|
It has been a really exhausting month. You can look over on the Wings
section to see some work done (finishing up some riveting there) but
otherwise it has been a dead week. Between a nasty bout of cold/flu
that ran through the family (and had me down for over a week), Sun-N-Fun,
and a death in the family (my wife's cousin), we have gotten little
done.
However, this weekend we got all the camping stuff out of the garage
(from Sun-N-Fun), rearranged the shelves to have airplane-stuff down
lower, threw out some stuff that needed throwing out, and generally
got things in shape to get working again. Oh, and we had a house guest
this weekend as well (not that his visited really got in the way of
airplane work much, truth be told). Of course, none of those activities
counts as time in the builder log!
What I did get done is finding the seat back braces (F-638), did the
layout of the lightening holes, and drilled the pilot holes for them.
Rather than use my fly-cutter to cut all eight holes, I'm going to
run out after dinner and get a 2 1/4" hole saw to do the job.
Time : 1.0 hours |
| Seat Back Braces / Seat Angles |
April 26, 2005 |
|
I spent some time tonight cutting the lightening holes in the seat
back braces (F-638), and trimming the flanges on the end. They are all
shaped, deburred, and ready to have the hinge installed.
I also dug out the .125 and .064 angle I needed for the seat back
reinforcements. I cut all the angle to length, rounded the tops and
angled the bottoms of the seat side reinforcement angle, and buffed
the ends up with my Scotchbrite wheel. I still need to file the
.040 notch in the bottom of the side angles, and round the back of
the top reinforcement angles ... but then it'll be time to drill.
Time : 2.5 hours |
| More Seat Back Work |
April 28, 2005 |
I radiused the angles which cross the top of the seat back, and then used
my vixen file to cut the notches in the bottom of the four side angles.
I cut the hinges for the set back braces and am ready to lay out the rivet
holes for the hinge. Time to stop 'cause I have a meeting to attend to
tonight!
Time : 1.5 hours |
| More Seat Back Work (Again) |
April 29, 2005 |
|
This afternoon I drilled the hinges to the seat back adjustment braces
and then primed the braces. The hinges are now ready to rivet to the braces
and I'll likely do that very soon.
I also laid out the rivet holes on the seat side angles, and got two of
the four drilled. I now need to finish drilling the other two, and then
match-drill them to the seat backs. Maybe I'll get to that tonight, but
more likely it'll be tomorrow morning.
Oh! And my platenut order came in from Wicks, so I can finish up the
baggage floor this weekend if I get time (and if I get my conduit
installed under the baggage floor area).
Time : 2.0 hours |
| Drilled Seat Backs |
April 30, 2005 |
I finished drilling the two side angles for the seats, after having laid
them out yesterday. Then
I drilled the side and top angles to the seat backs. That doesn't sound
like much, but took all the time I spent out in the shop. :) I still need
to cut the bottom hinge, drill the bottom angle, and drill the bottom
hinge. Once that is done I'll debur, prime, and rivet it all together.
I sincerely believe I can get it all done tomorrow (since working tonight
is done as I have to get ready to go out to dinner with my wife!).
Time : 3.25 hours |
| Finished Seat Backs |
May 1, 2005 |
|
I finished drilling all the hinges and angles for the seats. They are
now ready to be deburred (what little I have not already deburred as
I went along), the angles primed, and riveted. Unless something goes
badly awry, I *will* have the seat backs finished today. Way cool!
Ok ... lunch is done ... and I am back at it ....
I finished deburring, priming, and riveting the seat backs. I also
riveted the hinge to the seat back adjustment brace.
I had to use my C-frame and a small 5-lb hammer to set the rivets on the
set back adjustment hinge (the half attached to the seat back itself). The
rest of the rivets went in easily with my pneumatic squeezer.
The seats are now (temporarily) installed and look great! I'm quite
pleased with how this all went together.
Time : 5.5 hours |
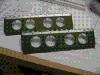
| Dimpled Baggage Floors / Started Front Tunnel Cover |
May 2, 2005 |
|
I dimpled the baggage floors, and then realized I could not find the
MS21051 platenuts I needed to finish the job. (I ordered some from Wicks.)
I also talked to Van's about running conduit under the baggage floors
and got an uncertain answer. I'll need to think about it a bit more
before I start to cut metal.
So I pressed on to the center tunnel floor, and found the .040 which
makes the cover itself, and cut the AZ6 for the support. As I was
shaping the AZ6, however, I mis-cut the left support so needed to order
more stock from Van's. Given that things are not going smoothly tonight
I'm going to listen to the fates sending me messages and will quit for
the evening!
Time : 2.0 hours |
| Drilled Baggage Conduit / Riveted Seat-Pans and Baggage Floor |
May 8, 2005 |
|
I ordered the missing platenuts (with dimpled ears, even) so am ready
to get back to the baggage floor. I also called Van's and they confirmed
(after some discussion, and I think a little mis-communication) that I
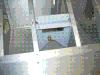
can run the conduit like I want. This morning I started very
cautiously drilling the holes for the conduit. I wanted to make
absolutely sure that I would not accidentally cut the rear spar
carry through bar. I made a drilling template, measured about a dozen
times, compared my vertical positioning with the square hole in the
center of the bulkhead (to make sure I used even less vertical
space than it did, just to be safe) and then I drilled. I drilled
to the closest size hole with my Unibit, opened it up a tad with my
Dremel, and then filed the edges clean. Once my large Adel clamps
come in I'll anchor the forward end to a seat rib.
After lunch I riveted in the aft seat pans (which were partially installed
on the QB fuselage already). I also riveted in the baggage compartment
floor ... NOT forgetting to install all the various nutplates. I also
(based on the assembly manual suggestion) ran a tap through all the
nutplates which hold on the baggage compartment aft wall down at the
baggage floor. The critical thing here is that I actually remembered
to do it ... and before riveting the nutplates in place, at that. :)
But .... my back is killing me. I've spent (as you see above) about
six hours on the plane today, most of which was spent bending over to
reach the fuselage floor. The fuselage is low to the ground, which
helps, but .... my back is killing me anyway. Time to hit the hot-tub
(and Advil)!
Time : 6.25 hours |
| Fabricated F-741A / Rivet Layout on F-741B |
May 10, 2005 |
|
Tonight was short night, but I wanted to get a little done. I screwed
up one F-741A support by mis-reading one cut line .. and had to order
some replacement Z-channel. However, I had enough left to fabricated
at least one of the supports, and did so tonight. Doing it the second
time around went much faster, even doing it right. :)
I also spent a little time laying out the rivet holes on the F-741A top
cover. I ran out of time to work on things tonight so that is where
I stopped. More tomorrow night!
Time : 1.0 hours |
| Fabricated Second F-741A / Fitted Tunnel Cover |
May 15, 2005 |
|
This weekend (heck, the whole week) has been hectic, but I did want
to "touch the project" at least a little today. I got my
bit of replacement Z-channel and in very short order fabricated the
second (right) F-741A. I then drilled both supports to the nutplates
already in the plane, drilled the cover plate itself, and then drilled
the cover plate to the supports.
Once everything was drilled I countersunk the rivet holes in the
supports and dimpled the cover. I've got to wait until it isn't
threatening rain out there to prime the supports (since they are not
ALCLAD), so I'm calling it a day.
I have no plans for the upcoming week, or the
weekend, so I'm hoping to get back on track with building. This last
week was a washout due to family responsibilities and then needing
(and wanting) to drive Theresa to Damascus, VA to attend "Trail
Days", a backpacker gathering. It was lots of fun, and
well worth the driving. Today I caught a little of the last day of
the Lumberton fly-in, but came home early so I could at least get a
bit of work done on the plane. I'm glad I did.
Time : 2.0 hours |
| Primed Tunnel Cover Parts |
May 16, 2005 |
I had almost NO time to work on the plane today, mainly due to a broken
hot-tub heater I had to troubleshoot (the igniter module is dead, which
happens .. of course .. to be about the most expensive part that could
fail). BUT, while I was working on the hot-tub heater I took out a bit
of time to prep and prime the tunnel cover parts. They are now ready
for assembly. (And, I "touched the project" again today ...
which is a "Good Thing ™". :)
Time : 0.5 hours |
| Riveted Tunnel Cover |
May 17, 2005 |
|
I had a little time while a work activity ran (and ran, and ran) so since
my computer was worthless while it cranked on that ... I walked
away and set a few rivets. :) Sad to say, even that didn't use up enough
time for this particular activity to be done. So I'm making this
entry while it finished. I need a new machine, and am due a refresh in
September! Woo hoo! I can't wait. It is only May, of course, so I have to
suffer just a little longer.
What did I do? I set the rivets in the tunnel cover. Not a big deal, but
another small step forward. I hope to get more done tonight if our regular
Tuesday night "financial update evening" doesn't run too late.
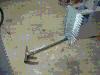
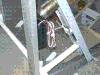
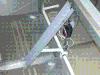
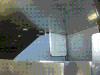
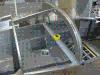
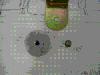
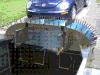
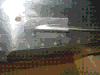
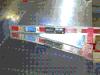
During the evening I got a little time to work, and installed the Adel
clamp on the forward end of my under-baggage conduits. I've included a
picture of how that went together.
Afterward I started collecting up parts for the forward covers, including
the altered parts needed for the high-pressure fuel pump for the fuel
injection. Studying the plans it looks like no real problem making the
alterations.
Time : 1.5 hours |
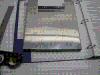
| Trimmed Forward Fuselage Covers |
May 24, 2005 |
I spent some lunch-hour time today working on trimming the front covers.
These are the covers that go over the fuel lines from the fuel selector
valve .. and which also cover the FI fuel pump. For the FI pump the
supplied covers have to be trimmed and some new pieces have to be
installed. This accounts for the larger size of the FI pump and filter.
I have a little more trimming and filing to do, but am close to having
them ready to install.
Time : 0.5 hours |
| Drilled Forward Fuselage Covers |
May 28, 2005 |
|
I drilled the various fuselage cover pieces (baffle, etc.) together. Since
I couldn't prime (rain) I also started on the stick book retaining rings.
I couldn't believe it, but after cutting out two I realized I picked up the
wrong measurement off the plans ... and cut them too small. Sooooo ... I
had to lay out another pair, and cut them. Oh well.
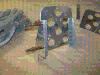
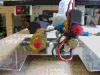
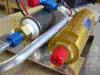
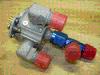
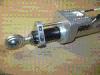
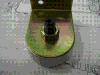
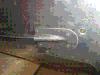
I also spent a little time scratching my head over the AFP fuel pump. As
I look at the plans, the "T" AN fitting that comes off the gold-colored
check valve indicates that the leg of the "T" should come off pointing
horizontal if the manifold on the pump is vertical. Mine, on the other
hand, comes off at a 45 degree angle down. Unfortunately this causes
the tubing to hit the filter, which will never work. Time to do some
investigation.
Time : 1.5 hours |
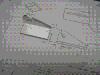
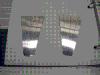
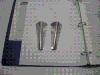
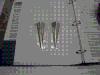
| Fabricated Stick Boot Covers |
May 28, 2005 |
|
I finished cutting out the stick boot covers, and then remove the metal
in the middle. A bit of drilling, nibbling, Dremel-ing, and then filing
got the job done.
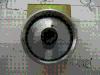
I also talked to
Walter Tondu, a builder who had the same problem with the AFP fuel
pump fit, about my situation.
In the end he felt mine was even worse off than his, and we concluded that
the smart solution would be to call AFP and talk to them. Since they are
just a few hundred miles away (145.5NM, to be exact) ... if need be, I
could even go there and get my problem resolved (one would hope).
We'll see what they say. I am going to include a few pictures here so
you can see the problem I am talking about.
Later in the day I found a little more time to work and made the last
cutout on the forward cover, as well as getting the heat baffle primed.
With a little more filing to clean up the latest cuts I'll be ready to
assemble the baffle to the forward cover.
NOTE: I did go to AFP, and they were fantastic. They adjusted the angle
of the fitting and re-made the pre-fabricated line that comes with the
pump. They also bench ran my pump and verified that it had no leaks and
that it produced adequate pressure. GREAT SERVICE!
Time : 3.75 hours |
| Riveted Forward Cover Baffle / Nutplates |
May 30, 2005 |
I spent a little time on this Memorial Day and did a little riveting.
I got the heat baffle riveted in place, along with all the nutplates
on the forward cabin cover.
Time : 1.25 hours |
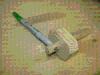
| Fabricated Vent Line Fittings |
June 2, 2005 |
|
I've been sick a week, and then after that went out of town for a week,
and when I got back decided I really needed to do some reorganizing and
cleaning in the shop. I spent some time today on that, and then wanted
to make *some* small headway on the airplane .... so fabricated the vent
fittings.
These are the bulkhead fittings that go at the far end of the tank vent
lines under the fuselage. I wrapped duct tape around the threads of
the fitting and chucked it into my drill press. Then I used my vixen
file to make short work of the threads, and cleaned it all up with some
emery cloth. After that I made a quick 45-degree cut on the cleaned up
end and neat-ened up the cut with my disc sander. A nice easy focused
task, that at least let me log and hour or so of work on the plane for
the day.
Time : 1.5 hours |
| Forward Center Covers |
August 7, 2005 |
|
I've not been out working due to the heat/humidity which has hit
spectacular levels this summer, even for North Carolina. I went out
and *forced* myself to work today, and made some forward progress.
I got the mounting plate for my AFP fuel pump final-fitted and primed.
I riveted on the angles and primed the assembly. It is ready to install.
Time was also spent on checking the fit of other covers that go into
this area with an eye toward final drilling and fitting of nutplates.
I'm ready to have this annoying area completed.
I finally had to stop due to the heat/humidity. I was soaked, and I
was continually dripping sweat on the parts, the plans, and the assembly
manual. Yuck.
I also spent a little time .. while waiting for primer to dry .. fixing
the alignment of my flap hinge on the right wing. Riveting has caused
some mis-alignment of some of the hinge eyes, and sliding the pin in
slowly from eye to eye identified the poorly aligned ones and a little
tweaking set them straight.
Time : 3.5 hours |
| Odds and Ends Day |
August 13, 2005 |
|
Once again the heat (and work) last week kept me away from airplane
work ... but I decided to brave the heat/humidity today to see if I
could get a LITTLE done. (Of course, most of the day was consumed
with shopping for a bathroom refinishing job we are undertaking!)
I didn't want to get into anything heavy, so I did a number of odds
and ends. I routed the rudder cables (before things were so closed
up they would become hard to route), trimmed the mounting plate
for my newly received Andair fuel valve, mounted the platenuts on
the fuel valve plate, and Unibit-ed the mounting hole for the fuel
valve.
Note, to make the Andair fit as easily as possible I ordered one
that had right-angle fittings for the two inputs (rather than the
female fitting that comes by default if you order from Van's). I
also got an Earl's adapter fitting. It was called a "-6 Female An
Swivel on Run" fitting, part number 926106ERL. You can find them
at many online hot-rod parts outlets. (I love the name .. as the
image that a 'female swivel on run' conjures up just proves that
I am a dirty old man!) Not cheap, but it has normal male
-6 AN fittings on one arm and middle of the T, and on the the
other arm of the T is an AN nut. That allows the fitting to be
screwed directly into the output of the Andair valve making a very
nice neat installation. Cool! :)
Time : 2.5 hours |
| Cut 1" Hole for Andair / Trimmed Plate |
August 26, 2005 |
While waiting for Pete to arrive so that I could put a bead on a
piece of tubing for him ... I cut the 1 inch hole in the fuel valve
mounting plate for the Andair fuel valve. I also trimmed the triangular
flange from the end of the plate (since I'm going with electric trim,
and don't need the flange for the manual trim) and deburred all of
the edges.
Time : 0.75 hours |
| More Forward Center Cover Work |
August 27, 2005 |
|
I installed platenuts on the Andair fuel valve, laid out and drilled
the mounting holes for the valve, mounted platenuts on the fuel valve
plate, and primed the plate. I also drilled, dimpled, and primed the
fuel pump cover pieces and are ready to rivet.
You can also see the Earl's fitting in the pictures here. It is the
perfect item to help make the tubing runs easy in this tight spot!
A side note .. today is beautiful. Temps in the 80s and low (relatively)
humidity. Maybe we are finally going to get back into airplane building
weather again! Thank goodness.
Time : 3.25 hours |
| More Forward Center Cover Work |
August 28, 2005 |
I drilled the fuel pump mounting plate to the fuselage, riveted the
fuel pump cover together, drilled it to the fuel pump mounting plate
and the fuel valve cover assembly. If we weren't going to have guests
in an hour I'd finish drilling the front cover to the fuselage, but I
am outta time for today (for now, at least).
Time : 2.5 hours |
| Finished Forward Center Cover Work |
September 3, 2005 |
|
I finished up the forward covers, finishing the drilling, priming (now
that I have a new stock of primer), and installing of platenuts. Hard
to believe it can chew up 5 hours doing just those tasks ... but it is
a lot of small tedious steps, each taking their own bit of time.
We also had Tracy and Mike come over today so that Mike could use the
plane as a "photo subject". We set up, took a few shots, went and ate
Dim Sum, then came back and finished it all up. A nice little visit, and
Mike even got pressed into helping me set a few rivets. :)
Time : 5.25 hours |
| Installed Crotch Strap Kit |
September 4, 2005 |
|
I started fresh on the crotch strap kit, and stripped the blue plastic
off the parts this morning. By this evening (including a break for lunch
and helping my wife with the grocery shopping) I pulled the last pop
rivet. Nice to start and finish one whole assembly in a single day of work!
I decided to detour and do this instead of installing the flap motor
assembly just because it seemed a good thing to do. Tomorrow, with
luck, I'll get the flap motor assembly installed. :)
Time : 6.5 hours |
| Fabricated F-766B Flap Actuator Angle |
September 9, 2005 |
I had just a little time before heading out tonight, so I grabbed a bit
of angle and fabricated the part. I find it so satisfying to take a small
piece of raw material and end up with a functional/functioning part. :)
Time : 0.5 hours |
| Flap Actuator Assembly |
September 10, 2005 |
|
Today was flap actuator day .. and I collected up the rest of the parts,
drilled the flap torque tube clevises, and (after some consultation with
my EAA Technical Adviser, who I caught over at Denny's) drilled the flap
actuator itself for the rod end bearing safety wire. I only sacrificed
two of my tiny drill bits ... but the safety wire hole came out
perfectly.
In the afternoon/evening (after quite a few family-related chores had
consumed a bit of my day) I finished drilling the bearing blocks for
the flap actuator torque tube. I installed the whole assembly in the
fuselage, though I have not drilled the bolt holes for the center bearing
block yet. I'm outta time for today, and will take care of that tomorrow.
Time : 4.25 hours |
| Flap Actuator Assembly (continued) |
September 11, 2005 |
|
I put the actuator weldment in place (with the ends in their respective
bearing blocks), drilled the bolt holes for the center bearing block,
installed the nutplates, and bolted the whole assembly into the fuselage.
Tedious, and backbreaking since I've not yet resorted to putting the
fuse on a "rotisserie". :)
In the afternoon I worked on the F-766 assembly, getting the platenuts
installed, the lower attach brackets riveted, all the parts drilled (except
for final drilling the top attach bracket for the rivets), and all the
parts (again, except for the top attach bracket) primed. I'm close to
done with the whole assembly, but out of time for today.
Time : 6.25 hours |
| Flap Positioning Sensor Installed |
September 17, 2005 |
|
I am, unfortunately, sick with a cold this weekend and it is going to
badly cut into my building time. I decided I could piddle on the plane
as long as I didn't mess with anything that couldn't be fixed
without ordering new parts. :) This means no drilling, no cutting, and
no bending of metal.
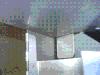
So I installed the sensor (mainly a notched rod, with some microswitches
to sense the notches) for a flap position system on my flap actuator
assembly. You can see in the picture how it goes on, and there was no
way I could mess this up. :)
As a note, the system is from a company called "Show Planes", and was
purchased from Van's. It looks like a nicely done little system.
Time : 0.5 hours |
| Flap Actuator Assembly (continued) |
September 18, 2005 |
|
Miracle of miracles ... I woke up this morning feeling pretty darned
good! So, leaping at the opportunity I worked on my plane. I installed
the front and back braces (again), and after rectifying a small problem
I put the side covers on and drilled the back brace to the side covers.
The small problem was using universal rivets to hold the reinforcement
plate for the flap actuator bolt rather than flush rivets. This caused
a small interference problem with the side covers ... of course.
Drilled 'em out, countersunk/dimpled, and put new rivets in. Problem
resolved.
I also fabricated a bracket for the flap controller. I created a couple
of Z-brackets out of back-to-back light angle, and put #8 nutplates on
so I could screw the controller box in place. This will be tucked inside
the covers for the flap actuator assembly and will be nicely out of the
way.
I did much priming, nutplate riveting, drilling, fitting, and such
activities today ... but did not finish. I'm close, though! At this
point I'm feeling a bit tired and like I should not push it on the off
chance my cold relapses.
Time : 6.0 hours |
| Flap Actuator Assembly (continued) |
September 22, 2005 |
|
My cold is finally on the way out ... and, it did relapse. I don't know
why I got a break last Sunday but I'm not going to complain about it. :)
I spent a little time tonight figuring out how to use the new crimper
dies I got for my ProCrimper II. They are different from the other dies
I've bought ... with a number of extra parts. There were NO instructions
from Digikey, but I found a datasheet on the Mouser web site (bless Google!).
With that in hand I was able to install it with zero problem, and it
worked like a charm. I'm quite happy. If I didn't have to run back out
to work tonight I'd finish the flap actuator installation ... as all I
have to do right now is bolt/screw it all in place.
Time : 1.5 hours |
| Flap Actuator Assembly (completed) |
September 23, 2005 |
|
I confirmed (with Van's) about the hardware needed to attach the rod end
bearing to the flap actuator weldment .. and finished up the install of
the flaps tonight. I also got my shipment of slightly larger Mate-N-Loc
connectors from Digikey and installed a connector on the end of the
flap controller wires. It sure makes for a nice tidy termination of
the wires.
I now need to go finish up one small thing on the Wings ... the
installing of the flap on the left wing. Ok, maybe it isn't small, but
it does need to happen. :)
Time : 2.0 hours |
| Flap Actuator Rod-End Bearing Safety-Wired |
September 25, 2005 |
|
Ok, yeah, I know in the previous entry I said the installation was
completed. I forgot to safety-wire the jam-nut on the rod-end bearing
so pulled it partially apart to take care of that. Tedious, but not a
big deal. I feel better making that small bit of extra effort since they
do call it out on the plans.
I'll just note here as well that I installed the one other piece of tubing
on the fuel pump assembly that doesn't go "somewhere else". That is to
say, off to the fuel valve or the engine. I'll install those pieces of
tubing once I perform the final install of the pump in the fuselage. It
only took me two tries to get this one piece of tubing fitted. :)
NOW ... off to do a little finishing up work on the left wing. :)
Time : 0.5 hours |
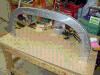
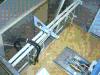
| Prepare to Trim Rear Spars |
September 26, 2005 |
|
I wanted to first find the trim detail for the rear spars, and then
lay out the areas to be trimmed ... and then walk away. Tonight gave
me the perfect opportunity to do this as we are going out to dinner
so I had a half-hour between the end of the work day and when we are
thinking about leaving.
I did a couple of things to help insure that I have the area laid out
correctly. First I Xerox-ed the trim detail from the plans (sheet 38)
and cut it out like a paper doll. I then used the dimensions from the
plans to lay out the cut lines. To confirm my layout I took my "paper
doll" and lay it on the end of the spar, lining everything up carefully.
I confirmed that the area I had marked off aligned with the areas on
the Xerox-ed paper ... and they did.
I'm now going to call Van's, confirm that I'm doing the right thing,
and ask advice on how best to cut the spars. I believe the
way I'm going to do this is to clamp some "guard metal" in place
outside the lines (say, maybe 1/8" to 1/4") and then cut the bulk of the
material off with a cut-off wheel on my die grinder. I'll then finish
up the remainder of the removal of material with files. The final
clean up will be with a small Scotchbrite wheel on my die grinder to
polish out any file nicks. I'll update this with the actual procedure
(and how it goes) when done.
Ok .. just talked to Van's, and the "hatched area" on the plans is
the MINIMUM of trimming that will be needed. Gus felt sure I'd likely
need to trim a little more. Therefore, the first cut can be done with
a hacksaw and don't worry about polishing until the final fit has
been made. This means that fitting the wings will be iterative, which
is fine by me as it allows me to remove no metal other than just
what is needed to get the fit right.
Time : 0.5 hours |
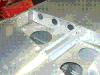
| Prep for Wing Fitting |
September 29, 2005 |
|
I spent a few hours today getting ready to fit the wings to the fuselage.
The first thing I did (at lunch, not counted in the hours listed here) was
pick up four 7/16" bolts. This is to avoid using my beautiful close tolerance
bolts for trial fittings of the wings!
This evening I took the bolts to my bench grinder and knocked off the
threads to create homebrew "drift pins". I cleaned the grinding up with
my Scotchbrite wheel and I think I'm good to go now. I also pulled the
false spar out from the center section, so that area is now free to
accept the wing spars.
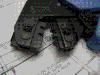
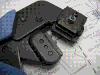
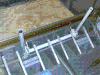
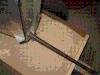
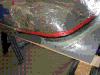
I also took the plunge and did the first bit of trimming on the rear
spars. I have to say I was nervous, even though Gus said this was a first
trim and would certainly not be the last. This initial bit is the MINIMUM
that can be taken off, so worrying too much about cutting right to the
line isn't worth the effort.
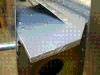
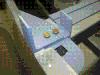
I worried anyway, and was very careful about this trim. You can see the
results (not very polished, as I took Gus' word that polishing was a real
waste of time at this point) in the pictures here. I did take his
advice in one regard .... I used a hacksaw on the end piece as it was the
quick way to make the cut. For the underside I used my Dremel and a bit of
filing to get to the line.
Time : 2.25 hours |
| More Prep for Wing Fitting |
September 30, 2005 |
|
Today was mostly spent running around picking up odds and ends to
finish my wing fitting task. I got some wood to make some supports
for the fuselage stand ... to get the wheels off the ground. You do
not (I don't believe) want the fuselage rolling away from you as you
try to install the wings. :)
I also picked up a few more plumb bobs, a laser "chalk line" tool,
another big Vise-grip clamp (to match the one I already have), and
filling the real chalk line with blue chalk.
Time was spent in the shop getting things cleaned up, stored,
stowed, and generally made ready for lots of movement of big airplane
parts. I also fetched the wing root fairings from the storage building
to have them on hand for later.
Generally I don't log my "running around time", but I did spend a bit
of time in the shop today ... and am going to credit myself with an
hour of work. I'll be doing little tomorrow as I believe we'll be going
up to VA for the EAA fly-in there, but on Sunday we'll fit the wings
(with help from a friend or two).
Time : 1.0 hours |
| Wing Fit Questions / VA EAA Fly-in |
October 1, 2005 |
|
I had a number of questions regarding the process of fitting the wings
to the fuselage, as well as some bolt fit/alignment questions. We went
to the Virginia EAA Fly-in this year, and ran into Mitch Lock (the east
cost trouble-shooter for Van's aircraft, and all around good guy). Rather
than delay 'til I could talk to Van's on Monday, I was able to get all
of my questions answered by Mitch! Very convenient. Oh, and the fly-in
itself was nice too. :)
|
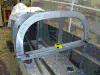
| Fit Wings to Fuselage! |
October 2, 2005 |
|
This was a big day. In the morning I tapered my drift pins a little more
on the advice of Mitch. Also, if you look earlier in the Fuselage log page
you'll see that my fuselage
is on a rolling dolly/stand. This is great most of the time, but sucks
when you are trying to wiggle wings into the spar carry through box. I
spent some time this morning making some "risers" that lift the stand
up a few inches .. just enough that the wheels are off the ground. They
worked great. I also spent a little time figuring out which holes
in the lower skin are used for wing root fairing screws, and putting rivets
in all the rest. I also marked three inches in from the center of each
soon-to-be screw hole, and even created a little marking/drilling jig to
make the job a little easier.
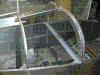
After a break for lunch, Pete Beal came over to help fit the wings. We
fiddled with setting up the fuselage, marking the centerline, and getting
ready to actually plug in the wings. When we did that step we brought
Theresa and Marie out, and they helped heft the wings into place. The
first (right, sticking out into the driveway) wing plugged in easily,
but the bottom drift pin was VERY stubborn. The second (left,
pointing into the garage) wing didn't want to go in .. and we had to
fiddle a bit before we realized the rear spar was hitting the rear
attachment fork on the fuselage, and we had to wiggle things into place.
Those drift pins went in very easily.
We had to install/remove/install/remove the left wing a few times to trim
the rear spar by a few 16ths. My new small vixen file made short order of
the trimming. I/we also used a StraitLine laser line tool to make sure
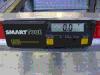
the wings/fuselage were totally square, and that the wings had NO sweep.
We also used my SmartTool level to make sure everything was level within
a tenth of a degree (overkill .. for sure .. but comforting).
|
|
We are taking a break while Pete meets his wife for dinner, and when he comes
back we'll do a final check on incidence and will clamp/drill the rear spar
attachment bolt holes. Once that is done we will take the "driveway wing"
(right) off and put it back in the cradle so we can shut the garage door
again. I'll finish off the work (fuel line, vent line, tank attachment
bracket, wing root fairing) on the left side first .. and then we'll swap
wings. By doing one wing at a time I can keep the option of being able to
shut the garage .. and otherwise, I'd be out of luck. We have a 2-car
garage, and maybe if I had fewer benches we could fit it all, but I LIKE
my benches.
While Pete was at dinner I confirmed all the measurements, triple checked
the angle of incidence, quadruple checked the edge distance, marked the
location where I wanted to drill, and got everything ready for the actual
drilling of the rear spars. When Pete got back we very carefully put drill
to metal and slowly drilled the holes. I drilled a "dimple" with my long
#30 bit, then drilled the initial hole with the long 1/4" bit. We then
final-sized the holes with the 5/16" bit.
Once that was done we removed the right (driveway) wing and put it back
in the cradle in the garage. We lifted the tail so I could get my low
rolling table back in the garage as well, and called it a night. Since
I had taken the right wing back off (so we can close the garage door) I
confirmed that I had PLENTY of edge distance ... so I am one happy camper.
It was a long day, but we got a lot done. I see it as a real milestone
day. Thanks everyone (Pete, Theresa, Marie, and Kat) for all the help!
Time : 8.75 hours |
| Test-Run Flap Motor Controller |
October 4, 2005 |
|
To get ready for cutting the flap control rod holes, I needed to be able
to run the flap motor. I wired up a switch (through a Mate-N-Loc connector)
as per my wiring diagram and gave it a try. I used my 12V power supply to
run the whole deal, and it worked like a charm. A single down-click of the
momentary switch runs it from one flap setting down to the next flap setting
.. and flipping the switch up (and leaving it there, non-momentary) runs
the flaps all the way up. Precisely the behavior I wanted. It was
a small achievement, but gratifying.
As a side issue it allowed me to test out all my new crimping dies as I had
to crimp AMP pins/sockets, as well as PIDG terminals. Everything worked as
advertised.
Time : 1.25 hours |
| Drilled Belly Skin to Wing Screw Holes (not quite) |
October 6, 2005 |
|
Ok ... by "not quite" I mean ... I didn't. I have a very very close fit
situation at the back edge of the wing. I only have 5/32" of edge distance
for the screw hole, and that isn't enough to fit the #8 dimple. I talked
to Van's and got a variety of suggestions, but wanted to find out exactly
how much overlap there was. I created a "feeler gage" from a bit of .025
and just bent a little "hook" on the end. I slid it between the wing and
the belly skin, pulled it snug against the wing edge, and used a sharpie
to mark the edge of the belly skin. I have a full half-inch of overlap
so do have some wiggle room.
On the front edge I have even more overlap, and in fact after moving just
two holes from the rear I end up with enough clearance. I did some test
dimples close to the edge of a piece of scrap .025 and discovered I could
go as close as 7/32" and still have room to spare for the dimple ... and
could get even closer without cracking (but I don't want to).
What I'm going to do for those two rear-most holes is move over by a tiny
2/32" to give me the 7/32" I want/need, and then going forward just drill
where they should go. I do NOT like having to "fudge" .. but .. I've not
had to do it often, and so I guess I should not complain. I did want to
rest on it all to make sure everything is going to work out and that I am
not overlooking anything (though this *is* one of the suggestions I got
from Van's).
I spent a little more time studying page 36 for all the fuel/brake line
routing, so feel ready to jump into that when I finish up with the wings.
I also clecoed the tank reinforcement angles on the inside of the fuselage
preparing to drill the tank support bracket holes.
Time : 1.75 hours |
| Odds and Ends |
October 8, 2005 |
We have company coming over today so I didn't want to get into anything
too heavy. So I did a number of odds and ends. I drilled the holes for
the brake lines to pass through in the center rudder pedal brace (after
engaging in a hunt to find the darn thing, as it had gotten misplaced).
I pulled out the control sticks and started to prepare them to be
installed. I pulled down the aileron pushrods (previously fabricated)
and the tubing to fabricate the elevator pushrod. I reamed out the
brass bushings in the control sticks, and drilled the holes to clean
out the power coating in preparation for running bolts into the holes
on the control sticks as well. All useful stuff that had to be done,
but nothing really concrete to show for a few hours work. :)
Time : 2.25 hours |
| Drilled Belly Skin (Left) / Fit Fairing / Drilled for Tank Bracket |
October 9, 2005 |
|
I spent the morning getting ready to drill the holes.
This included arranging to jack up the fuselage a little further, getting
all my tools in place, and then deciding I *still* can't fit under there
easily enough to drill the holes while laying on my creeper even
with the fuse jacked up. I'm went to Wall-Mart to buy another roll of
the universally handy "blue foam pad" that I've used before. I could have
just laid on the concrete, but I want to be as comfortable as possible so
I get these holes *right*. Since I'm dealing with some picky edge distances
I want everything in my favor.
I got the bottom holes drilled (delaying the one that overlaps the
wing-root fairing until fitting the fairing). I then fit the fairing
and drilled it (after some fiddling and concern about hole position).
With that done I bent and drilled the holes for the tank attach bracket.
Finally, I slid the aileron pushrod into the wing for final fitting and
adjusting, but then ran out of time for today. I'll finish that up one
night this week. The only thing I have left after that point is to cut
the flap pushrod hole, then this wing can come OFF.
Time : 5.25 hours |
| More Odds and Ends |
October 16, 2005 |
|
I had intended to finish up my left wing today (to be ready to pull it
off and put on the right) ... but could NOT find enough of the flap pushrods
AT6 material to fabricate them. Clearly I had not planned ahead and had
either mis-placed a piece, or used it up for spacer material. I'll just
order more from Van's. So the cutting of the flap rod exit holes could not
happen this weekend.
I did bolt the aileron pushrod to the bellcrank, so that is done. I also
started installing the control sticks, and only stopped that process
because I wanted to think real hard about how I wanted to attach my
co-pilot control stick (I'd really like to NOT use a bolt, if possible,
to make it easier to remove). I found all the parts needed for the next
steps ... except for the above-mentioned flap control rods. I also got
down the two elevator pushrods, and drilled the small one for its rod
end bearings. I stopped short of finishing them up because that would
entail coating the inside of the rods with primer, and I'm out of time
for today.
Time : 4.5 hours |
| Flap Pushrods |
October 28, 2005 |
|
Yeah .. I had long break here. I was out of town last weekend and during
the weeks work has slammed me with some urgent activities. I was also
waiting on an order from Van's (you know how that can be). It came
in today, and my replacement AT6-058x5/16x9 stock came in. This means I
can get back to fabricating and installing my flap pushrods. I cut the
two rods to length, and even got one threaded.
My first attempt (a few weeks ago) at drilling and threading was not at
all adequate. I had two problems. Drilling/tapping the hole straight was
not achieved, and holding the tube in place well enough to tap it an inch
deep was ... well ... a disaster. I'll tell you what I did to get past
these problems (without resorting the the metal lathe I don't own).
I asked some metal-fans I know of (the guys on a knife-making list) how
they would approach the problem. The best suggestion I got was to take
two pieces of hardwood (like some 1x2 oak, which is what I had on had)
and clamp them on their sides in the drill press vise with a bit of paper
(like a business card) between the two pieces. Then take a drill which
is the OD of the tube, and drill all the way through the wood. Once the
pieces of paper come out it is SLIGHTLY undersize, and will serve as a
homebrew clamp all the way around the tube.
After that it is easy. Step drill up to the size desired without moving
the tube between bit changes. Chuck the tap into the drill press (making
SURE it is unplugged or otherwise disarmed) and start the tap. Once you
get to the point where the tap is WELL into the tube and it starts to get
hard to turn the chuck by hand .. you can loosen the chuck and put a tap
handle on the tap. You are already in straight at that point and it is
just a matter of driving for a little more depth. I did use a countersink
cutter to put a SMALL bit of a chamfer on the inside of the whole before
starting the tap to help center it. The tap was a taper-style tap, but I
think the chamfer helped get things started very centered.
Works like a charm. My first one came out perfect. I now have three more
to do, and it'll then be time to use my Dremel to cut holes in the fuselage.
*shudder*
Time : 0.5 hours |
| Flap Pushrods Finished / Left Flap Hung |
October 29, 2005 |
|
The hour-count is so low today because most of the day was spent helping
my daughter build a Lyre for a school project. To be clear, SHE did all
the work with me supervising and instructing on how to use the tools. So
far she has run the drill press (cutting out eight 2-inch holes with a
hole saw), used a jig-saw to do some bulk stock removal, and a rasp to
rough-clean some of the inside holes. She's doing great. :)
During the time she was working solo, I worked on finishing up the flap
push rods. That was done easily enough ... at the cost of one 1/4-28 tap.
Yeah, I broke one. So it goes. I also got the left flap hung. Those hinge
pins are a PAIN to install, but I did it. My hands may never be the same
though. Now it is time to install the pushrods and I'll get to that this
weekend *if* my daughter doesn't need too much more time (but working with
her is a real joy, so I ain't passing it up for the world .. and the plane
will just have to wait).
Time : 2.5 hours |
| Sticks Installed / Flap Finished |
October 30, 2005 |
|
I spent a good bit of time today getting the sticks installed. The amount
of time expanded due to a number of things. One is interruptions with the
continuing help on the Lyre project. :) Quite pleasant interruptions as I
enjoy working with my kids. But it did cause me to stop and then have to
pick back up work repeatedly taking more time. The other thing pushing out
my time was the need to be able to work in the cockpit. I finally took out
the shipping cross-brace, cleaned up the front cockpit, and put in my
temporary "floor board" (i.e. an appropriately sized piece of plywood).
Once that was done I could kneel in the cockpit to work on the sticks. They
are now in, and the one aileron is temporarily bolted in place (to be taken
off again when the wing comes back off).
In the evening I finally cut the hole for the flap push rod. It wasn't as
fiddly as I had feared it might be. It sure helped clearance when I finally
remembered to put the star washer (with a regular washer under) on the CM-4MS
stud. Until then the thin jam-nut was hitting the opening on the side of
the fuselage.
I am now finally ready to REMOVE the left wing, and start it all over again
on the right wing. :)
Time : 6.25 hours |
| Elevator Pushrods Primed Internally |
October 31, 2005 |
I had just a LITTLE time before the ghosts and goblins started to show up,
so I went out and ran some primer through the insides of the elevator
push tubes. Now they can dry really well before I close them off. Oh,
and ... Happy Halloween!
Time : 1.0 hours |
| Elevator Pushrods Assembled |
November 2, 2005 |
I went straight out to the garage to work on the plane after work-time was
past, and got the two elevator pushrods drilled, and their ends installed.
They both still need to be primed, but I need to do that when it is not so
dark outside, and not so chilly either. I'll likely wrap them up this
weekend (as since we are back to standard time ... it is really hard to
get out and work *before* it gets dark and chilly on weeknights).
Time : 2.0 hours |
| Redecorated Garage |
November 4, 2005 |
Ok ... what I mean by that is we took one wing off, moved everything
around, and put the other wing back on. I appealed to Marilyn to come
help Theresa and myself, and she was (as always) a real champ. Theresa
and Marilyn hefted those wings, hauled them around, and helped me wiggle
the right wing back into place. This was, of course, along with having
to try the fuselage in just about every orientation (except inverted)
to get things to fit. In the end we put it in the orientation I had
all along assumed we would have to use.
Time : 1.5 hours |
| Drilled Belly Skin (Right) |
November 5, 2005 |
|
Today was Christopher's 18th birthday, and we spent a good bit of time
this morning celebrating (and will celebrate more later, but he is out
with friends this afternoon). Therefore, I got started a little late
this morning ... but made good progress. The belly skin (right) to
wing root holes are drilled.
After lunch I fitted the wing root fairing and the tank attach bracket.
I also installed the aileron pushrod onto the aileron bellcrank (with
the TruTrak roll servo). Tomorrow all I need to do is fiddle with the
sticks a bit, install the flap, cut the flap pushrod exit hole, and
adjust. Once that is done (and that is easily done in a light day of
working) the wing can come back off. This round was MUCH faster due to
having gotten it all figured out on the other wing first.
Once I finish with the wings (installing platenuts, mainly) I may well
store them off-site until needed again. That'll give me a LOT more room
in the shop ... room I'll need for painting, canopy work, and eventually
(in a year) the firewall forward effort.
Time : 3.75 hours |
| Aligned Sticks / Carved Flap Hole / Shop Cleanup |
November 6, 2005 |
|
I spent the early part of the morning getting straightened up, priming
a part or two, and then aligning my sticks (finally). Before I endure
another round of getting aluminum chips in my hair I'm going to go get
some lunch ... then after lunch I'll install the flap, and cut the exit
hole for the flap pushrod.
I did cut the hole for the flap pushrod, and this time actually needed
to trim the flap a bit to fit. It was just barely scraping along the
side of the fuselage. A little file-work did the trick. I got that done
and with the help of Dennis Roberts (a new RV-7 builder himself, who
came to visit and spend a little time working with some of the tools)
we got the wing off and back in the cradle. I now need to figure out
my strategy for moving forward, as I think I really need to paint
before I do any more work in the cabin. Sadly, I'm not ready and the
right wing went MUCH faster than expected. I'll figure out how to use
a little of my time up though .... there is plenty to do. :)
Time : 4.5 hours |
| Fabricated Rudder Cable Exit Fairings |
December 3, 2005 |
Well, maybe. I took a crack at making rudder cable exit fairings, and they
came out OK but not "perfect". See
Sam Buchannan's
fuselage page eight, in about the middle of the page, for details.
I need to decide if they are good enough or not, but lean toward using
them as I think they are plenty good enough. We'll see. :)
Time : 1.0 hours |
| Odds and Ends |
January 1, 2006 |
|
A long while back I mis-drilled a forward longeron when installing the
brake pedals for the first time. I solved the problem by drilling out
the longeron upon which the pedals rest, and re-fabricating it. I've
long needed to re-rivet it in place, but simply have had other things
distracting me. Theresa and I finally installed the rivets today and
did so in short order.
I also set most of the rivets in the tailcone, mainly because there was
no reason to not finish them up. Theresa will need to help me drive four
remaining rivets (that look like a real pain to set).
I started moving forward on getting the fuselage cabin ready for paint.
All the random junk that had collected in the fuselage was removed, the
cabin had the shop vac used on it, and I removed the flap actuator and
torque tube. I also preped the side panels that cover the portion of the
spare carry-through that runs up the side of the fuselage ... installing
a few platenuts now in case I ever want to mount something later. I'll
fill the holes with screws until needed one day, and I made them flush
so they would be somewhat less obvious.
Finally, I pulled all the parts (at least I hope I got all the parts)
out of storage that go into the cabin and will need paint. This includes
all the fuel pump covers, flap actuator covers, baggage are covers, and
baggage area back wall. Each will need to be completely cleaned and preped
for painting, and areas to not recieve paint will need to be masked off.
Time : 4.75 hours |
| Building Paint Booth |
January 8, 2006 |
I spent a bit of time this morning working on a "paint booth" for painting
the inside of the cockpit. I'm building this from PVC and plastic sheeting
and have had to make multiple runs to the hardware store as I have "evolved"
my booth design. It is hard to judge how much time to log, so while I spent
a lot of time at the hardware store ... I'm only logging those hours spent
in the shop actually cutting/fitting PVC. :) Seems a reasonable compromise.
I hope to get the booth frame (i.e. the PVC part) finished tomorrow. Tonight
we have a birthday party to attend, so that cuts my Saturday short.
Time : 2.25 hours |
| More PVC / T.P. Filter Installed |
January 9, 2006 |
|
I cut/fitted a bunch more PVC today. Pulling it all together took longer
than I expected .... and it didn't help that I was "designing on the fly".
That always makes things go more slowly. I'll learn one day.
I also installed (which is to say, I hung on the wall near the compressor)
my Motor Guard M-60 air filter (aka: "toilet paper filter"). This will help
me have my air as clean as I can, affordably, get it for painting. Not much
to write, even if a lot of time went into the day (and aching muscles came
out).
Somehow this kind of work is NOT gratifying. I'm ready to get this painting
behind me (maybe the painting itself will be fun??) and back to working on
airplane parts themselves. Time for Advil now.
Time : 5.5 hours |
| Acquired Paint |
January 16, 2006 |
|
The family and I have been discussing cabin color for ages. I'm boring
and have leaned in the direction of the usual grey one commonly sees in
RV cabins. The family said "yuck, boring". I don't entirely agree, but
since this has become a bit of a family project ... I thought it wise to
at least listen.
As we talked, they suggested a blue/grey as a compromise, and the more
I thought about it the more I liked it. At Lowe's one day my daughter
and I looked at paint chips just to get some ideas ... and we walked
away with a few. Further consultation with family produced a choice and
my son and I headed out to pick up the paint today.
The folks at Finishmasters continue to be great. Don spent a lot of time
helping me match the chip and advising me on how to shoot the paint ...
more time than they'll ever recoup in money spent by me. I've scanned
the final paint mixture for posterity (and so I can replicate it if need
be) in the picture you see here.
|
| Paint Booth Work |
January 22, 2006 |
The big break here was due to me being out of town for a week, and once
back we had plans for a party which consumed much of the weekend. We also
had our end-of-the-year party/potluck for EAA Chapter 1114 (where I got a
bit of a plesant surprise). Today I spent some time (after some party
cleanup and recovery) knocking together a small frame to hold a heater
filter ... for the outflow of air from the paint booth ... and pulling
some plastic onto the booth frame. I'll need more plastic to finish the
job, though!
Time : 1.5 hours |
| More Paint Booth Work |
January 28, 2006 |
Yet another day (week) consumed with real-work and family-stuff. That is
not a complaint, just an observation. :) I did get some time this evening
to get out and get most of the rest of the plastic on the paint booth. I
should get that finished tomorrow .. and .. believe it or not .. maybe
get a little painting done. Time will tell. The picture here shows the
booth ready for business (in fact, was taken later after some paint had
been shot in it).
Time : 1.5 hours |
| First Paint in Booth |
February 4, 2006 |
|
I finally got the last small odds-and-ends finished on the booth, and shot
a little paint (primer, actually). I wanted to prime my elevator pushrods
and used them to "test drive" the booth. It worked great.
Lessons learned ... be sure to set up all the parts on ONE side of the
small-sized booth. Otherwise it gets too crowded. Don't pull the Hobbyair
hood on until you are in the booth, as you'll fog in moments otherwise.
Make sure you mix enough material so you don't have to stop shooting in
the middle of the job!
Now you see why I wanted a "test drive". I've got family-plans for the
rest of the day, but tomorrow I'll shoot some of my first color. We'll
see how THAT goes.
Time : 2.25 hours |
| Shot Some Color |
February 5, 2006 |
|
Today I shot my first bit of color. It is still out in the shop drying,
but I'm optimistic. I first shot primer on the backside of the panels
(where I was NOT going to shoot color) and then, once that was dry enough,
I flipped them over and shot primer on the front. I let that dry for an
hour then shot color over it.
I have a feeling that I laid it on too heavily, but that is why I picked
some of the "less visible" panels for this first round of paint. We'll
see how they look and will adjust from there. The picture here looks a
bit dark ... and it is actually a nice blue/grey color. I'm pleased.
UPDATE: I took one of my examples by Finishmasters (the great folks here
in the Raleigh/Durham area who sell paint, and who have spent more time
with me than they have made profit) to get their input. The painting-guru
there seemed to think I had done fine job after all, with the one issue
being not quite adequate surface prep. I should have known I needed to do
a better job, but it takes making your own mistakes to really drive it
home. That being said, he also felt that I shouldn't worry about re-shooting
the stuff already painted as it was plenty good enough (particularly given
I picked not-so-visible panels for my first attempt). I picked up some
lint-free paper towels, some tack rags, and some surface cleaner. We'll
see if a little more attention to surface prep will make the results even
better.
Time : 3.25 hours |
| Shot More Color |
February 9, 2006 |
|
I'm trying to get a little painting done after work .. and am battling
the cold to do it. The minimum suggested temperature for the paint is
55 degrees ... so I'm using my space heater (very carefully, and not
when paint is actually being shot, and not near any solvent at ANY time
at all) to try and keep the temps above 55 degrees. It is a battle and
I doubt I'll try painting on a cold evening like this again.
Then again, I had high hopes that I'll have quite good results so was
excited about taking another shot (pun intended) at the job. It is all
still wet now (and the space heater is still running trying to keep it
warm for a while) so it'll be a bit before we know the final results.
UPDATE: The pictures here show the results. I am very pleased
with how it all came out. I think I have the painting thing figured out.
Time to really get in gear now and finish up all the small parts since
I seem to be getting good clean coverage.
Time : 3.25 hours |
| Yet More Painting |
February 12, 2006 |
More painting. What can I say? I had to re-shoot a few parts from the
last session due to inadequate coverage ... and we'll see how that turns
out. I'm quite optimistic. I think I'll have one more batch of "small
parts", and then one round of painting a fuselage skin (inside) before
I'm ready for the cabin. I _have_ discovered a few other parts that'll
need paint and may try to get them taken care of in this round of
painting too. I hope that "this round" is the "last round", but only
time will tell. I'll include a pic of one of the parts shot in this
batch tomorrow when they are dry. At least the outside temps are not
so darned low ... so my space-heater can keep up easily enough and it
isn't the battle it was the last time.
Time : 2.75 hours |
| And Yet More Painting |
February 24, 2006 |
|
Work has consumed all my time and energy over the last few weeks. We are
into the final stages of getting a software release out ... and there is
urgency to the assignments that is all-consuming. Thus, the break in the
airplane work you see from the dates here.
That being said, I went out after work today and did another round of
small-part painting. I'm getting faster. :) Part of what made me make
the extra after-work effort was the weather. It is a beautiful warm day
and I could not let that go by without squirting some paint!
I think I have about one
more small batch to do, and after that have to paint the inside of the
fuselage. Then I'll be (for now, but I know not forever) done!
Time : 2.25 hours |
| Morning Misc / Afternoon Painting |
February 25, 2006 |
|
This morning I needed to let the parts from last night cure a little
more .. so did "other stuff". I got the louvers on the cabin head input
bent outward. It was easier than I had anticipated. I simply clamped a
bit of aluminum angle to the edge/corner of a bench, aligned the bend
line with the edge of the aluminum, clamped a small block of wood on the
back side ... and then using a little piece of wood (cut from a paint
mixing stick) used a hammer to tap-tap-tap the bend in place. Worked
great. I also drilled some angle for mounting my strobe power pack (I
said this was a bit of "morning misc") and bent the stick boot flanges
to match the bend on the seat-pan.
I also pulled out all the rest of the parts I needed to paint, and
preped them for an afternoon session in the paint booth. After lunch
I pulled it all into the paint booth and shot some paint. We'll see
how this batch turns out. :)
I am *still* a bit heavy handed on the paint. I got a few runs from the
session last night. I think that is my natural impatience working against
me. I'm going to try to lighten up and maybe take two passes at the paint
instead of trying to get it all done in one. (Yeah, I can hear you saying
"Duh!" right now.)
Time : 4.0 hours |
| Started Canopy Bow |
February 26, 2006 |
Last night's painting came out great. But today I'm taking a break from
painting and starting to work on the canopy bow. I got out all the parts
and fabricated all the little angles that go into the structure. A bit
tedious if one is in a hurry ... but I was just happy to be messing with
nice honest aluminum again. :) The (slightly blurry) picture shows the
results of a pleasant bit of time abusing aluminum.
Time : 3.0 hours |
| Misc Canopy Bow Work |
March 8, 2006 |
|
I have social obligations tonight (and the big break in the dates is
due to going to Airflow Performance for a class ... look at the Engine
section to read about that) so only could sneak in a little time. But
a little is more than none, so I'm pleased.
I pulled the plastic off of the join strips for the canopy bow and
deburred/dressed the edges. They are nice and smooth now. I also cut
the 1.5 inch access holes in the canopy bow rear pieces. Before doing
that I confirmed with Van's that I can just use the tooling holes
rather than be overly anal about getting the hole positin JUST RIGHT.
In fact ... I made the Van's tech support person laugh about how
they sometimes get a little overly anal with the drawings and
truth be told it doesn't hardly matter WHERE those holes go as long
as they do the job of letting you get a wrench in there. :)
Time : 1.0 hours |
| More Misc Canopy Bow Work |
March 9, 2006 |
|
My parts from Van's arrived today! Woo hoo! Tonight I cut a piece of
plywood upon which I can lay out and drill my rear canopy bow pieces.
I measured (and measured and measured) to make sure I had the layout
marks right, then clamped the two rear bows to the plywood.
I fabricated the two join plates ... which consisted of just laying
out the pattern of holes, deburring the edges, drilling the holes,
and then deburring the holes. I drilled the two plates together since
the hole pattern is the same on both. I then drilled the rear plate
to the rear bows .. and called it a night.
Time : 2.5 hours |
| Drilled Canopy Bow Join Strips |
March 11, 2006 |
|
This morning I jumped into marking the bow for the rivet holes and
drilling it to the join strips. Tedious, but easy. I hope to get it
all drilled today (but the rest will have to come after the family
gets back from our lunch together).
After lunch I finished drilling the canopy bow to the join straps,
as well as the front center join plate. This is slow tedious work
marking, centerpunching, and drilling all the spots .. particularly
as there is a need to cleco incrementally each step of the way to
make sure the join straps snuggle up against the canpoy bow pieces
as they should. But ... that part is done! Now I just need to make
sure the height is on the money, and then disassemble it all and deburr
spots that need deburring, and countersink where the rivet factory
heads need to go. All in all a successful day in the shop.
Time : 6.5 hours |
| Assembled Canopy Bow |
March 18, 2006 |
|
I spent the morning drilling the rear angle to the canopy bow, deburring
all the holes (and boy are there are lot of them for such a small part of
the airframe), and countersinking the rivet holes.
As of lunchtime I had just primed the rear pieces and was letting them dry
prior to assembly. After lunch I finished the assembly of the canopy bow.
This included priming the rest of the parts, finishing up a bit of the
countersinking, and setting all (200+, if you can believe it!) the rivets.
Tomorrow ... it starts getting fitted to the plane. :)
Time : 7.0 hours |
| Started Fitting Canopy Bow |
March 19, 2006 |
Today I started fitting the canopy bow to the plane. This is an area in
the plans that are not 100% clear. I checked various builder websites and
I get conflicting information from them too. I did file-and-fit a bit and
am pausing before I go too far. I'll talk to Van's tomorrow to confirm how
it should all go together. I -think- I know, but want to be sure before
I make too much metal go away.
Time : 2.5 hours |
| More Canopy Bow Work |
March 25, 2006 |
|
I did confirm with Van's how much to trim and how the F-631C angle should
fit into the F-631 rollover bar. I finished trimming the one side I had
started, and then trimmed the other side to match. I drilled the two sets
of angles for the "keeper rivets".
Since I have a quick-build fuselage, I had to go in and trim the tail end
(like, the last 2 rivets worth, detailed on page 25 of the plans) F-721B.
Following a suggestion from Van's tech support, I used an Exacto saw to
trim the bulk of the material off (putting a bit of protective scrap
under the saw cut). I then used my Dremel to -gently- carve away the
forward bit of metal (see the detail in the plans) as well. I cleaned
it up with a small Scotchbrite wheel on my die grinder, and it looks
great.
I'm now waiting for the F-631C/D angles to dry after having primed them.
Once they are dry I can rivet them and start looking at drilling them to
the fuselage. Joy. :)
Time : 2.0 hours |
| Riveted F-757 (finally!) |
March 26, 2006 |
|
Parts I had been holding off riveting for ages (don't rivet until you
absolutely must!) are finally attached to the fuselage. I had to put
these in place to prepare for the drilling of the canopy bow attach
angles.
After lunch I spent a lot of time fitting the roll bar/canopy bow to the
fuselage. I wanted to go slow and trim only what was needed. It took a
few iterations but I got it right. I'm going to wait to drill while I
let what I did sink in a bit ... to make sure I'm happy with the current
state of affairs. (That, and I'm tired!) The pictures show how it fits
to the fuselage ... though the parts are just sitting there, and are not
clamped in any way. However, I get exactly 17 7/8" to the top of the
roll bar, which is what I wanted. :)
Time : 4.75 hours |
| Odds and Ends |
April 9, 2006 |
|
Theresa and I got back from Sun-N-Fun yesterday, and after a bit of
unpacking and other needed chores were completed I got out into the
shop and "touched the project" a bit. After asking the folks in the
Van's tent how to buck the eight (four per side) rivets on the rear
bottom inside bulkhead on the fuselage (they are in a tight area under
some J-stringers) the answer was .. as I expected .. to just use
blind rivets. So I did. Drilled the holes out to 1/8", opened up the
countersink a bit, and installed CS4-4 rivets (all as per instructions
from the folks at Van's). Done. I also set the four top rivets on the
side longeron (just behind/under where the canopy roll bar angles will
be bolted) since I picked up some longer rivets at Sun-N-Fun. That
took all of 5 minutes to wrap up now that I had the right parts!
I also tried out the Avery drill jig I purchased for drilling items such
as AN nuts. My first test piece (on a throw-away nut) was a piece of cake.
Came out great. My second one on a nut already on a flaired piece of tube
(i.e. if I screwed it up, the whole assembly would have to be tossed)
caused me to break the bit. Darn it. I was able to tap out the broken
part of the bit and salvaged the part. *whew*
I also spent a little time getting ready for final fitting/drilling of
the roll bar ... but refrained from actually taking a drill to the parts
since I am still not 100% rested up from the crazy drive back from Sun-N-Fun!
All in all, it is great to be back home .. and great to "touch the project"
again after a week of being gone.
Time : 1.25 hours |
| Drilled Roll Bar Mounting Angles |
April 12, 2006 |
I finally satisfied myself that I had the angles set up right, and the
fuselage ready to be drilled. So I did it. Clamping them was challenging
so it took much longer than it should have to drill four bolt holes. But
they are done, and everything looks perfect, so I'm not going to gripe
about it taking a few minutes more than I might have liked. :)
Time : 1.75 hours |
| Canopy Bow Work (again) |
April 16, 2006 |
Trimmed the canopy bow angles to match the curve of the fuselage side.
Drilled the rear brace to the fuselage bulkhead, and to the canopy bow
itself. Drilled the spacer, and riveted it to the rear brace. Drilled
the side angles at the front which attach the sides of the brace to
the canopy bow, and riveted them to the brace. Drilled the top angle
which attaches the brace to the canopy bow. Drilled the rear holes, and
countersunk them for the AN509-10R10 screws. In fact, I've done all
the drilling -except- the match-drilling of the skin to the #30 holes
at the back-side of the brace, and drilling the bow attach angle holes
into the canopy bow itself.
Time : 4.75 hours |
| Canopy Bow Work Finished |
April 22, 2006 |
|
Today I finished up all the various bits of drilling on the canopy bow
(roll bar) structure. I drilled the rest of the holes through the attach
angle, as well as through the skin. I tapped the appropriate holes in the
angles. I'm now ready to dimple and paint the skin (painting just the part
that "shows" when installed). Once that is done, I'll be ready to paint
-everything- that is left, and then take down my paint booth. FINALLY!
I now have to play taxi for my daughter. More airplane work tomorrow!
Time : 4.25 hours |
| Dimple F-774 / Prep For More Painting |
April 23, 2006 |
|
Today didn't seem particulary productive. However, I did get the F-774 skin
dimpled, including remembering to dimple correctly those few holes which
were for 1/8" rivets, and those holes for #8 screws. It was a very awkward
skin to dimple ... particularly since I'm working in a reduced amount of
space.
I am on track to fix that little problem, though. I now have -everything-
done that needs to get done for my final round of painting. Thank GOODNESS!
I hate painting, but have a handful of misc parts to paint ... then we
reconfigure the paint booth and paint the cabin. And that phase of my
life will be OVER! (Can you tell I hate painting? Oh .. yeah .. I said
that just a moment ago. Didn't I? Well, it is true.)
Time : 4.5 hours |
| Fix Mis-Drilled F-631C |
April 28, 2006 |
|
I realized shortly after drilling my first forward hole on the F-631C that
I had grabbed the clearance drill for a #8 screw and not the one used
if the hole is to be tapped! Doh! I double-checked with Van's and they agreed
it could be opened up to accept a #10 screw. I only did the lower one (leaving
the upper a #8) but did do it on both sides so that the plane would not be
out of balance. :) (YES! That is a JOKE! Though I did do both so as to avoid
confusion later in life if I ever needed to replace the screws.)
This was a good way to spend a lunch hour. Beats long lunches with co-workers
who only want to talk about ... *gasp* ... work!
Time : 0.75 hours |
| More Painting |
April 29, 2006 |
|
Today was a day of getting back in the saddle with respect to painting. I
have been finding excuses to not paint for weeks. I ran out of them today.
I pulled out parts that had been stored, and generally spent a whale of a
lot of time getting everything ready. This included masking off all the
areas (most) of the F-774 just so I could shoot a little paint on the
small bit of that skin that will be visible inside the plane.
I really dislike painting. It all seems like black magic. I'll surely be
glad when I'm done (soon!) and will be able to get back to simply abusing
aluminum full-time!
Time : 4.0 hours |
| Yet More Painting Prep |
May 6, 2006 |
|
I spent some time this morning making a fixture to hold the seats and
the roll bar for painting. I hope to get the last of the "small stuff"
painted today, then tomorrow re-work the paint booth and get the cockpit
ready for paint. I _may_ get as far as shooting the cockpit paint
tomorrow, but am not holding my breath. We'll see how it goes.
I do hope to get the "small stuff" painted this afternoon after the family
gets back from lunch. Watch this space ......
.... but I never got back to working on the plane after lunch. I went and
looked at cars instead, and purchased a Volkswagen New Beetle TDI. It is
blue and looks like a blueberry on wheels. My intention is to run biodiesel
in it, and I'l fascinated by the whole process of fuel conversion so will
likely at least join the local co-op and learn to make my own fuel. Way
cool. (Yes, I'm crazy.)
Time : 1.5 hours |
| Yet Again More Painting Prep |
May 13, 2006 |
I had a huge break in airplane work due to car-stuff and work-stuff. This
weekened I am back at it and am trying to get a few more parts painted.
This -should- be the last batch of "small stuff" (though a few parts are
kinda large, actually, like the seat backs). For a few parts I had to
make some holders/jigs for painting. With that done I just need to prep
the parts and shoot paint. That'll all have to wait until I get back
from a birthday party for a friend's little girl though.
Time : 2.5 hours |
| Shooting More Paint |
May 14, 2006 |
|
I got all the various parts scuffed and cleaned and into the paint booth
this morning. I can't believe it took over 2 hours to do that, but I am
being slow and careful on parts prep. Oh well. After lunch I'll shoot paint
and then it'll be time to prep the fuselage cabin for painting! Wow.
After lunch .. and I painted. I hate painting. I'm no good at it. Or maybe
I picked a poor interior paint .. but no matter what I do I either get bad
coverage (and have to paint again) or runs. Frustrating. I need to have a
paint mentor ... but, I'm about done and intend to never paint again if I
can help it (unless I find someone who will help me who -really- knows what
they are doing). I'm good at a lot of things, but painting isn't one of
them! :)
UPDATE: The painting came out better than I thought it would based on the
early assessment when looking at it wet. It still ain't anywhere near perfect,
but it isn't as bad as I thought it would be. :)
Time : 4.5 hours |
| Final Painting Prep? |
May 20, 2006 |
|
My plan today is to prep the last bit of parts to be painted. The reason
it will take a bit of work is that the "last bit" is the fuselage interior
itself. I need to clean (started already), mask, and scuff for painting.
I got a little done this morning (after the EAA 1114 meeting) but am
stopping to head to lunch with the family. It is a birthday celebration
lunch for my daughter, who just turned 15! Woo hoo!
More after lunch .......
.... except, I went to LBT for the fly-in instead. Oh well!
Time : 0.5 hours |
| Really Final Painting Prep? |
May 21, 2006 |
I spent today re-configuring the paint booth to fit the fuselage, hung
more plastic for the larger paint booth, taped and masked massive amounts
of the fuselage where I don't want paint, and started to clean and prep
the aluminum for paint. The problem is that the aluminum is -filthy- (this
is a QB, and I can't figure how HOW Van's gets them so dirty in shipping).
I have cleaned and cleaned and cleaned ... and I still feel it needs more
cleaning. I'm not going to get finished today, as I am exhausted from all
the bending over to clean (and clean, and tape, and mask, and clean). I
may take a day off from work tomorrow to wrap it all up JUST so I can be
DONE! (Have I mentioned that I hate painting? Well .. I do. *sigh*)
Time : 5.5 hours |
| Final Cockpit Paint (Hopefully) |
May 22, 2006 |
I took a day off of work to try and wrap all this painting mess up. I spent
the morning cleaning ... and cleaning .. and cleaning some more. Why did I
need to clean so much after cleaning yesterday? Well, it was -that- dirty.
I then scuffed the aluminum, and cleaned again. Then using lint-free rags
I used some special cleaner .. and you guessed it .. cleaned again. I then
shot some primer, then shot a light coat of paint. I waited a bit for the
paint to get tacky, then came back with another coat to fill in the light
areas and built up the coat. We'll see how it does. If I ended up with some
thin areas still ... I'll shoot another coat. I am crossing my fingers that
I do NOT have to do that (I want to be done .. badly), but will shoot more
paint if needed.
Time : 6.5 hours |
| One Last Coat |
May 26, 2006 |
Now that the first round of painting has had plenty of time to dry, I went
and evaluated the coverage. I found it a little lacking in some areas and
thought I'd shoot one final coat ... with a focus on the thin areas. I also
sanded out a few small runs while I was at it. I used up the LAST of this
batch of paint .. and it was exactly what I needed to get the job finished.
I feel good about this latest round of painting, and now that I am done I
think I _might_ finally be getting the hang of it. Isn't that how it always
goes?? :) But, with luck, I am THROUGH PAINTING!
Time : 1.5 hours |
| Paint Booth Comes Down |
May 27, 2006 |
There is ONE spot on the plane where I'm really not happy with the paint,
but it is (a) small and (b) can be taken care of with a touch up gun. So
the booth comes DOWN! Finally. Painting has been a much more extended
exercise than I ever expected. Oh well. As long as I don't quit ... I will
STILL have an airplane when I'm done. Tomorrow I finish the shop cleanup,
and get back into building out the fuselage.
Time : 2.5 hours |
| Post Paint Progress |
May 29, 2006 |
|
Yesterday was spent in a major shop cleanup, so much so that it really
could NOT be considered "airplane work". So while I spent quite a few
hours in the shop, nothing could be logged. I did some sweeping, a bit
of compressor maintainence, and re-storing some airplane parts, putting
up all the tools scattered around, and collecting up much of the painting
paraphenelia (like the HobbyAir) for storage.
Today I started re-installing stuff that I had to pull out of the fuselage
for the painting exercise (flap stuff, mainly), and then moved forward with
new work too. I did re-install all the flap mechanisms, then moved to getting
the API boost pump installed. I reattached the pump and filter to the mounting
plate, installed the fuel valve, and fabricated the line that runs from the
filter to the fuel valve.
Ok ... I fabricated it three times, with the third one being the charm. :) I
understand everyone goes through this fouled up fuel line fabrication phase
at first. My second line, fron the check valve to the fuel valve I got right
the first time, though. I was pleased.
I also installed the fuselage tank brackets, which have been waiting for
final installation for ... well ... too long. I got that done in short order
and then moved to installing the AN fittings in the firewall for the brakes.
I stopped short of installing more fuel lines waiting for an answer to a
few questions fron the RV list. All in all ... a good post painting progress
day!
Time : 5.5 hours |
| Started Vent Line Fabrication/Installation |
May 30, 2006 |
After work today I spent a little time puzzling out some firewall penetration
issues (and based on Ken Scott's input ... decided to just delay it until I
had the engine) then pressed on to fabricating the vent lines. I drilled the
holes for the vent fittings, and then started bending up the first (left)
vent line. I'm 90% done, but out of time. More tomorrow.
Time : 2.0 hours |
| Vent Lines, Continued |
June 4, 2006 |
|
Remember how I said in the previous entry I was 90% done? Well, I had 100%
left to go, unfortunately. As it turns out I worked from the easy end to
the difficult end, and realized that in doing that it wasn't possible to
-complete- the difficult end working it in that direction.
I set it aside and then tackled the right side. I started at the difficult
end and ... repeatedly ... worked on the bends/fittings, then when it was
clear the path I was on wouldn't work, I cut that first six inches off and
started over. I had at least three false starts before I got the right set
of actions. For one, I learned that if the bends at the fitting are really
close/tight, you have to put the AN nut collar on FIRST, then do those
close bends by hand. I got a lot of use out of my spring bender yesterday.
I got to the end and am quite happy with this right-side vent line. It took
a LOT more time than I had hoped, but I think I learned a good bit in the
process. I hope the new left side will be much easier.
I also installed the vent line elbows in the fuselage, got the screens (from
a sink faucet aerator) attached to the final vent line fitting with some
JB Weld. So I _did_ do more than just fiddle with one single bit of tubing,
but not much. It was just one of those days.
Time : 3.5 hours |
| Vent Lines Finished, Brake Lines Started |
June 10, 2006 |
|
I went out this morning and cleaned up my vent line termnation fittings and
got them installed. I then bent up my left-side vent line and it went MUCH
faster now that I've done it once and knew how the flow of fabrication should
go. Adel clamps are in, fittings are torqued, and we are done with those.
I then screwed on the Aeroquip hoses for the brake lines, and riveted the
center rudder pedal brace in place (finally). I've set the rudder pedals
in the fuselage, and need to bolt them in when I find two lost AN-22A bolts
(darn it) ... or "snitch" a couple from my friend Marilyn tonight. With a
little more work I'll have the rudder pedals in place for good, and will
be done with running the brake lines as well.
Time : 3.25 hours |
| Brake Line Fittings Installed |
June 11, 2006 |
I spent a few hours today (all the time I had available) figuring out (and
finding) the fittings to go to the master cylinders. I also had to track down
both my Van's-supplied brake fluid reservoir and my Matco clear reservoir
and figure which I wanted to actually use, and out how I wanted to install
it. After talking with Mark Phillips I am leaning in the direction of using
the Matco _if_ I can modify it a bit. We'll see.
Time : 2.25 hours |
| Brake Pedals Installed / Fluid Reservoir Mods |
June 13, 2006 |
|
Tonight I fiddled with getting the rudder pedals installed. I tossed in the
pilot-side seat and some cushions (stolen from the couch!) to do a bit of
test fitting. I'm a 5'11" guy so thought the most-forward setting would be
good .. and I think that is about right. I did have the seat back as far back
as it would go, so if I need to get closer I can move the seat easily enough.
I'm gonna bolt them in there for good tomorrow.
I also modified my Matco brake reservoir .. or prepared to. I wanted to run
a bolt up from the inside of the reservoir (if you have one you'll know
what I'm talking about, if not I'll have some pix soon) with a hole drilled
through it. The idea is to let -that- be be the vent line so I can put some
clear tubing to vent overflow. It'll make it easier to bleed the lines when
I need to ... and the clear body will let me check the fluid level during
preflight (*if* I install it where I can see it with the canopy tipped up).
Note, also, that with a threaded end on the top I can find/fabricated some
sort of fitting to make it easier to add brake fluid once installed. The
normal vent hole (visible in the Disassembled picture above) will be filled
as it is now no longer needed.
Time : 1.25 hours |
| Pedals Installed / Brake Lines Finished |
June 23, 2006 |
This entry is actually a collection of short bits of fiddling in the shop
over the last week all added together. It has been very hectic lately and
working on the plane has come in 15 and 30 minute increments. But the pedals
are bolted in place, and the brake lines (except for the ones to the
reservoir) are installed.
Time : 1.25 hours |
| Started work on HS Installation |
June 24, 2006 |
|
I started fabricating the small parts (angles, shims) needed to install the
HS today. I am also working on getting the elevator control rods installed.
Bolting the lower control rod to the bellcrank is a pain in the butt. It
does not help that it is 90 degrees and 99.9% humidity today!
After lunch I got back out into the (HOT) shop and got more work done. The
first task was to attach the elevator pushrod to the control sticks. That is
a -really- tight spot there! But I got it done.
I then
finished fabricating the small parts for attaching the HS and VS to the
tail. I cleared space to being the HS and VS down from the ceiling, and
then brought them down. Dusty!
I clamped the HS to the tail of the plane and started measuring and tweaking
and measuring and tweaking (and measuring and tweaking) to get it straight.
Once done, I decided to wait before drilling. I want to get the drilling
right the first time, and at this point I am hot and tired and didn't want
to tackle it without being in top shape.
Time : 5.5 hours |
| Drilled Forward HS Attach Bolt Holes |
July 13, 2006 |
|
We spent all last week in Amsterdam on a family vacation. Had a GREAT time,
but lost two weekends of airplane working time. Thus, the latest gap in the
entries here. I'm caught up at work, caught up on sleep, and can now spend
evenings (it is 11:30PM as I write this) back on the plane.
After lots of worry and fiddling and careful measuring (with the HS taken
off the plane and clamped back in place a good number of times) I drilled
the bolt holes. I made good edge distance in all spots, and the "pancake"
drill attachment I picked up at the Fly-Mart one SnF finally came in handy!
I still need to drill the shims, but they are trivial compared to worrying
about getting the edge distance right on hidden angles.
I'm quitting for the night as it is late (for me) and stopping before I
screw something up seems wise. :)
Time : 2.5 hours |
| Finished Drilling Attach Bolt Holes on HS |
July 14, 2006 |
I had -very- little time to work on the plane today, but did get the
remaining HS bolts drilled. I'm going to have to back up a little (i.e.
take the HS back off the fuselage) to mount/align/drill the elevators.
It seems I got ahead of myself a bit, but I'll do that tomorrow and
then re-mount the HS and install the VS. I hope, in fact, to finish
the tail tomorrow.
Time : 2.0 hours |
| Fitted Elevators to HS |
July 15, 2006 |
I had skipped this step way back when I was doing the empennage, but the
time had come to get it done. I fit the elevators to the HS, drilled the
center hinge holes, and drilled the pushrod holes. I did it all as per
Van's directions, and (aside from having to trim the HS a bit to clear
the counterweight arms on the elevators) it all went pretty easily. I
now need to fit it all to the fuselage, but will leave that for the next
day of construction work.
Time : 4.5 hours |
| Attaching Vertical Stab |
August 5, 2006 |
|
We put the HS back onto the plane, and then set the length on the F-790
elevator pushrod, and then drilled the VS attach plate which connects to
the forward spar on the HS.
Between spending time with the family, and then in the afternoon feeling
very much under the weather, that was it for that Saturday.
Time : 2.0 hours |
| Attaching Vertical Stab (cont) |
August 6, 2006 |
I continued working on the VS, getting the elevator up-stop drilled to
the fuselage, getting the VS drilled to the up-stop, and then getting
the forward attach plate drilled to the forward spar of the VS. I have
a little more to do, but am out of time. (Spent time today driving with
my daughter who has just got her learner's permit, and is learing how
to drive. She did great, too!)
Time : 4.25 hours |
| Fixed Mistake |
August 9, 2006 |
|
Ok ... confession time. I blew it. I thought I had things positioned well
so that I could drill my elevator control horn for the AN4 bolt through
the bearing ... but I blew it. I got too close and the bolt would just
not go without grief. I talked to Gus at Van's and he had a number of
alternatives. I could grind down the bolt head and use a thinner nut. Or
I could weld a patch on the control horns and re-drill. Given that there
is *plenty* of room for a patch, that is what I did. It'll let me better
position the rod end bearinings and get things done right. And ... as
long as YOU don't tell anyone, nobody will ever see/know that I had to
patch this up. These control horns are hiding inside the fuselage once
the world is buttoned up.
I got a friend who is building a Dyke Delta (lots and lots of welding for
that project) to weld some small 4130 patches on my control horns. It took
a little time to wire-brush off the power coating, cut the patches, weld
the patches, and then bury the hot metal in sand to allow it to cool very
very slowly. But once done, it was done. Now I just have to re-drill the
holes (after, of course, adjusting the rod end bearings a bit!).
I hate it when I screw something up. You know I do. :)
Time : 2.25 hours |
| Cleaning Up Horns |
August 12, 2006 |
|
I finally got some time (crazy week, as usual) to get out this morning
and clean up the elevator horns after welding the patches on. I got one
taken care of already, but now have go to a "last weekend at home" for
my son. He heads off to college next Friday! Hard to believe.
After lunch I shot some primer on the first elevator horn, cleaned up the
second elevator horn, and got it primed as well. This puts them back in
the "ready to drill" state. I did take a die grinder to the welding to
blend the edge of the weld into the center of the patch so I had no high
spots. Hopefully that will allow a washer to sit flush.
Time : 2.75 hours |
| Installed Rudder / Start on Static Ports |
August 13, 2006 |
|
This morning I went out and created a drill template to drill the final
three bolt holes at the bottom of the vertical stab. I got those drilled
then hung the rudder. It looked so good I re-hung the elevators so I
could get a picture! I need to get the right size AL stock to make the
rudder stops (it is a long story why I don't have the right stuff on
hand now). Once that is in I'll really be done with the rudder. I still
need to pull the HS off, rivet on the forward attach plate, rivet on
the elevator up stop, trim the HS rear spar to allow full down travel
on the elevator, and re-drill the elevator center hinge point. I already
adjusted the rod end bearings to give me more clearance for the bolt
and it looks good. It sounds like a lot of work, but it really is just
a few odds and ends needing cleanup before calling it done.
I also started installing the static ports. I measured the location for
the ports, drilled the holes, drove out the mandrel from the pop rivets,
and RTVed the pop rivets to the tubing. I had to carefully tape it all
in place so the tubing would stay put while the RTV cures ... and had
to walk away from the plane for the night to give it time to cure.
Time : 3.5 hours |
| Fabricated Rudder Stops / More RTV |
August 22, 2006 |
|
First .. the break in work was due to needing to get my son ready to go to
college, then heading up to the mountains of NC to take him this last weekend.
It all went great, and I think he is settling in fantastically well.
I also had needed to order a piece of AL angle to fabricate the rudder stops
as I appropriated the original piece when I screwed up another part. I had
THOUGHT that I already ordered it earlier, but then realized I got the wrong
size AL angle! Dang! So I had to wait for Van's to shoot me a new piece
anyway.
Tonight I cut and fabricated the stops. Easy, simple, almost mindless work
that was soothing after a long crazy day at work. I also took OFF the RTV
I used earlier, as I realized I got the wrong stuff and it was not setting
up the way I wanted/needed. Dang, again! :) Fortunately MEK took it off
with almost no effort. I got new RTV and have squirted out a "test blob"
to see that it is going to cure right ... but after an hour it is already
in better shape than the other I purchased. I'll re-do the static port
installation tomorrow night.
Time : 1.5 hours |
| Finishing Up Tail (Almost Done) |
August 22, 2006 |
I finished up the rivet holes for the rudder stop (final drill, c'sinked),
and confirmed that I had them cut correctly. I then started to pull apart
the whole tail for the final bit of work needed. I riveted the VS attach
plate to the forward VS spar. I trimmed the lower flange of the HS rear
spar to allow the elevator control horns to have a full range of motion.
I super-glued (I hope) the washer to the rear side of the elevator up
stop as called for in the plans and instruction manual. It doesn't seem
like much when I write it all down here, but it was a good few hours of
work. Every little bit helps!
Time : 2.75 hours |
| Tail Work Finished |
August 26, 2006 |
|
I wrapped up the few remaining odds and ends on the tail this morning. I
re-drilled the elevator center hinge bolt holes through the control horns
and had -plenty- of clearance this time. I cleaned up a problem area on
a VS bolt hole. I mounted the rudder stops. I JB Welded the washer that
was previously super-glued, but didn't hold. I also used a dab of JB Weld
on the static port pop rivets because I didn't feel that a little bit of
RTV would hold them adequately. I'll have to let that glue dry over night
before I finish up the static port install.
A bit of my afternoon was spent helping another builder, Ernest, put together
a radio tray assembly and testing out some radio wiring. I also built a
cradle for the HS and VS (now that I'm done with them) so I could store
them at a friend's hanger rather than suspending them from the ceiling
in the garage again.
I'm going to get started on the forward upper cabin effort tomorrow. I'm
ready for a change of pace! :)
Time : 4.25 hours |
| Forward Upper Cabin Started |
August 27, 2006 |
Today I started work on the forward upper cabin. As always starting a new
section it was a sesson of finding/collecting/fabricating the parts for the
assembly. I got most of them ready except the LONG angles. They are cut to
length and the v-cut locations are marked, but are not yet trimmed. I
figure I'll spend various nights this week working on them. I did get the
other various parts cut to length (i.e. the hat section, for instance) and
got the small attach angles fabricated and drilled (except for the holes
that need to be drilled in assembly). I wasn't sure how much I would get
done today given I had to take my daughter out to practice her driving
quite a bit today, but in the end the day felt very productive.
Time : 3.25 hours |
| Drilled Hat Section and F-703B Angle |
August 28, 2006 |
I got home late-ish tonight, but wanted to do a little work on the plane.
Every hour of "touching the project" moves me that much closer to flying!
I first RTV-ed the static tubing to the static ports since the JB Weld
had long since dried. I then drilled the "hat section" to the sub-panel.
With that done I drilled the apex holes in the F-703B angle (the piece
that is the reinforcement angle along the top of the F-703 panel).
Time : 1.25 hours |
| Cut F-703B Angle / More on Static Ports |
August 30, 2006 |
|
I carved out some time to work, and first secured the static port line
to the bulkhead. I still need to drill/route the rest of the line to
the forward cabin area.
I also cut the 15-degree angles on the F-703B reinforcement. I was able
to rough-cut them on the bandsaw, but then had to file and scotchbrite
to clean them up. Tedious, but done now! :)
Time : 1.75 hours |
| Fluted and Drilled F-703C Angle |
September 2, 2006 |
Most of Saturday was a "family day", but I did work in a little time in
the evening. I got the F-703C seal angle drilled and fluted. I also drilled
it to the sub-panel. Those pieces are now ready to rivet.
Time : 1.0 hours |
| Drilled Stiffener Angle to Panel |
September 3, 2006 |
|
This morning I drilled the stiffener angle to the top of the panel. I had
to trim a little from the ends once fitted as I (intentionally) cut it
slightly oversize so I could get a perfect fit. I discovered that I drilled
a wrong-size hole in the side angles, so am just going to fabricate another
pair. Oh well.
More after lunch (and taking my daughter to practice her driving) ....
I finished up cutting/drilling the seal angles for the right/left sub-panels.
I am NOT thrilled with how these are fitting, and am going to take a break
to make sure I'm not screwing something up. I'll be glad when all these
various angles are finished, and fitted. They are somewhat "fiddly" to mess
with.
Time : 3.75 hours |
| Odds and Ends (Slow Day!) |
September 4, 2006 |
|
My biggest flaw as a builder is I can't bring myself to totally ignore
my family. :) Today was spent doing some more family activities, but I
did get out in the shop a bit. I also took Marie to see a friend's RV-7,
mainly to look at how the seats were upholstered. She is going to try
to cover my seats, and we felt looking at a finished set would help.
I also got my forward upper deck trial-fitted in place just to make sure
I _knew_ how everything went together. I also wanted to see if the spot
indicated for the engine controls would really do the trick. When I first
measured it out, I said "NO WAY!", but after I put the panel in place and
looked at it a bit .... I think it may well be a dandy spot. I should
have measured where Denny's falls, and may when I get back from San Jose
in a week. (Yes, I lose a week of airplane work traveling for my job.
Doesn't that suck! At least I get back on Friday, and don't blow a weekend
too.)
I also went and got some clear poly tubing with a 1/4 ID. I pulled it over
the static tubing where I'll jump a longeron as an anti-chafe measure. I
hope to keep the static line from even touching the longeron, but if it does
the cover tubing will recieve the abuse and not the inside tubing.
On that note, I'm done until next Saturday. Oh well. I did include a shot
of the upper deck clecoed in place. Man .. it looks good!
Time : 1.25 hours |
| Re-fabricating Side Seal Support Angles |
September 22, 2006 |
|
Ok ... I've lost weeks and weekends due to travel, and then a torn muscle
in my back. But, I'm back at it again (if still a bit stiff). I went by
the dimensions on the plans for cutting/drilling the angle ... and it was
significantly too long when I fit it to the side sub-panel! Frustrating.
So I re-ordered material and am taking a different approach. I'm going to
cut/drill all except that last hole ... which I can then put right where
I need it after double-checking the length of the angle. Hopefully that
will help.
I now have social obligations, so will be cutting tonight's work session
a bit short. Even so, it is nice to be back out in the shop! I've got to
watch my back else I'll re-injure it, but as long as I avoid that I think
I'm back in business again (since I have NO MORE travel planned until the
November trip to Superior for the engine building class).
Time : 1.25 hours |
| Upper Deck Construction |
September 23, 2006 |
This was good day of work. I got the seal supports finished and riveted
to the sub-panels. I got the sub-panels riveted to the upper deck ribs,
and cut the rib in front of the pilot so that it can be moved to the
left (facing forward) once I know how far it needs to move. All in all
a good long day of (somewhat tedious, and not worth talking about in
great detal) work. I hope to finish the upper deck tomorrow if I can
resolve one mistake I made without having to order more parts. :)
Time : 5.5 hours |
| More Upper Deck Construction / Cabin Heat Control |
September 24, 2006 |
|
While I discovered that I _do_ have to order some parts to resolve a mistake
I made (I guess I could sorta-kinda salvage the parts, but there would be
issues and I like things to be as perfect as I am capable of making them)
I still got a lot of good work done today. Except for the stubby-ribs on
the center sub-panel (since they are what I screwed up) I got the top deck
skin completely drilled to the sub-structure. This includes drilling to the
firewall. I also got the angle brace which lives at the far end of the
center rib (against the firewall) drilled. Lots of tedious drilling, but
all done and done nicely. I'm pleased. Now it is time to do some "Family
Stuff (tm)". Maybe I'll get more work done later tonight, but it is doubtful
at this point. We'll see.
Ok ... I did get back out in the shop a bit tonight, even with the terrible
humidity. I decided to do something "light" so I assembled the cabin heat
control box I've had on my shelf for months. A nice simple but rewarding
(due to the immediate gratification a small job like this gives) task.
Time : 5.0 hours |
| More Upper Deck Construction |
September 27, 2006 |
I got home late (after wrangling a ride in an RV-7 for a good friend,
Wally Dixon) but snagged a quick bite to eat and got a little work done
on the plane. I fired up the iPod (an 80GB iPod on shuffle will keep
you company for a loooong time) and drilled the panel attach angles to
the F-721A deck. Once I get my replacment short ribs I'll be ready to
wrap up the upper deck and move onto the finishing kit! Woo hoo!
Time : 1.0 hours |
| Yet More Upper Deck Work |
September 28, 2006 |
|
I spent a good bit of the day fiddling around on the last details of
the upper forward deck construction. I'd have finished it up if I had
not spent a good bit of time trying to figure out how I wanted to
install my handy-dandy Wemac eyeball vents. They are NICE, but since
they are not the regular thing there is no standard approach to
installing them. I'm close, but am not completely happy with the
current iteration of my design. I'll get it figured out, though.
While I fiddle on this (virtually the last thing I have to do on the
upper cabin deck) I'm going to start on the finishing kit work a bit.
Time : 5.25 hours |
| More Upper Forward Fuselage Riveting |
March 28, 2009 |
|
See my comment above about having too many things going on? Well, the
trend continues. Frankly, there are things work-related which are killing
my ability to carve out time for the RV, but today I got back to it. I
continue to try and wrap up the forward cabin area so I can rivet on
the forward top skin. Today I worked on a pair of different areas, but
all related to the upper forward fuselage area.
The first was finishing up work on the mounting plates for the eyeball
vents. This took a bit of final fitting, drilling, countersinking and
riveting. Joe Sumakeris stopped by again to lend a hand, and his
assistance was -greatly- apprecaited. Once I finished fitting and
drilling the mounting plates for the eyeball vents, we riveted the
side angles in place. I then final-drilled for the screw hole on the
panel and mounted a platenut. They are now ready for a final coat
of paint (which will have to wait until after the rain passes us by)
and I'll do a final mounting of them in the plane.
With Joe's help I also final riveted those areas in the upper forward
fuselage structure which could not be accessed with the squeezer. A
lot of this was -very- -fiddly- riveting, and Joe was a champ bucking
partner. He ran out of time, so we have 6 rivets left to drive to
consider it all -finished-. He said he would come back on Wednesday
to wrap up that operation. Thanks Joe!
Time : 6.5 hours |
| Cabin Heat Boondoggle |
May 29, 2010 |
|
After I
worked on the cowl ramps
a bit more, I decided to figure out how I wanted to mount my cabin heat
control. I thought it was worth a try to enlarge my fresh air inlet on
the pilot site to make room to include a cabin heat control. In the end,
I was not all that happy with how it turned out.
However, sometimes fabricating things that you throw away is like a type of
Zen meditation. Your meditate to the shaping of the AL, and after time
Enlightenment comes.
What Enlightenment did I get today? Put the cabin heat control over on the
passenger side of the compartment. :) I will fabricate that mounting piece
tomorrow.
Time : 2.0 hours |
| Cabin Heat/Fuel Exits/Right Brace |
May 30, 2010 |
|
First I re-fabricated the plate for the fresh air inlet, with the extension
beneath it for the cabin heat. This time .. on the passenger side. I think
this will work better in terms of cockpit layout and cable runs. While it
waited to dry from painting I launched into drilling holes for the fuel
line exits from the fuselage side. These need to be 1" to accept the big
grommet designed to go into this location. Fortunately, I have a large size
unibit and got it done in short order. The grommets are in, and I now
just need to finish fabricating the lines.
Then I started working on the thing that took .. well .. forever. There are
two triangular braces which should have been installed long ago, but got
missed. They go just ahead of the spar down in the lower left-hand and
right-hand corners (imagine them just behind your outboard heal if you
were to pull your feet back while sitting in the seats).
I discovered some time back that I had more interference between the forward
spar plates and the center spar bars which made it difficult to get bolts
in (short of hammering). The large bolts used to align the wings for the
rear-spar drilling go in without _too_ much trouble, but the partner AN-4
bolts do not, I discovered.
Talking with Van's about this they said .. basically .. go in and file/sand/cut
away a little of the outside plate, just do not cut the large spar bars.
This has been frightening enough an exercise that I have been putting it
off for some time. :) But today I did the right-hand side, and that part
of it all went fine.
The fit of the right-hand brace was not as good as would be nice, so I had
to take a needle file and open up the holes just a SMALL amount. With that
adustment done I was able to drill for the 5 AN-3 bolts that run down the
side of the fuselage and attach to the brace. Deburred, cleaned, and then
primed, the brace was bolted in place (temporarily, as I think the AN-3 bolts
will have to come back out to get the outboard AN-4 in when it is time to
attach the wings. Oh joy.)
The other work done today was
on the top cowl where
I did a little more glassing work.
to get some more work done there.
Time : 3.5 hours |
| Left-side Corner Brace Fitted |
June 12, 2010 |
|
For starters ... I got my medical today! This may not seem like much of
a big deal, but a year ago I had to get a special issuance medical due
to obstructive sleep apnea. After the initial song-and-dance with the FAA
subsequent re-issues of the medical supposedly could be done by my AME
as long as I had adequate documentation. Still, until I went through it
once I had a fear that _some_ sort of _snafu_ would crop up. But it went
like clockwork, particularly since I had all my needed documentation
which certified compliance with the treatment. (As a side note, using a
CPAP has me sleeping and feeling much better. Just saying.)
Ok ... after that (and lunch, and shopping with Theresa) I got a bit of
work done on the RV. I launched into the dreaded exercise of getting the
second inside corner brace installed .. the left side. Once again I had
to "tweak" the facing AL plate on the spar carry-through (and I hasten
to say, that this is what Van's tech support said I should do, and that
it was not at all uncommon to need it .. so don't freak). Even so I had
to file a little on the holes of the brace to get the bolts to clear
without having to resort to a sledge hammer (in fact, they could go in
with finger pressure ... noting that these were regular, not close
tolerance bolts, used only for clamping and fit-up, and not to be used
when the wings are installed).
It was slow, and tedious, and hot, and cramped ... but it is all done
except for the final bolting in place. And that will be a piece of cake
compared. That'll be work for tomorrow.
Time : 2.5 hours |
| More Alternate Air Fiddling |
July 5, 2010 |
|
The idea I mentioned above that I was going to revisit. I didn't. I
had an entirely different idea on the way to the party, and that is
what I pursued today. Even better, its going to work out. I fab-ed
a angle plate which will screw to the vertical forward stringer (in
line with the sub-panel) and has a slot to span the horizontal
stringer that runs down the length of the fuselage. (I suspect I
need a picture here.) The part below the horizontal stringer will
have the alternate air knob, and the part above will be the mount
for the headset plugs. I had wanted them low and forward anyway,
and this works out perfect.
Therefore, I had to fab a matching piece for the passenger side. Both
are mostly fabricated now, though need just a bit more work to be
completed. I also need to mount the platenuts which will get done
after lunch.
Post-lunch update ... the platenuts are mounted, and the plates are
finished, and drilled. I would install them but need to let the paint
dry first.
Left to do is to drill for the cable to pass through the stringer
and the firewall. I then have to route the cable and secure it. That
may be tomorrow nights bit of fun and games.
Marie and I bought a
Yudu screen print system today,
as an experiement. She wants to see if she can use it to paint patterns
on material. I want to see if I can use it to silkscreen my panel. This
is a _total_ experiment, so stay tuned and we will just see how it goes.
I do have the fall back of just getting the labels from Stein. They look
great too.
Time : 3.0 hours |
| Alternate Air Cable Installed |
August 8, 2010 |
|
After the morning work on
the heat muff, I launched into finishing up the install of the engine
alternate air control cable. This has been a fiddly thing to get right,
mainly because I (a) wanted it accessible, (b) wanted it out of the way,
and (c) did not want to install it in the panel itself.
I am pretty happy with final solution. It is down under the panel basically
just back and above where my knee will be when flying. I will use the
same panel for my headset jacks.
Time : 3.0 hours |
| Ballast Box |
November 25, 2010 |
I have long had a 50 pound bag of play-sand up on the rear deck as ballast
to keep the plane from falling over on its nose. That was handy because it
allowed me to still move the plane around. Now that I'm needing to pull
wires into the back, it ended up being in the way a bit. So I assembled
(from scrap) a box that I could hang from the tailwheel spring and pour
the sand into. It took a little fiddling to get it built, but now I can
reach into the back of the plane as needed. Handy.
Time : 1.75 hours |
| CreativeAir Ditched and other Misc |
January 2, 2011 |
|
Last night I went to start installing the wires for the CreativeAir strobe
system I bought lo these many years ago. After I purchased it I concluded
one should buy nothing that has electrons running through it until they are
absolutely positively needed .... but in my zeal, early on, this was a
purcahse I made. First, I went to dig up the owners manual and could not
find it. No problem, thought I. A quick trip to the CreativeAir website
would fix that problem. Oh, yeah, CreativeAir morphed into Whiskey Victor
and the old CreativeAir website vanished. Hmm .. looks like Whiskey Victor
has vanished too, as has Bill's personal website. Odd, but the upshot of
this exercise convinced me that Bill has abandoned the market.
I realize that the strobes are just repackaged Nova units, and I could
go to Nova for the information I need. But, in the end I decided that I
was a shmuck to have bought these so early and I'm just taking my beating
on the decision and am going to switch to LED strobes. They are the way
of the future anyway. While I'm at it I might ditch Bill's position lights
too. We'll see. Right now the only thing I _had_ to do was pull the old
strobe power supply out of the airplane (and LED strobes don't need a big
heavy power supply, so that is another win).
It would have been an easy exercise except two phillips head screws didn't
want to do anything but strip. So out came the die grinder with a cut-off
wheel and I sliced a slot into the screw heads and got them out with my
big blade screwdriver.
While I was in the mood to do various fuselage odds and ends, I finally
installed the Adel clamps to hold the rudder cable fairleads (little
plastic tubes at the back-end of the plane) in place. That is such a
tight spot, and Adels are so annoying, it took a while to get it done.
But now .... its done.
I should put this last item in the Firewall Foward section, but it was
a small bit of work .. and I'm tired. :) I added three L-shaped standoffs
around the sump to which I attached Adel clamps. I'll be running various
wires through those clamps along the stretch of space that is not quite
as crowded as some other areas. The standoffs are from Airflow and are
nicely anodized. Looks great!
Time : 3.5 hours |
| Flap Position Hardware Installed |
February 27, 2011 |
|
Today I wanted to work on some hardware, rather than pull wires. I had
gotten my 4-40 threaded rod in from McMaster Carr while we were down in
Florida watching the shuttle launch, so I decided to get the flap
position sensor pushrod installed. This took a lot of fiddling to get
arranged so I was happy with it. Multiple iterations of where to position
the adel clamp and how to orient parts ensued before a satisfactory
solution was found. Along the way I had to run the flap motor up and down
and near the end I had a classic failure. Even though I had tried to
safety the rod end bearing (well, actually, it is the actuator rod
that needs to be safety wired) it wasn't adequate to keep the actuator
rod from rotating and eventually unscrewing the rod end bearing.
So .... I took more severe measures. I drilled the rod end bearing to
accept some safety wire, and now have a positive safetying of the
actuator rod.
I also completed the installation of the flap position sensor pushrod.
I can't believe I spent 5 hours on this operation, but sometimes when
you are designing-on-the-fly it just takes time. Oh well. Next!
Time : 5.0 hours |
| Aileron Trim Install Continued |
March 14, 2011 |
|
Tonight I got a bit more work done on the aileron trim. In fact, it is
almost completed. I got the bracket completed (drilled, dimpled, primed,
and nutplates installed), modified the arm as indicated by the plans and
instructions, installed the arm in the bearing block, and installed the
bearing block on the bracket. I also found the neutral point on the
servo and installed the connecting arms.
I now need to stick it in the plane, drill for the servo mounting, connect
the wires that will run forward, and do the final install. I'll likely
leave out the springs for now, as I'll be pulling the sticks out again
before we are all done. The springs can go in at that point.
Time : 2.5 hours |
| Fuselage Turtledeck Skin Riveted |
March 19, 2011 |
Today Dennis came out and helped me rivet that turtledeck skin on. It
meant I had to crawl into the rear of the plane (for the first time, if
you can believe it .. given I did a quick-build fuselage). I was able
to get in .. and more importantly, was able to get out again too. The
riveting went _great_, and I'm well pleased with the results. There
were a few spots that simply could not be gotten to with the bucking
bar, and I'll be putting some pop-rivets in those places. No problem.
Thanks Dennis!!
Time : 3.5 hours |
| Riveted Lingering Rivets |
April 16, 2011 |
|
There were a set of rivets up along the upper rail of the fuselage
(where a cool pilot would rest his arm while taxiing) which were not
riveted at the QB factory. The rear-most ones left open are in a very
tight spot where none of my standard bucking bars would fit. So I
called a good friend, Ernest, to come over and help me make a "redneck
bucking bar". The pictures show the results.
With that bar I could slide the tongue up into the narrow space and
buck the rivets. I'm VERY pleased with the results. Amazing what you
can do with a little scrap, a welder, a grinding wheel, and a Scotchbrite
wheel.
Time : 2.5 hours |
| Rudder Cable Exit Fairings |
July 2, 2011 |
|
This morning I got out into the garage and wanted to tackle a simple
focused task that I could complete in short order. So the rudder cable
exit fairings came to mind. I already had them trimmed to size and
drilled, and I just needed to match-drill them to the fuselage, dimple
and rivet. Simple enough.
And it was simple enough. I got them on and they look -good-, really
good. These were Avery-supplied fairings (the ones I fabricated so
long ago were just too big .. the Avery ones were perfect). They are
on, and that task is checked off the list.
We have old friends visiting tonight (I need to pick Jenn up from the
airport, in fact) so that'll be about it for RV-work today.
Time : 1.5 hours |
| Canopy Fiberglassing |
July 4, 2011 |
No time like the present, I figured, so it was off to the airport to
finally work on actually laying glass down on the canopy. I had a
friend who wanted to come out ... so I put Joe to work. While we were
in the middle of that exercise another friend stopped by who has a
-lot- of glass experience. Mark jumped in and helped guide us, though
he felt we were basically on the right track anyway. All in all it was
a HOT day to glass, but we got a lot done. Now I just need to walk away
from it long enough to let it cure really well.
Time : 2.5 hours |
| Brought Canopy Home Again |
October 3, 2011 |
We brought the canopy back home because I need it to fit the rear
window. We loaded it up (on its storage frame) in the back of the
Rav/4 and drove it home. We waited until the next morning to put
it on the plane, but 10 minutes of work there and it was on. Man
oh man, does it look great. I think I really must make the effort
to get a picture and upload it. I've been remiss in taking pix
lately.
Time : 1.25 hours |
Total Time : 555.75 hours
|
|
![[ The Frye RV-7 Project ]](images/frye_project_banner.png)